
Chicken Mushroom Pie Recipe
This post contains affiliate links. As an Amazon Associate I earn from qualifying purchases.
If you’ve always wanted to make chicken mushroom pie but felt intimidated, this is your starting point. I’m going to walk you through EVERY single step—no assumptions, no shortcuts—because this dish deserves respect and you deserve confidence in the kitchen. Think of this as your personal guide to creating something genuinely impressive that tastes like it came from a restaurant, but tastes even better because YOU made it. Whether you’re cooking for yourself after a long New York workday or impressing someone special, this recipe teaches you fundamental techniques you’ll use forever. If you’re curious about other comforting mains, check out my best chicken gravy recipe—it’s the sister skill to mastering sauces like the one in this pie.
How to Make Chicken Mushroom Pie for the First Time (You’ve Got This!)
I’ll never forget the first time I attempted a chicken mushroom pie in my tiny Hell’s Kitchen apartment. I was convinced it would be complicated—all that filling, the mashed potato topping, coordinating the timing. My first attempt was actually a MESS. The filling was watery, the potatoes weren’t creamy enough, and I didn’t understand that you needed to build flavors in layers instead of throwing everything together.
But here’s what changed everything: I treated it like a puzzle instead of a race. One step at a time. When I realized that caramelizing the bacon and mushrooms FIRST creates the foundation for everything else, suddenly the whole dish clicked into place. Now, years later, this is the recipe I teach clients who are nervous about cooking. It’s not because it’s simple—it’s because it teaches you how professional cooks actually think.
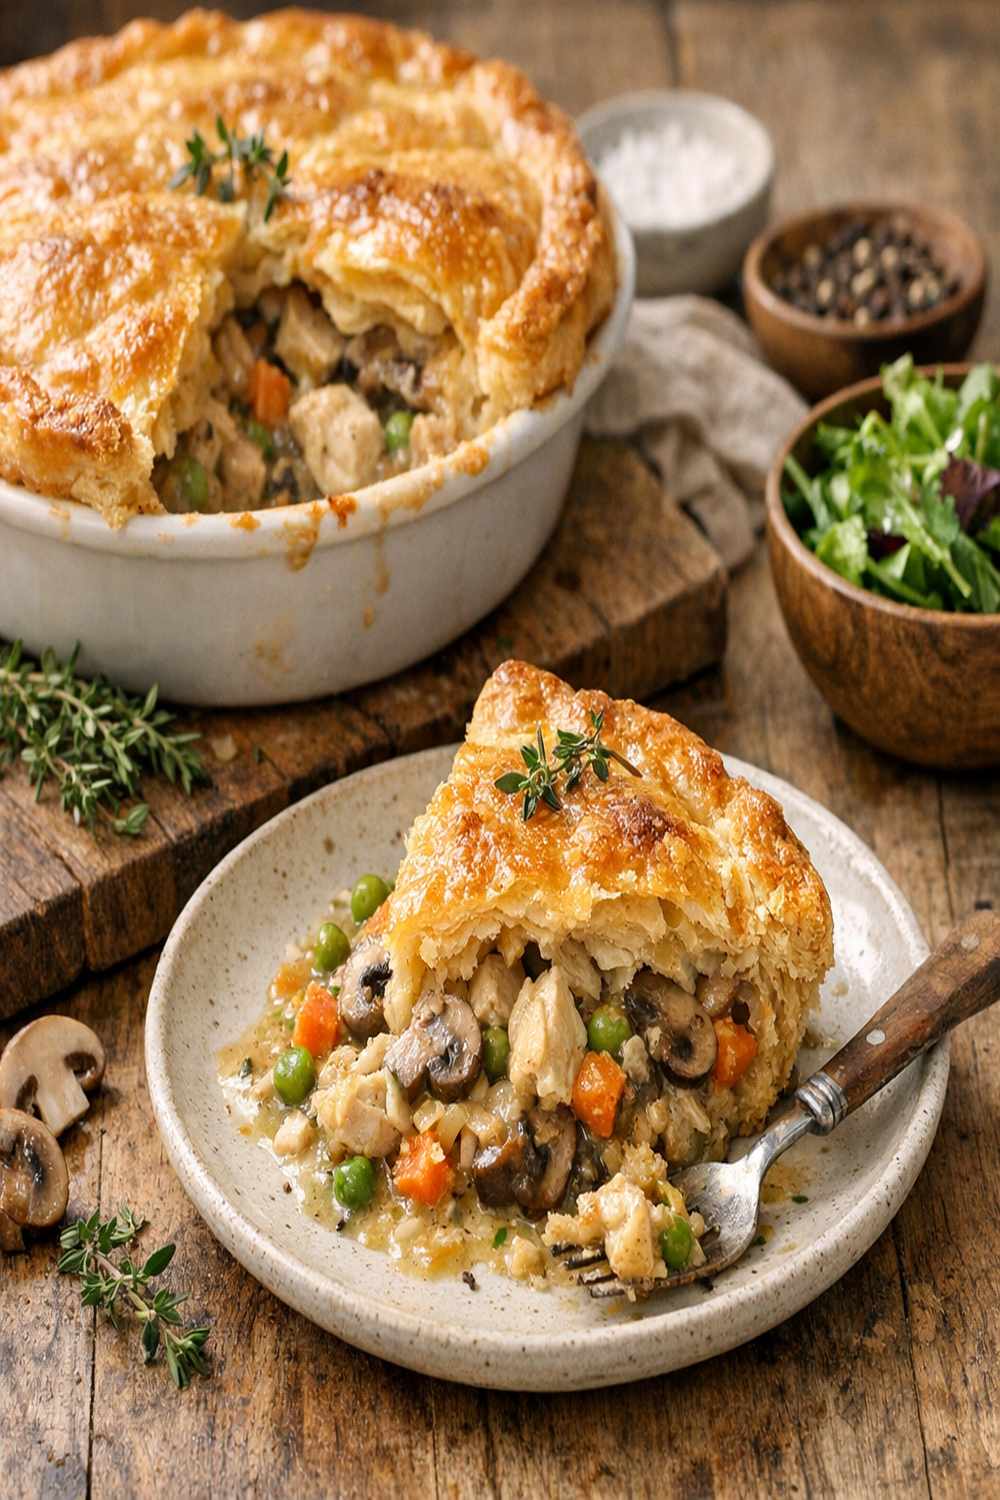
What to Expect Before You Start
Let me be honest about the reality: this is a two-stage recipe, meaning you’re making a filling, then topping it with mashed potatoes, then baking. Total time is approximately 90 minutes from start to table. The good news? Most of that is passive oven time, and the actual hands-on work breaks into manageable 15-20 minute chunks. You’ll need basic stovetop skills and one baking dish. That’s genuinely it.
- Don’t fear the beer (if you’re using Guinness). The dark beer cooks off completely and leaves behind deep, savory richness. The alcohol burns away, leaving only umami. If alcohol concerns you, substitute with extra beef broth—the pie won’t be quite as complex, but it’ll still be delicious.
- The mashed potato topping is actually easier than you think. Most beginners worry the potatoes won’t be creamy enough or will feel heavy. The secret is using hot milk and keeping stirring minimal. I’ll show you exactly how.
- Layering flavors matters more than fancy ingredients. You’re not using exotic mushrooms or rare spices. You’re using the technique of building flavor—cooking bacon first, then mushrooms, then chicken, THEN sauce. Each step extracts and concentrates flavor.
Equipment You’ll Need (And What You Can Skip)
I’m a registered dietitian AND a practical cook in a city where counter space costs money. You don’t need fancy equipment for this recipe. Here’s what actually matters:
- One large, deep skillet or Dutch oven (12-inch minimum). This is where you’re building your entire filling. A regular nonstick skillet works fine, though a cast iron or stainless steel pan will give you better browning on the chicken and bacon. Budget alternative: any large pot with a fitted lid.
- A standard baking dish (9×13 inches) for the final pie. Glass or ceramic works equally well. No need for anything fancy.
- A potato masher or fork. A real masher is maybe $5 and worth it for texture control, but your fork will work in a pinch—just expect slightly chunkier potatoes.
- A sharp chef’s knife and cutting board. You’re cutting chicken, mushrooms, and potatoes into chunks. A dull knife is actually MORE dangerous because it requires more pressure.
- Measuring cups and spoons. I’m serious about this one—salt and pepper especially need precision when you’re building layers of flavor.
- A wooden spoon for stirring. Optional but helpful for scraping up browned bits from the pan bottom (what professional cooks call the “fond”)—that’s pure flavor.
The Ingredients—A Beginner’s Shopping Guide
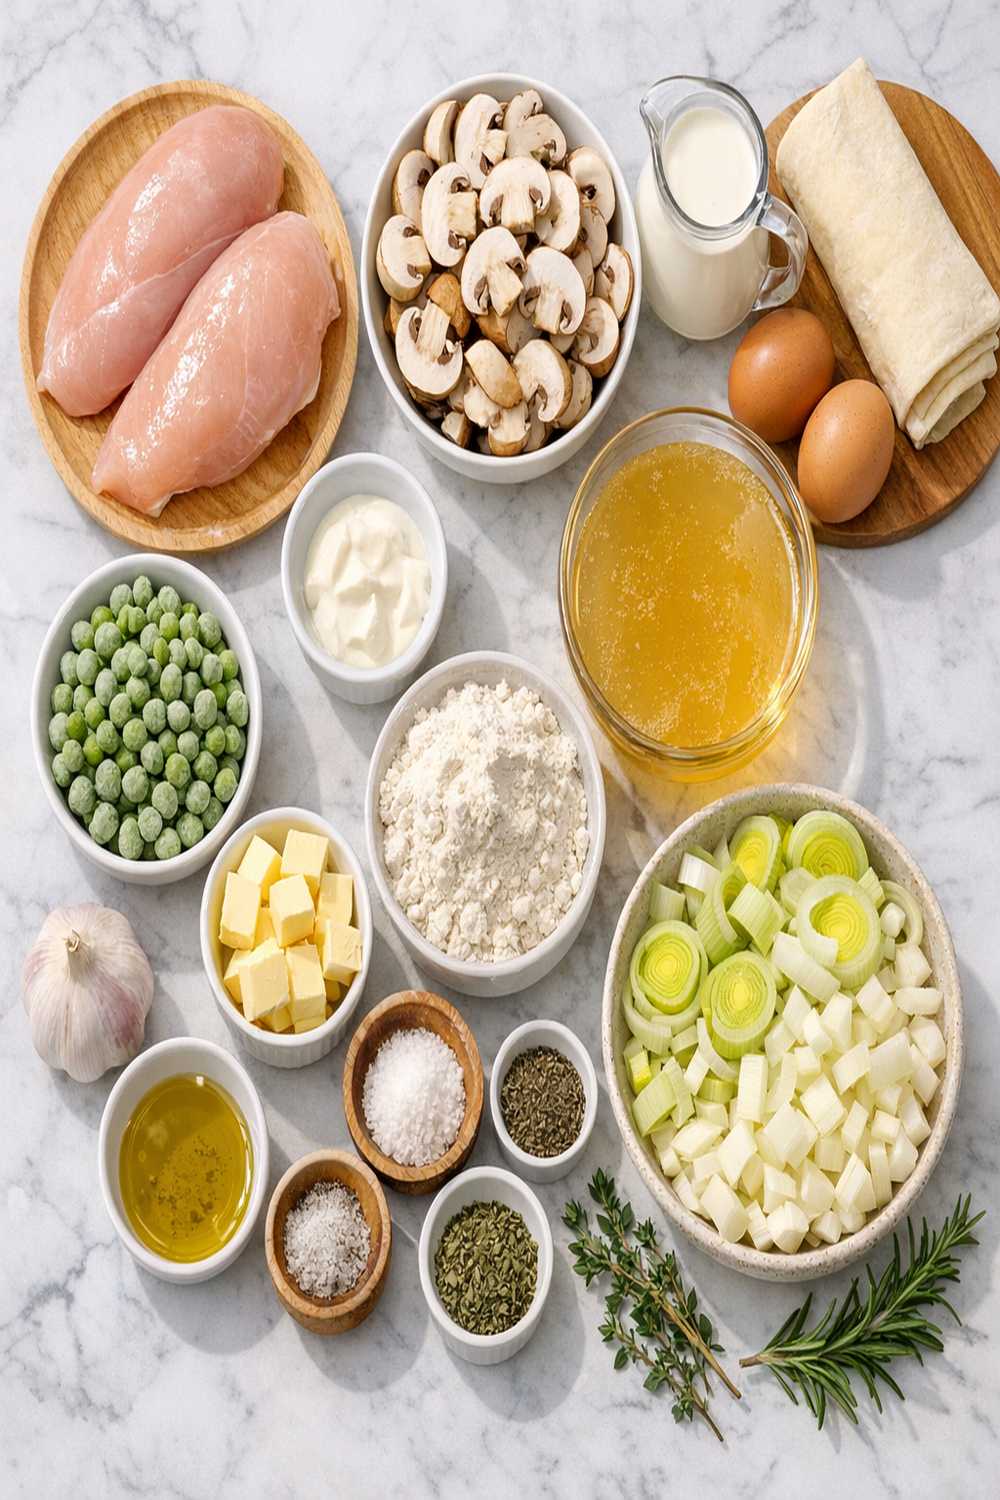
Shopping for this recipe is straightforward because you’re probably using ingredients you recognize. Here’s my insider tips on what to look for and where to find everything. I shop at my neighborhood bodega on the Upper West Side, but these ingredients are available EVERYWHERE—no specialty stores required.
For the Chicken and Protein Base
- 750 grams (1.5 pounds) boneless, skinless chicken thighs (look for thighs that are pale pink, not gray, and roughly uniform thickness; chicken thighs are more forgiving than breasts because they stay moist when cooked)
- 100 grams (3.5 ounces) thick-cut bacon, preferably uncured (ask the butcher counter to cut it if your store doesn’t carry it pre-cut; smoky flavor matters here)
For the Vegetables and Aromatics
- 4 garlic cloves (buy pre-minced in a jar if you’re nervous about mincing, but fresh minced is worth the 90 seconds of knife work)
- 1.5 medium onions (one medium onion is roughly the size of your fist; cut into roughly 1-inch chunks so they cook at the same rate as the chicken)
- 1 kilogram (2 pounds) starchy potatoes like Russets (avoid waxy potatoes like red potatoes; starchy varieties mash into clouds, not gluey paste)
- 500 grams (1 pound) button mushrooms (choose smaller ones if possible; larger ones should be halved or quartered so pieces cook evenly)
- 2 fresh thyme sprigs (from the produce section or dried thyme will substitute perfectly; thyme is optional but creates restaurant-quality depth)
For the Sauce and Finishing
- 30 grams (2 tablespoons) grated Parmesan cheese, preferably freshly grated (pre-grated from a bag works but doesn’t brown as beautifully)
- 180 milliliters (three-quarter cup) water (simple tap water balances the saltiness of broth)
- 180 milliliters (three-quarter cup) whole milk, heated (full-fat milk creates creamier potatoes; cold milk will cool the potatoes and prevent proper mashing)
- 7.5 grams (one-half tablespoon) white pepper or black pepper (white pepper is slightly more refined-tasting but black works fine)
- 60 milliliters (quarter cup) all-purpose flour (spooned and leveled, never scooped directly from the bag—scooping compacts flour and throws off measurements)
- 15 milliliters (1 tablespoon) tomato paste (adds depth without making the pie taste like tomatoes; it’s a flavor amplifier)
- 240 grams (four-sixths cup) unsalted butter, divided into portions (unsalted lets you control saltiness, which matters in a dish with bacon and broth already present)
- 180 milliliters (three-quarter cup) Guinness beer, any dark stout, or extra beef broth if avoiding alcohol (don’t use light beer—you need the deep flavor)
- 30 grams (2 tablespoons) unsalted butter, melted, for topping (or olive oil spray as a lighter alternative)
- 360 milliliters (one and one-half cups) beef broth, low-sodium (low-sodium gives you control over final salt level)
Essential Seasonings
- 1.5 teaspoons kosher salt, divided (kosher salt has larger crystals than table salt, making it easier to control; table salt will oversalt if you use the same measurement)
- 1 teaspoon freshly cracked black pepper, divided (buy pre-cracked or use a pepper mill; pre-ground loses pungency)
Pro tip: Buy your chicken and bacon from the butcher counter if possible, and ask them to cut the bacon to your specifications. They’ll do it happily, and you avoid the pre-packaged option where thickness varies wildly.
Step-by-Step: Your First Chicken Mushroom Pie
I want you to feel genuinely EXCITED about starting this. You’re about to learn the exact technique professional cooks use for building depth in braises and stews. Every step has a reason. Every timing detail matters. Let’s go.
Step 1: Prep Everything Before You Touch Heat
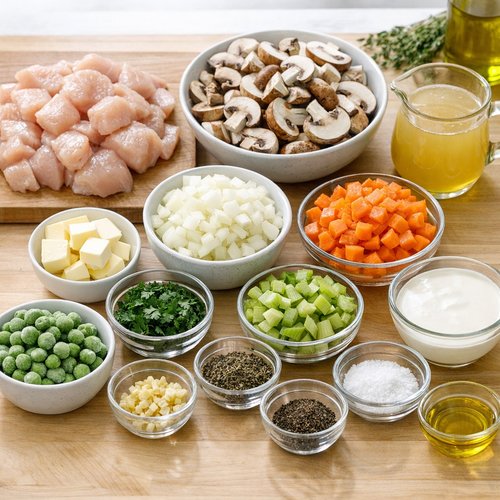
This is called mise en place—French for “everything in its place”—and it’s the single most important habit that separates confident cooks from stressed ones. Chop your chicken thighs into roughly 2-inch chunks (they’ll shrink as they cook). Cut bacon into 1-inch squares. Halve or quarter your mushrooms so all pieces are similar size. Rough-chop your onions into chunks. Mince your garlic. Peel and cube your potatoes into 1-inch pieces and place them in a bowl of cold water so they don’t brown.
Why does this matter? Once you start cooking, you need both hands and your full attention. If you’re still chopping while something is burning on the stove, you’ve already lost. Spend 15 minutes prepping now and you’ll cook with confidence and control.
Step 2: Brown the Bacon and Render Its Fat
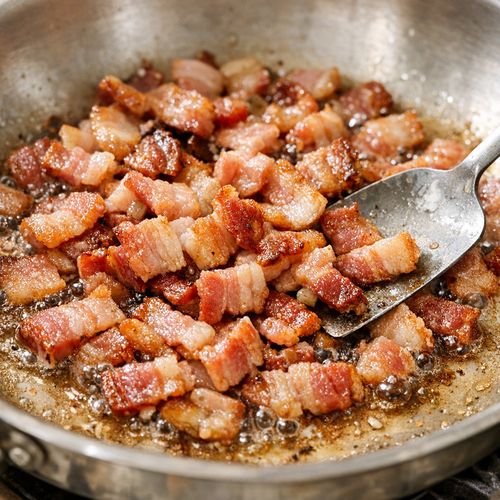
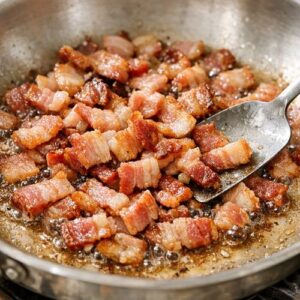
Place your large skillet over medium-high heat with NO oil added. Add the bacon pieces and cook them, stirring occasionally, until they’re golden and crispy at the edges but still slightly chewy in the center—about 5-7 minutes. You’re not making bacon strips; you’re rendering the fat and creating crispy texture. When it’s done, remove the bacon with a slotted spoon and set it aside on a paper towel. Leave every drop of fat in the pan. That’s liquid gold.
CRITICAL WARNING: Don’t walk away during this step. Bacon goes from perfectly cooked to burned in seconds. Stay nearby and keep stirring.
Step 3: Sauté the Mushrooms Until Golden
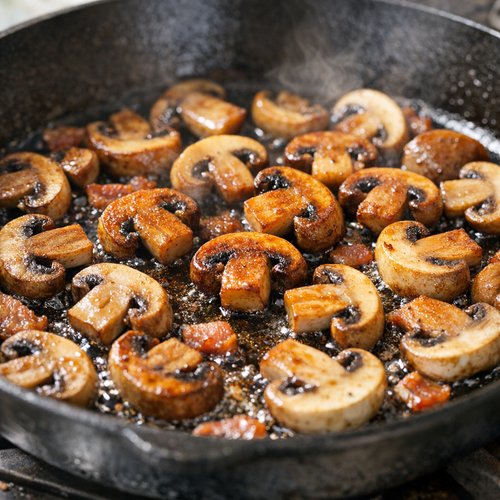
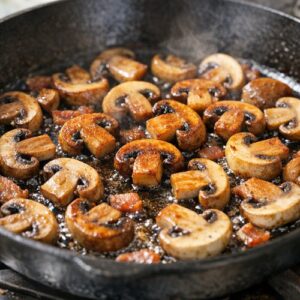
With the bacon fat still in the pan, increase heat to medium-high. Add your mushroom pieces and DO NOT STIR for the first 3-4 minutes. This sounds counterintuitive, but you want mushrooms to develop a golden crust on one side. This is called the Maillard reaction, and it’s where deep mushroom flavor develops. After 3-4 minutes, stir and let them sit again for another 3 minutes. You’re looking for deep golden-brown color. The whole process takes about 8-10 minutes.
When mushrooms are done, they’ll have released their moisture, reabsorbed it, and developed concentrated flavor. You’ll smell something earthy and complex—that’s your signal you’re on track.
Common beginner mistake: Overcrowding the pan or stirring constantly. Give mushrooms space and patience. Crowding them steams them instead of browning them.
Step 4: Build the Flavor Base with Onions and Garlic
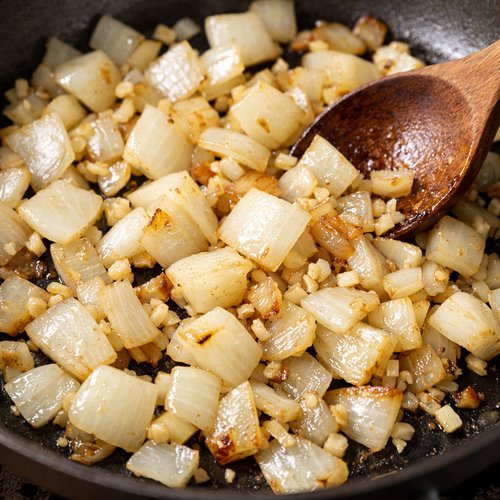
Reduce heat to medium. Add your onion chunks and cook, stirring occasionally, until they’re slightly softened and the edges are beginning to brown—about 5 minutes. Then add your minced garlic and fresh thyme sprigs (if using). Stir constantly for exactly 60 seconds. You want the garlic fragrant but not browned.
This 60-second window is important: garlic cooks FAST and bitter garlic ruins everything. Once you smell it clearly, you’re done. This is that restaurant-quality depth you’re building.
Step 5: Brown the Chicken Properly
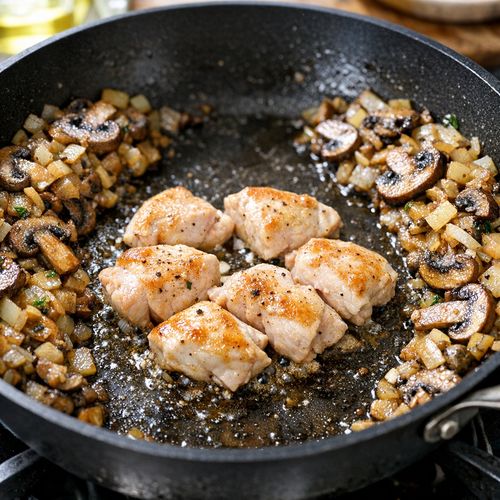
Push your mushroom-onion mixture to the sides of the pan, creating a clear space in the middle. Increase heat to medium-high. Pat your chicken pieces dry with paper towels (moisture prevents browning). Season them with half your salt and half your black pepper. Add them to the empty space in the pan and leave them alone for 3-4 minutes.
Again, no stirring. You want a golden crust to form on the bottom side. After 3 minutes, stir and let them cook another 3-4 minutes. You’re not cooking chicken through—you’re BROWNING it. The inside will finish cooking in the braising liquid.
The chicken is ready when it has golden-brown color on the outside but is still slightly pink inside. This is completely safe because you’re about to braise it in liquid, which will finish cooking it.
Step 6: Create the Sauce Base with Flour
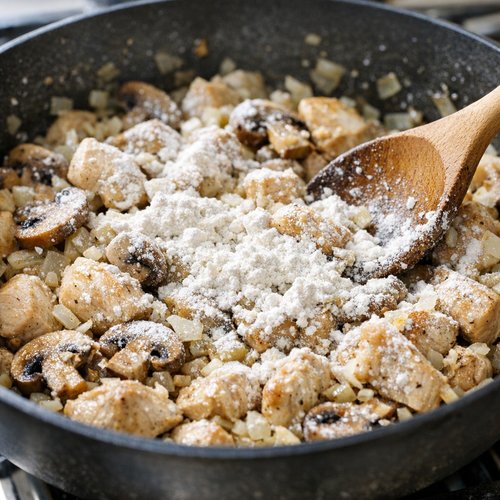
Sprinkle the flour over everything—chicken, mushrooms, onions, all of it. Stir constantly for 2 minutes. You’re cooking out the raw flour taste and creating what’s called a roux (pronounced “roo”)—flour cooked in fat that will thicken your sauce.
This step is crucial and slightly different from gravy because you’re doing it in the middle of other ingredients, not separately. Just keep stirring and you’ll see the mixture darken slightly and smell toasted.
Important detail: If your mixture looks dry or is sticking, add an extra half-tablespoon of butter. You want it to look like damp sand, not paste.
Step 7: Add Liquid and Build the Sauce
Reduce heat to medium. Add the tomato paste and stir for 30 seconds, letting it slightly darken. Then add the beer (or extra broth if avoiding alcohol) slowly while stirring. You’ll hear sizzling—that’s correct. The liquid will be thin and slightly separated. Keep stirring for 1-2 minutes.
Now add the beef broth and water. Stir well. The mixture will look thin and loose. This is exactly right. You’re about to simmer this, and the liquid will reduce slightly, and the flour will finish thickening everything. Don’t panic if it looks soupy.
Return the cooked bacon to the pan. Taste the sauce and adjust seasoning with remaining salt and pepper (remember, you’ve already seasoned the chicken, so taste before adding more).
Expert’s Nutritional Tip: The umami depth here comes from three sources: the dark beer, the tomato paste, and the rendered bacon fat. As a registered dietitian, I notice clients often skip umami-rich ingredients thinking they’re unhealthy. Actually, these three ingredients add so much flavor that you can use less salt overall and feel more satisfied with smaller portions. That’s win-win for both taste and nutrition.
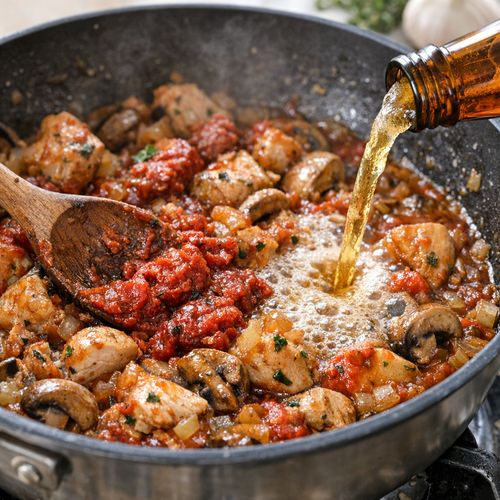
Step 8: Simmer Until Chicken Is Tender
Bring the mixture to a gentle simmer (small bubbles breaking the surface constantly, not a rolling boil). Add the thyme sprigs if you haven’t already. Reduce heat to low, cover with a lid or foil, and let it simmer undisturbed for 20-25 minutes.
Your goal: chicken pieces should shred easily with a fork when done. The sauce should coat the back of a spoon but still be pourable. If it’s too thin after 25 minutes, remove the lid, increase heat to medium, and simmer uncovered for 5 more minutes—the liquid will reduce.
CRITICAL SAFETY WARNING: Make sure the lid fits securely so steam doesn’t escape unpredictably. Check the pan after 10 minutes to ensure liquid is simmering, not boiling. If it’s boiling vigorously, turn heat lower immediately.
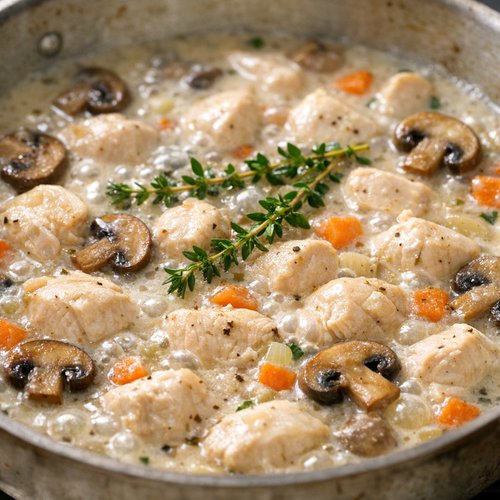
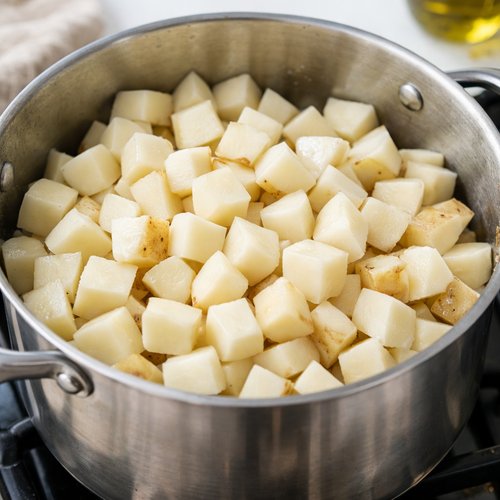
Step 9: Start the Potatoes While the Filling Simmers
About 10 minutes after the filling goes into its simmer, start your potatoes. Drain the cubed potatoes from their water and place them in a large pot. Cover with cold, salted water by about 2 inches. Bring to a boil over high heat, then reduce to a gentle simmer.
Potatoes are done when a fork pierces them with zero resistance—about 12-15 minutes depending on how uniformly you cut them. Don’t skip this test. Undercooked potatoes will be grainy when mashed. Overcooked potatoes will turn to mush.
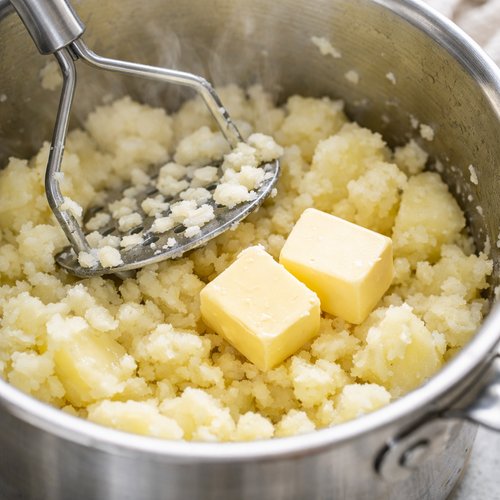
Step 10: Drain and Mash the Potatoes
When potatoes are tender, drain them completely in a colander. Return them to the empty pot. Add the 30 grams (2 tablespoons) of cold butter cut into small pieces and the white pepper. This is critical: mash immediately while potatoes are still steaming. You’re trying to work in the butter while it melts.
Mash until roughly 80% smooth—a few small lumps are actually better than completely smooth. Then slowly pour in the hot milk while stirring gently with a wooden spoon. Do NOT over-mix. Over-mixing develops gluten and creates gluey, heavy potatoes.
Taste and adjust salt if needed. The potatoes should taste seasoned but not oversalted—remember, they’re a topping to a savory filling, so they don’t need to be highly seasoned on their own.
Step 11: Assemble the Pie
Preheat your oven to 190°C (375°F). Transfer the chicken and mushroom filling to your baking dish, spreading it evenly. If there’s excess sauce that seems too liquid, you can leave a bit in the pot, but you want the filling moist, not swimming. Spoon the mashed potatoes evenly over the filling. You don’t need to seal it completely—the potatoes create a natural topping.
Brush the melted butter over the potato surface. Sprinkle with Parmesan cheese and a tiny pinch of salt and pepper. This creates the golden, crusty top that makes people think you’re a professional.
Place the baking dish on a baking sheet (this catches any filling that bubbles over—prevents a messy oven).
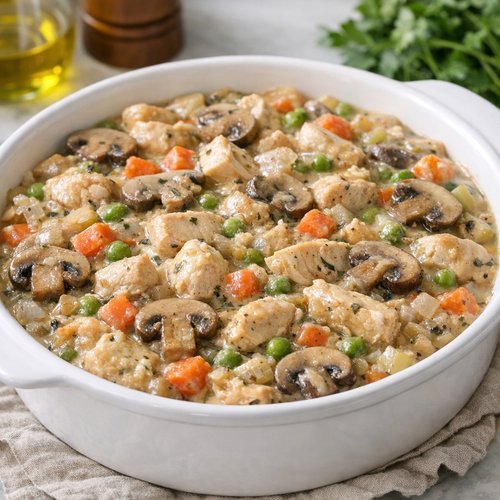
Step 12: Bake Until Golden and Bubbly
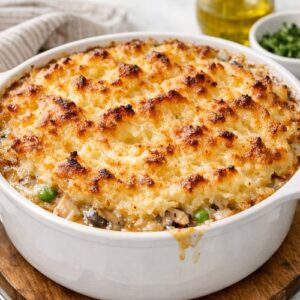
Bake for 25-30 minutes until the potato topping is golden brown and you can see filling just starting to bubble around the edges. Don’t worry if it seems too short—remember, the filling is already cooked. You’re just heating everything through and creating color on top.
SAFETY WARNING: The baking dish will be EXTREMELY hot. Use oven mitts and place it on a heat-safe surface. Let it rest for 5 minutes before serving—this lets the filling set slightly and makes serving cleaner.
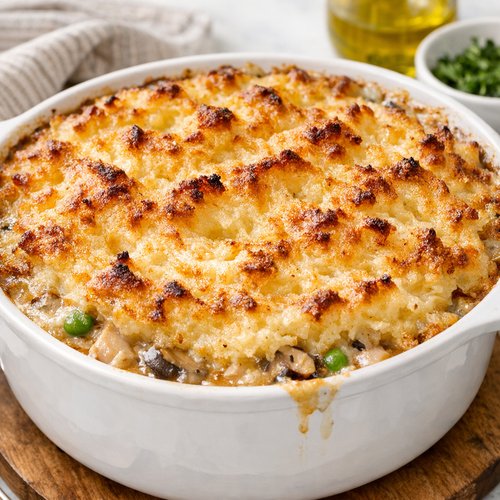
The pie is done when the potato top is deep golden brown and feels firm when you lightly press it with a spoon. The filling should bubble slightly at the edges.
How to Tell If You Did It Right
Knowing what success looks and smells like is CRITICAL for building confidence. Here’s exactly what you’re looking for at different stages:
- After the mushrooms cook: They should be deep golden-brown, not pale. They’ll have released their liquid and reabsorbed it. The smell should be earthy and concentrated, not raw or metallic.
- After the filling simmers: The sauce should coat the back of a spoon but still run slightly if you tilt it. The chicken should shred easily with a fork. The liquid should smell savory and deep, with no raw flour taste or harsh alcohol smell (alcohol should have cooked off completely).
- After the potatoes mash: They should be smooth with tiny lumps visible—not gluey, not grainy. They should hold their shape slightly when spooned onto the filling but still be creamy, not stiff.
- After baking: The potato top should be deep golden-brown with crispy edges. The filling should bubble slightly at the edges. When you cut into it, the filling should be hot and the potatoes should be fluffy, not dense.
- When you taste it: The filling should taste savory and complex—no single ingredient dominates. The sauce should coat your mouth pleasantly without being greasy. The potatoes should taste creamy and buttery. If the filling tastes salty or harsh, you’ve likely oversalted during assembly (lesson for next time).
What Went Wrong? Beginner Fixes
- The filling is too thin and watery even after simmering. This usually means your flour-to-liquid ratio was off OR you didn’t let the flour cook long enough in the roux stage. For next time: measure flour precisely. But right now? Remove the lid from your filling, increase heat to medium, and simmer uncovered for 5-10 minutes. The liquid will reduce and thicken. If it still seems thin, mix 1 tablespoon flour with 2 tablespoons cold water, stir until smooth, and whisk it into the filling over medium heat. Let it cook for 2 minutes and it will thicken instantly.
- The potatoes are gluey and heavy instead of fluffy. This happens from over-mixing or adding liquid that’s too cold. For next time: warm the milk first and stir gently instead of beating. Right now, it’s too late to fix, but know that even gluey potatoes taste delicious—it’s just a texture issue, not a taste problem.
- The potato top is pale instead of golden after baking. Your oven temperature might be off (ovens vary wildly), or 25 minutes wasn’t quite enough. Place the pie under the broiler for 2-3 minutes, watching carefully. The Parmesan will brown fast and create that golden color. Don’t walk away—broilers are powerful.
- The filling tastes too salty. This usually means you seasoned the chicken, then the overall sauce, then tasted before considering that bacon and broth added salt too. For next time: taste after adding liquid, not before. If it’s already too salty, add 60 milliliters (1/4 cup) more water or broth to dilute slightly.
- The chicken pieces are tough instead of tender. They didn’t simmer long enough, or your heat was too high and they cooked too fast. They need gentle, steady simmering—small bubbles, not vigorous boiling. Always go longer rather than shorter (chicken stays moist even if you simmer it 30-35 minutes instead of 20).
Make-Ahead Guide: Prep Like a Professional
Here’s where this recipe becomes genuinely practical for your real life. I teach busy clients in Manhattan how to make restaurant-quality meals on their schedule, not the recipe’s timeline.
Option 1: Assemble Everything the Night Before Complete steps 1-8 (the entire filling) and steps 9-10 (the potatoes). Cool both completely. Transfer the filling to your baking dish, cover tightly with plastic wrap, and refrigerate overnight. Refrigerate the mashed potatoes separately in an airtight container. In the evening, you simply top the filling with cold potatoes (they’ll warm through during baking), brush with butter, sprinkle Parmesan, and bake for 35-40 minutes instead of 25-30 (the extra time accounts for everything being cold).
Option 2: Freeze the Filling Only After the filling simmers, cool it completely, transfer it to a freezer-safe container, and freeze for up to 3 months. Thaw overnight in the refrigerator before baking. Make fresh mashed potatoes the day you want to serve. This is perfect for batch cooking on a Sunday for multiple weeknight dinners.
Option 3: Prep Components in Stages Monday: Do all chopping and prep (step 1). Tuesday evening: Make just the filling (steps 2-8). Thursday: Make potatoes and assemble (steps 9-12). This spreads the work across three short sessions instead of one long cooking day.
CRITICAL SAFETY NOTE: If making ahead, cool the filling to room temperature before refrigerating (leaving hot food in the fridge lets bacteria grow). Use within 3 days of making if refrigerated, or freeze for up to 3 months.
Your Next Steps After Mastering This
You just learned three fundamental techniques that apply to HUNDREDS of recipes: browning proteins and vegetables to develop flavor, creating a roux to thicken sauces, and braising (slow-cooking in liquid). Once you’re comfortable with this pie, you’re ready for beef stew (same technique, different protein), creamy chicken pies with different fillings, or even vegetarian versions with hearty mushrooms and lentils.
If you want to deepen your sauce skills, check out my best chicken gravy recipe—it teaches you the same roux-based technique but focuses specifically on the sauce component. You’ve basically already done this by making the pie filling.
From here, try experimenting with different mushroom types (cremini, oyster, shiitake), adding vegetables like carrots or peas to the filling, or switching the beer for dry white wine. Once you understand the BASE technique, the variations become endless.
Can I Store Chicken Mushroom Pie?
Refrigerator: Store the fully assembled and baked pie in an airtight container for up to 4 days. Reheat gently in a 160°C (325°F) oven for 15-20 minutes until warmed through. Microwaving works but will soften the potato topping slightly.
Freezer: Cool the pie completely, wrap it tightly in plastic wrap and then foil, and freeze for up to 3 months. Thaw overnight in the refrigerator, then reheat as above, adding 10 extra minutes to account for cold starting temperature.
Just the filling (unbaked): Up to 4 days refrigerated in an airtight container, or up to 3 months frozen. Thaw overnight and proceed with fresh mashed potatoes.
Pro tip: Don’t freeze the mashed potato topping separately—it develops a grainy texture. Either freeze the whole assembled pie or freeze just the filling and make fresh potatoes before baking.
Nutrition Information
This recipe makes approximately 6 generous servings (one-sixth of the pie per serving). Based on USDA data for the ingredients listed:
Per serving (approximate): 480 calories | 24g protein | 32g fat | 28g carbohydrates | 3g fiber | 8g sugar | 18g saturated fat | 890mg sodium
The protein comes primarily from chicken and bacon. The carbohydrates are from potatoes. The fat profile includes saturated fat from butter and bacon, plus unsaturated fat from the chicken skin (which you’ve removed, but fat renders into the filling). The sodium is significant because of broth, bacon, and cheese—this is a rich, savory dish meant for occasional indulgence, not daily eating.
From a nutritional standpoint, the chicken thighs provide more iron and B vitamins than white meat chicken, and the mushrooms add antioxidants and mineral compounds that support immune function. The dark beer (if using) contains polyphenols similar to dark chocolate. The potatoes provide resistant starch when cooled slightly, which supports digestion.
This is wholesome comfort food, not health food—and that distinction matters. Eat it joyfully, enjoy your time in the kitchen making it, and don’t overthink the numbers. One serving of this provides real nourishment and satisfaction.
What Can I Serve With Chicken Mushroom Pie?
The pie is almost a complete meal on its own (protein, vegetables, starch), but here’s what makes it shine as part of a table:
- Simple green salad with lemon vinaigrette. The acidity cuts through the richness of the cream sauce. Just lettuce, olive oil, lemon juice, and salt—nothing complicated.
- Steamed or roasted green vegetables. Broccoli, green beans, or asparagus tossed with a little butter and garlic. You’re adding color and a slight bitter note that balances the savory filling.
- Crusty bread for soaking up sauce. Because there will be sauce, and you’ll want bread to catch it.
- A full-bodied red wine like Pinot Noir or a dark ale. The tannins in red wine pair beautifully with the mushroom-beer sauce. A dark beer echoes the Guinness in the filling.
Don’t over-complicate the sides. The pie is rich and flavorful—it doesn’t need competing dishes. A salad and bread are genuinely enough. This is about letting your pie be the star.
Seasonal Variations: Keep It Fresh Year-Round
Spring version: Add fresh peas and diced carrots to the filling in the last 5 minutes of simmering. Replace half the mushrooms with asparagus cut into 2-inch pieces. Use fresh tarragon instead of thyme. Spring vegetables brighten everything.
Summer version: This pie is less appealing in summer, honestly—it’s comfort food for cooler months. But if you want to make it, reduce the butter in the potato topping slightly, use white wine instead of beer, and serve it with a substantial salad instead of bread. The lighter sauce will feel less heavy in heat.
Fall version: Add diced carrots and celery to the mushroom-onion base. Use cremini or oyster mushrooms instead of buttons. Replace Guinness with a brown ale. Add a pinch of nutmeg to the potatoes. The warming spices amplify autumn feelings.
Winter version (this classic version): This is when the pie is MEANT to shine. Dark beer, hearty chicken, deep flavors. No changes needed—just make it confidently and serve generously.

Chicken Mushroom Pie Recipe
Ingredients
Equipment
Method
- This is called mise en place—French for "everything in its place"—and it's the single most important habit that separates confident cooks from stressed ones. Chop your chicken thighs into roughly 2-inch chunks (they'll shrink as they cook). Cut bacon into 1-inch squares. Halve or quarter your mushrooms so all pieces are similar size. Rough-chop your onions into chunks. Mince your garlic. Peel and cube your potatoes into 1-inch pieces and place them in a bowl of cold water so they don't brown. Why does this matter? Once you start cooking, you need both hands and your full attention. If you're still chopping while something is burning on the stove, you've already lost. Spend 15 minutes prepping now and you'll cook with confidence and control.

- Place your large skillet over medium-high heat with NO oil added. Add the bacon pieces and cook them, stirring occasionally, until they're golden and crispy at the edges but still slightly chewy in the center—about 5-7 minutes. You're not making bacon strips; you're rendering the fat and creating crispy texture. When it's done, remove the bacon with a slotted spoon and set it aside on a paper towel. Leave every drop of fat in the pan. That's liquid gold. CRITICAL WARNING: Don't walk away during this step. Bacon goes from perfectly cooked to burned in seconds. Stay nearby and keep stirring.
- With the bacon fat still in the pan, increase heat to medium-high. Add your mushroom pieces and DO NOT STIR for the first 3-4 minutes. This sounds counterintuitive, but you want mushrooms to develop a golden crust on one side. This is called the Maillard reaction, and it's where deep mushroom flavor develops. After 3-4 minutes, stir and let them sit again for another 3 minutes. You're looking for deep golden-brown color. The whole process takes about 8-10 minutes. When mushrooms are done, they'll have released their moisture, reabsorbed it, and developed concentrated flavor. You'll smell something earthy and complex—that's your signal you're on track. Common beginner mistake: Overcrowding the pan or stirring constantly. Give mushrooms space and patience. Crowding them steams them instead of browning them.
- Reduce heat to medium. Add your onion chunks and cook, stirring occasionally, until they're slightly softened and the edges are beginning to brown—about 5 minutes. Then add your minced garlic and fresh thyme sprigs (if using). Stir constantly for exactly 60 seconds. You want the garlic fragrant but not browned. This 60-second window is important: garlic cooks FAST and bitter garlic ruins everything. Once you smell it clearly, you're done. This is that restaurant-quality depth you're building.
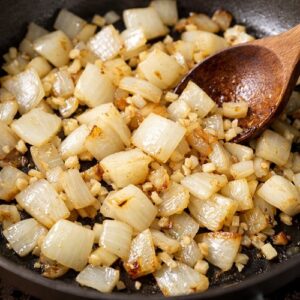
- Push your mushroom-onion mixture to the sides of the pan, creating a clear space in the middle. Increase heat to medium-high. Pat your chicken pieces dry with paper towels (moisture prevents browning). Season them with half your salt and half your black pepper. Add them to the empty space in the pan and leave them alone for 3-4 minutes. Again, no stirring. You want a golden crust to form on the bottom side. After 3 minutes, stir and let them cook another 3-4 minutes. You're not cooking chicken through—you're BROWNING it. The inside will finish cooking in the braising liquid. The chicken is ready when it has golden-brown color on the outside but is still slightly pink inside. This is completely safe because you're about to braise it in liquid, which will finish cooking it.

- Sprinkle the flour over everything—chicken, mushrooms, onions, all of it. Stir constantly for 2 minutes. You're cooking out the raw flour taste and creating what's called a roux (pronounced "roo")—flour cooked in fat that will thicken your sauce. This step is crucial and slightly different from gravy because you're doing it in the middle of other ingredients, not separately. Just keep stirring and you'll see the mixture darken slightly and smell toasted. Important detail: If your mixture looks dry or is sticking, add an extra half-tablespoon of butter. You want it to look like damp sand, not paste.
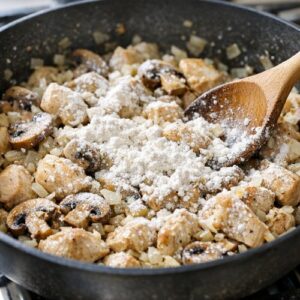
- Reduce heat to medium. Add the tomato paste and stir for 30 seconds, letting it slightly darken. Then add the beer (or extra broth if avoiding alcohol) slowly while stirring. You'll hear sizzling—that's correct. The liquid will be thin and slightly separated. Keep stirring for 1-2 minutes. Now add the beef broth and water. Stir well. The mixture will look thin and loose. This is exactly right. You're about to simmer this, and the liquid will reduce slightly, and the flour will finish thickening everything. Don't panic if it looks soupy. Return the cooked bacon to the pan. Taste the sauce and adjust seasoning with remaining salt and pepper (remember, you've already seasoned the chicken, so taste before adding more). Expert's Nutritional Tip: The umami depth here comes from three sources: the dark beer, the tomato paste, and the rendered bacon fat. As a registered dietitian, I notice clients often skip umami-rich ingredients thinking they're unhealthy. Actually, these three ingredients add so much flavor that you can use less salt overall and feel more satisfied with smaller portions. That's win-win for both taste and nutrition.

- Bring the mixture to a gentle simmer (small bubbles breaking the surface constantly, not a rolling boil). Add the thyme sprigs if you haven't already. Reduce heat to low, cover with a lid or foil, and let it simmer undisturbed for 20-25 minutes. Your goal: chicken pieces should shred easily with a fork when done. The sauce should coat the back of a spoon but still be pourable. If it's too thin after 25 minutes, remove the lid, increase heat to medium, and simmer uncovered for 5 more minutes—the liquid will reduce. CRITICAL SAFETY WARNING: Make sure the lid fits securely so steam doesn't escape unpredictably. Check the pan after 10 minutes to ensure liquid is simmering, not boiling. If it's boiling vigorously, turn heat lower immediately.

- About 10 minutes after the filling goes into its simmer, start your potatoes. Drain the cubed potatoes from their water and place them in a large pot. Cover with cold, salted water by about 2 inches. Bring to a boil over high heat, then reduce to a gentle simmer. Potatoes are done when a fork pierces them with zero resistance—about 12-15 minutes depending on how uniformly you cut them. Don't skip this test. Undercooked potatoes will be grainy when mashed. Overcooked potatoes will turn to mush.
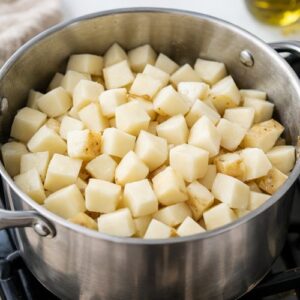
- When potatoes are tender, drain them completely in a colander. Return them to the empty pot. Add the 30 grams (2 tablespoons) of cold butter cut into small pieces and the white pepper. This is critical: mash immediately while potatoes are still steaming. You're trying to work in the butter while it melts. Mash until roughly 80% smooth—a few small lumps are actually better than completely smooth. Then slowly pour in the hot milk while stirring gently with a wooden spoon. Do NOT over-mix. Over-mixing develops gluten and creates gluey, heavy potatoes. Taste and adjust salt if needed. The potatoes should taste seasoned but not oversalted—remember, they're a topping to a savory filling, so they don't need to be highly seasoned on their own.
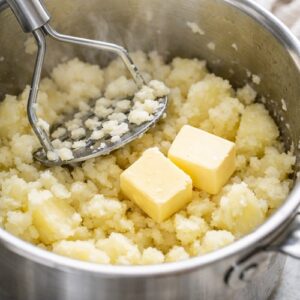
- Preheat your oven to 190°C (375°F). Transfer the chicken and mushroom filling to your baking dish, spreading it evenly. If there's excess sauce that seems too liquid, you can leave a bit in the pot, but you want the filling moist, not swimming. Spoon the mashed potatoes evenly over the filling. You don't need to seal it completely—the potatoes create a natural topping. Brush the melted butter over the potato surface. Sprinkle with Parmesan cheese and a tiny pinch of salt and pepper. This creates the golden, crusty top that makes people think you're a professional. Place the baking dish on a baking sheet (this catches any filling that bubbles over—prevents a messy oven).
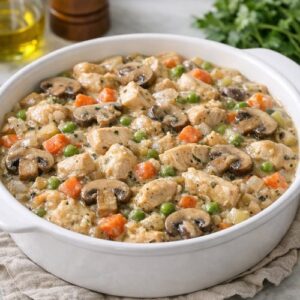
- Bake for 25-30 minutes until the potato topping is golden brown and you can see filling just starting to bubble around the edges. Don't worry if it seems too short—remember, the filling is already cooked. You're just heating everything through and creating color on top. SAFETY WARNING: The baking dish will be EXTREMELY hot. Use oven mitts and place it on a heat-safe surface. Let it rest for 5 minutes before serving—this lets the filling set slightly and makes serving cleaner. The pie is done when the potato top is deep golden brown and feels firm when you lightly press it with a spoon. The filling should bubble slightly at the edges.
Notes
FAQs
Can I use chicken breasts instead of thighs?
Technically yes, but I don’t recommend it for beginners. Chicken breasts are lean and tend to dry out
