
Honey Soy Salmon Recipe
 By
By This post contains affiliate links. As an Amazon Associate I earn from qualifying purchases.
If you’ve always wanted to make Honey Soy Salmon Recipe but felt intimidated, this is your starting point. I’m going to walk you through every single step like you’re cooking in my kitchen with me. This dish is GENUINELY easier than you think—I promise. The combination of sweet honey, savory soy, and that perfect golden crust on the fish? That’s restaurant-quality cooking happening in your own home, and it takes less than 20 minutes. Whether you’re cooking for yourself on a Tuesday night or impressing someone special, this recipe delivers. If you’re nervous about cooking fish, start here. And if you’re looking for other quick weeknight wins, check out my Boneless Skinless Chicken Strip Recipe—it teaches the same pan-searing technique you’ll master today.
My First Salmon Disaster (And Why Yours Won’t Be)
Let me be honest with you. The first time I tried to cook salmon in my tiny Astoria kitchen apartment, I BURNT it. Completely blackened the outside while the inside was still raw. I was so embarrassed—here I was, a registered dietitian, and I couldn’t even cook a simple fish fillet. The problem? I didn’t know that salmon needs lower heat and shorter cooking time than I thought. I also didn’t give the pan enough rest time before cooking.
That failure taught me something crucial: fish doesn’t need complicated techniques. It needs RESPECT for its delicate nature and a few key tricks. Once I figured out the timing and temperature, salmon became one of my go-to proteins. Now, twelve years later, I make this Honey Soy Salmon Recipe at least twice a week. It’s foolproof when you understand the “why” behind each step, and that’s exactly what I’m giving you here.
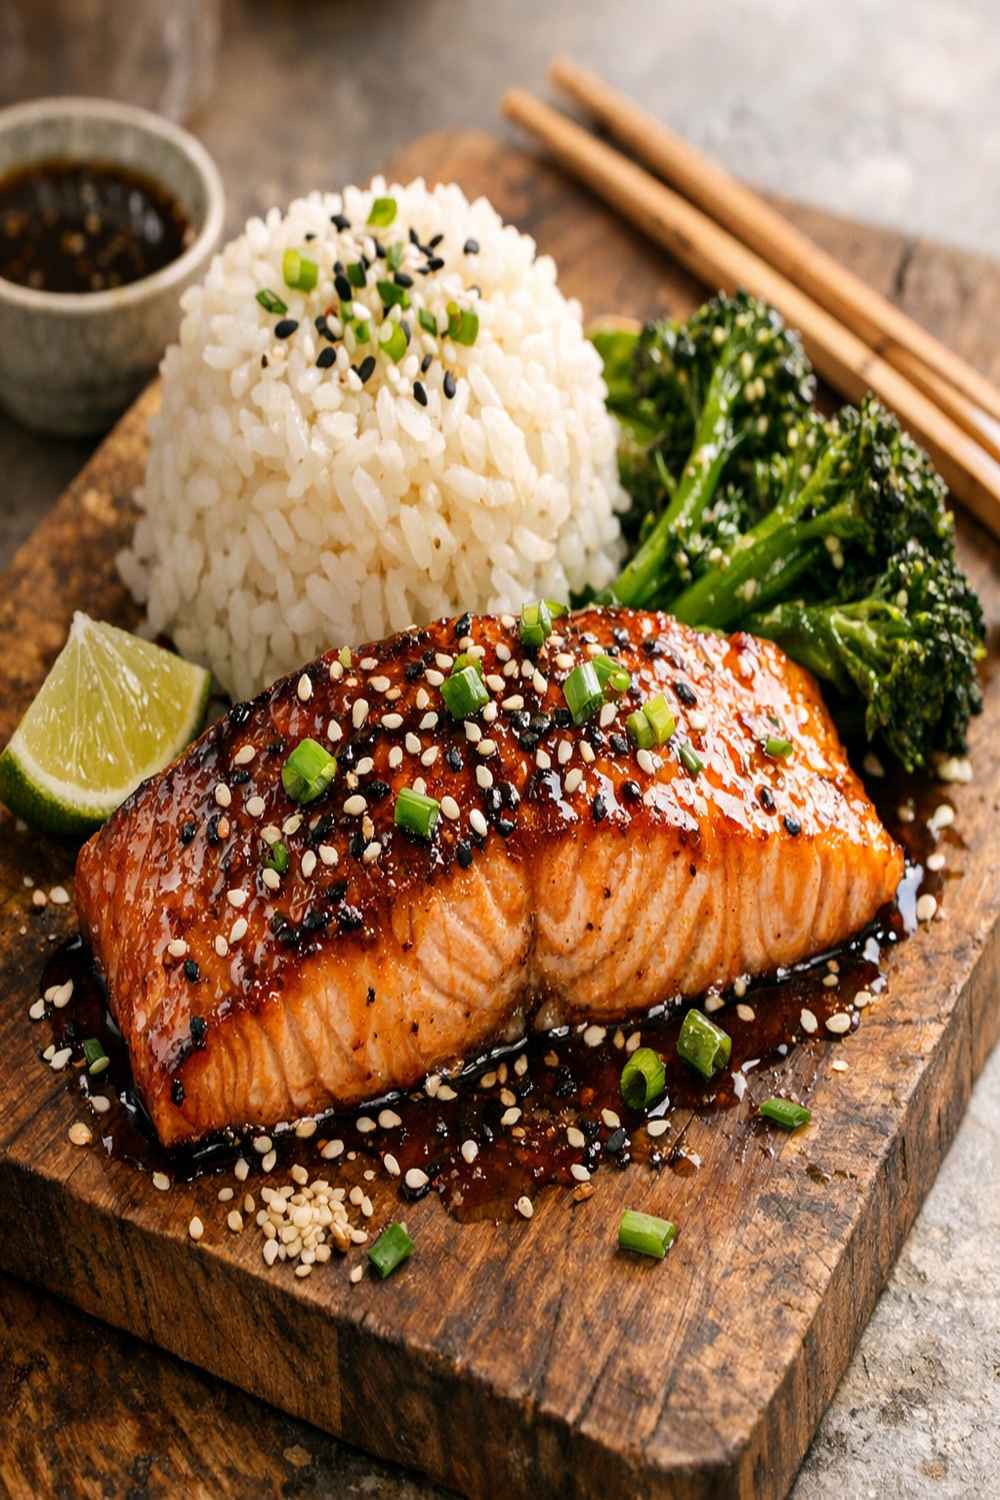
What to Expect Before You Start
Let’s set realistic expectations so you’re not surprised mid-cooking. This recipe takes about 30 minutes total, including prep—but the actual cooking time is only about 8-10 minutes. That means you’ll spend most of your time just standing there, which is PERFECT for beginners because you’re controlling every moment. The difficulty level is genuinely beginner-friendly, but there are a few moments that need your full attention.
- The Fish Won’t Fall Apart – Many first-timers worry their salmon will break into pieces when they flip it. It won’t, as long as you let that first side get properly golden. The crust that forms is MAGIC—it holds everything together.
- Your Sauce Will Thicken Quickly – This is actually a good thing and a sign you’re doing it right. The honey caramelizes in the hot pan and reduces to a beautiful glaze. If it thickens too fast before your fish is cooked, you can add a splash of water to slow it down.
- You Don’t Need Fancy Equipment – One non-stick pan and basic kitchen tools are literally all you need. No fish poacher, no special spatulas, nothing expensive.
Equipment You’ll Need (And What You Can Skip)
I’m going to give this to you straight: you need almost nothing for this recipe. The beauty of cooking in New York City is learning to do MORE with LESS space and fewer tools. Here’s exactly what matters:
- One Medium Non-Stick Skillet (10-12 inches) – This is your MVP. Non-stick prevents the fish from sticking and breaking apart. If you don’t have non-stick, a stainless steel pan works too—just use more oil. A budget-friendly non-stick pan from any drugstore works perfectly fine; you don’t need professional-grade equipment.
- Small Mixing Bowl – For whisking together your sauce ingredients. Any bowl you have will work.
- Whisk or Fork – To combine the sauce. A fork honestly works just fine if that’s all you have.
- Paper Towels – Critical for patting the salmon dry. This creates that gorgeous golden crust.
- Wooden Spoon or Silicone Spatula – For flipping and stirring. Metal utensils can scratch non-stick pans, so go soft.
- Measuring Spoons and Optional Measuring Cups – Nice to have for accuracy, but honestly, if you’re experienced in the kitchen, eyeballing is fine. For beginners, I recommend measuring properly the first two times you make this.
The Ingredients – A Beginner’s Shopping Guide
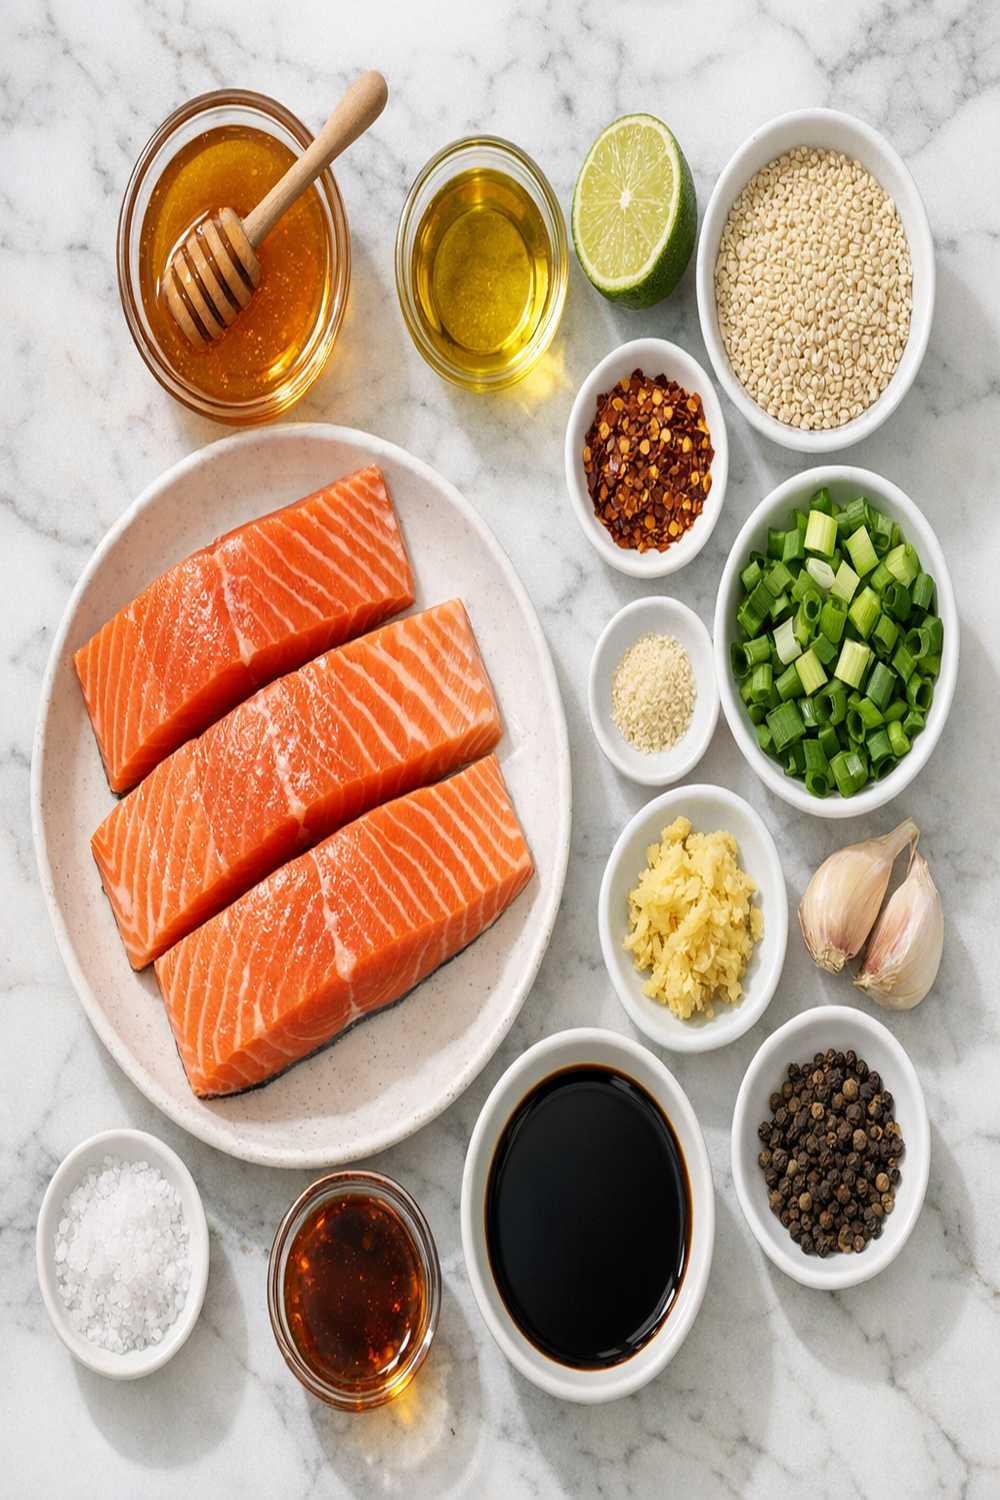
Here’s the beautiful part: this recipe uses ingredients you probably already have in your pantry, or can grab from any New York City bodega, grocery store, or Asian market. Let me break down where to find each one and exactly what to look for when shopping. I’ve also included beginner-friendly substitutions because cooking should be flexible and meet YOUR kitchen reality.
For the Sauce
- 2 tablespoons soy sauce—all-purpose or light soy sauce (find this in any grocery store’s international aisle or Asian market; avoid dark soy sauce which is too strong)
- 4 tablespoons raw honey (look for organic honey in the baking aisle or natural section; any brand works, from local NYC apiaries to store brands)
- 1 large garlic clove, minced (or 2 small cloves; fresh garlic only—jarred minced garlic changes the flavor profile)
- 1 tablespoon white vinegar (or use rice vinegar, apple cider vinegar, or lemon juice—never balsamic as it’s too thick and sweet)
For the Fish and Cooking
- Sea salt and freshly ground black pepper (to taste)
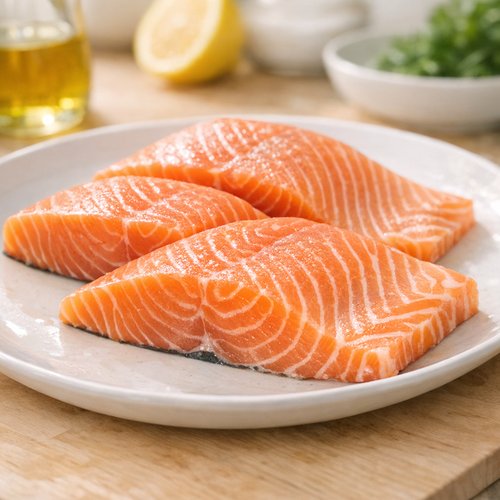
- 2 salmon fillets, skinless (6 ounces or 200 grams each; ask your fishmonger to remove the skin, or buy pre-skinned fillets which most supermarkets carry)
- 2 tablespoons olive oil (any kind works—don’t use expensive extra virgin for cooking as heat damages its delicate flavor)
For Finishing
- 1 tablespoon sesame seeds (find these in the baking aisle, international section, or Asian market; white, black, or mixed all work)
- 2 tablespoons fresh chives or scallions, finely sliced (or use fresh shallots; these add bright, fresh flavor at the very end)
Shopping Pro Tip from My NYC Kitchen: Buy your salmon the same day you’re cooking it. Fresh salmon smells like the ocean—clean and neutral. If it smells fishy or ammonia-like, it’s not fresh. Most NYC grocery stores have excellent fish counters, and I always ask the fishmonger when their salmon came in. Building that relationship with your local fish counter person is GOLD.
Step-by-Step: Your First Honey Soy Salmon Recipe
Okay, here we go. I’m going to assume you’ve never cooked salmon before, so I’m being detailed on PURPOSE. Read through all the steps once before you start cooking—this helps your brain map out the whole process. Then follow along step-by-step. You’ve got this!
Step 1: Bring Your Salmon to Room Temperature
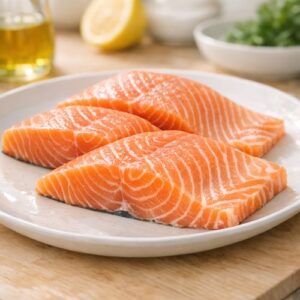
Remove your salmon fillets from the refrigerator and place them on a clean plate. Set a timer for 20 minutes. This is CRUCIAL and often skipped by beginners. Why? Cold fish cooks unevenly—the outside burns while the inside stays cold and raw. Room temperature fish cooks evenly throughout, giving you that perfect medium-rare center. Yes, 20 minutes feels long, but it’s non-negotiable for success. Use this time to prep everything else.
Step 2: Mince Your Garlic
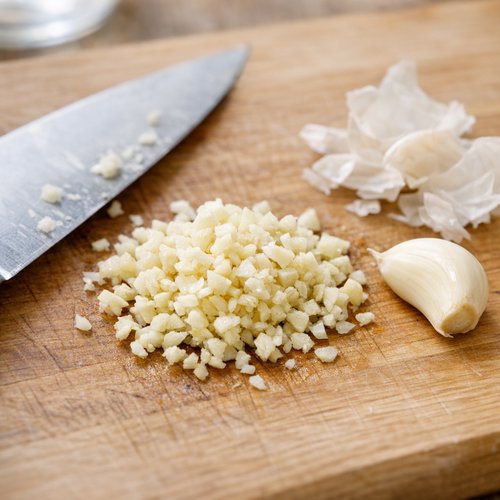
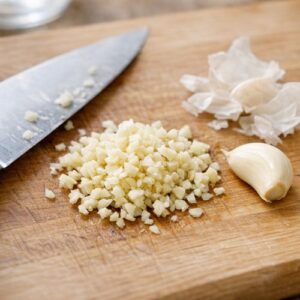
While your salmon is coming to temperature, prepare your garlic. Take one large garlic clove (or two small ones) and remove the papery skin. Place it on your cutting board and press it gently with the flat side of your knife—this loosens the skin and makes mincing easier. Chop it into tiny pieces, roughly the size of a pea. The smaller and more uniform your pieces, the better the flavor distributes. Don’t worry about being perfect—just small is the goal.
Step 3: Make Your Sauce
In a small mixing bowl, combine 4 tablespoons honey, 2 tablespoons soy sauce, 1 tablespoon white vinegar, and your minced garlic. Use a whisk or fork and stir until everything is completely combined. The honey might be thick, so you might need to whisk vigorously for about 15-20 seconds. You’re looking for a smooth, uniform mixture with no streaks of honey. Set this bowl aside—you’ll use it in a few minutes. The sauce should smell aromatic and balanced: sweet from the honey, salty from the soy, and bright from the vinegar.
Step 4: Pat Your Salmon Completely Dry
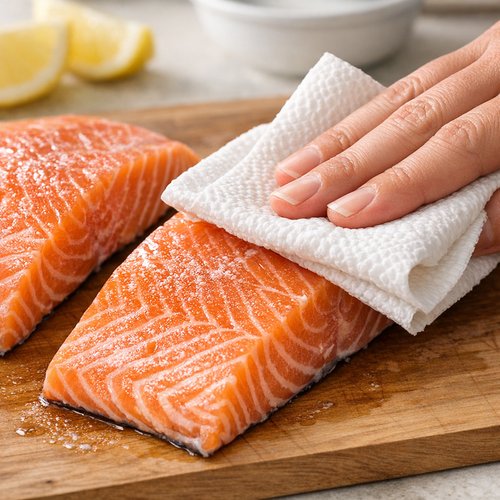
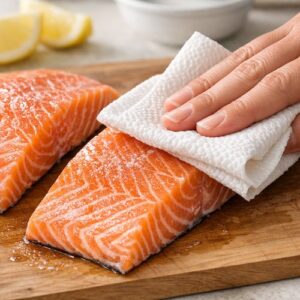
This is the secret step that separates restaurant-quality salmon from soggy home-cooked salmon. Your salmon fillets likely have some moisture on the surface. Take paper towels and gently pat BOTH sides of each fillet until they’re completely dry. I mean really dry—no visible moisture at all. This moisture prevents the golden crust from forming. Spend a full 30 seconds on this step. It feels silly, but I PROMISE it makes a difference.
SAFETY WARNING: Make sure your salmon is thawed completely if frozen. Any ice crystals can cause dangerous splattering in the hot pan.
Step 5: Season Your Salmon
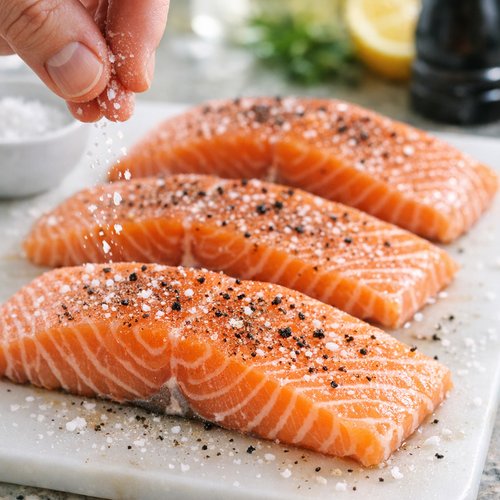
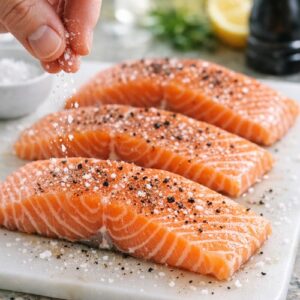
Sprinkle a pinch of sea salt and a few grinds of black pepper on both sides of each fillet. Don’t oversalt—remember, your sauce has soy sauce which is already salty. You’re just adding a whisper of seasoning to highlight the salmon’s natural flavor. A good rule: if you can see the salt and pepper crystals, you’ve added enough.
Step 6: Heat Your Pan (This is Critical)
Place your non-stick skillet on the stove and turn the heat to medium-high, or just under medium-high if your stove runs hot. This is where many beginners struggle because every stove is different. Here’s how to know when your pan is ready: drizzle in your 2 tablespoons of olive oil and wait about 60 seconds. The oil should shimmer and move easily across the pan. It shouldn’t be smoking—if it’s smoking, turn down the heat slightly. You want the oil hot enough to create a crust, but not so hot that it burns the fish. The pan is ready when a tiny piece of salmon sizzles immediately when it hits the surface.
SAFETY WARNING: Hot oil can cause serious burns. Keep your hands and face away from the pan. Never leave the pan unattended once oil is heating.
Step 7: Place Salmon in the Pan (First Side)
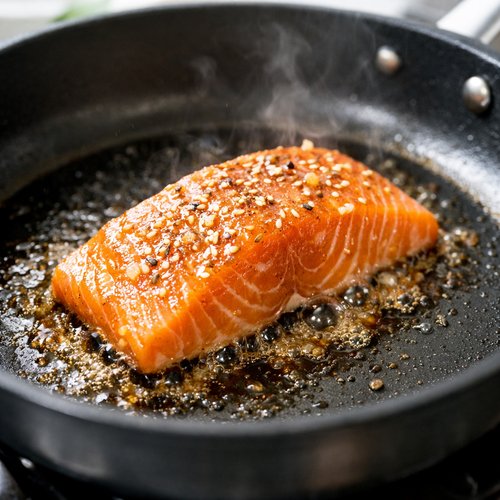
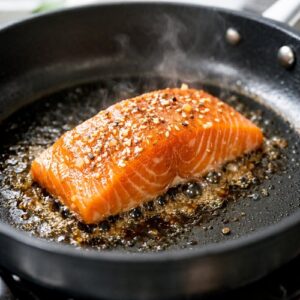
Carefully place your first salmon fillet in the center of the pan. You should hear an immediate, satisfying sizzle. If there’s no sizzle, your pan isn’t hot enough—remove the fillet and wait another 30 seconds. Once the fillet is in, DO NOT MOVE IT. This is hard for beginners because you want to fidget, but resist. Leave it completely alone for 3-4 minutes. During this time, the bottom is developing that gorgeous golden crust. Set a timer. You can cook the second fillet in a separate pan if you have one, or wait until the first one is flipped. (If cooking one fillet at a time is easier for your mental load, do that—there’s no shame in working with smaller portions while learning.)
While you’re waiting, do a visual check: you should see the edges of the fillet starting to turn opaque. That’s the fish cooking from the heat. The bottom might feel slightly firm when you gently nudge it with your spatula.
Step 8: Flip Your Salmon (The Moment of Truth)
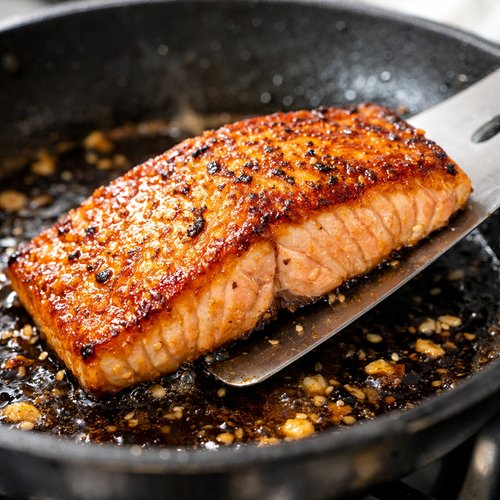
After 3-4 minutes, check the bottom of your salmon. It should be golden brown—not white, not pale, but genuinely golden. If it’s still pale, wait another 30-60 seconds. Once it’s golden, slide your spatula under the fillet completely. You want full support underneath before you lift. With confidence, flip it in one smooth motion. The fillet should flip easily. If it’s sticking, wait 30 more seconds—it’s not ready to flip yet.
REALITY CHECK: If your fillet breaks a little during flipping, that’s okay. It happens. Just push the pieces back together in the pan and keep going. You’ll still eat a delicious dinner.
Now cook the second side for 2-3 minutes until it’s also golden. Your salmon is cooking through at this point—you’re not searing anymore, you’re finishing the cook.
Step 9: Pour the Sauce Over the Salmon
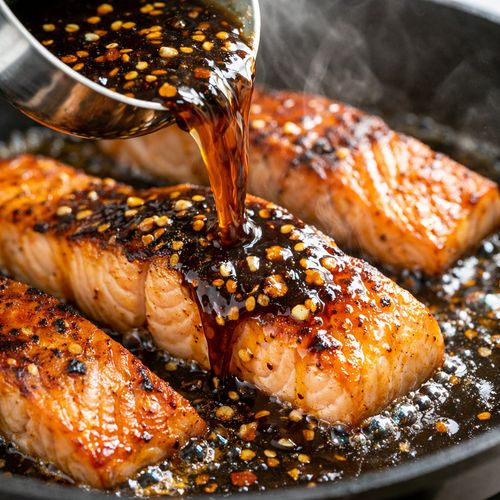
After the second side has been cooking for 2-3 minutes and is golden, pour your prepared sauce directly over the salmon fillets. The pan will be very hot, and the sauce will immediately start to sizzle and bubble. This is EXACTLY what you want. The honey will caramelize, the vinegar will reduce, and the whole thing will come together into a glossy glaze. You’ll smell something absolutely incredible—that’s the Maillard reaction happening, the chemistry that makes food delicious.
Let the sauce cook for about 1 minute, gently spooning it over the salmon to coat both sides. Watch it closely—it will thicken as it cooks. This is a good sign.
Step 10: Check for Doneness
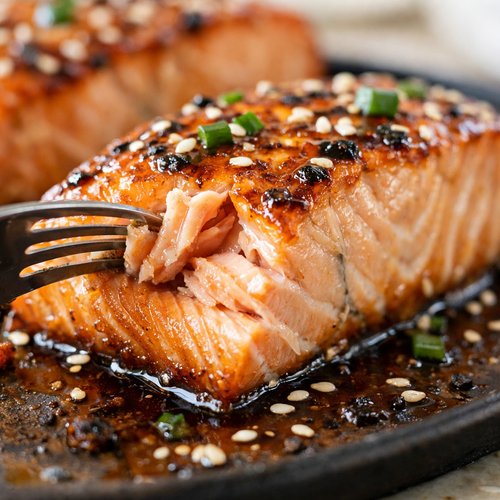
Here’s how to tell if your salmon is cooked to perfection: look at the side edge of each fillet. You should see the fish gradually turning from translucent (raw) to opaque (cooked) as you move from the edge toward the center. For medium-rare—which is my preference and restaurant-standard—you want the very center to still have a tiny bit of translucency, while most of the fish is opaque.
If your sauce thickens too much before your salmon reaches your preferred doneness, add water 1 tablespoon at a time to loosen it up. Keep cooking until the salmon is done to your liking. If you prefer well-done salmon (and some people do!), cook it longer. There’s no wrong preference here.
DONENESS GUIDE: Medium-rare: slight transparency in the very center (2-3 more minutes). Medium: completely opaque throughout but still moist (1-2 more minutes). Well-done: completely opaque and firm throughout (2-3 more minutes).
Step 11: Transfer to Your Plate
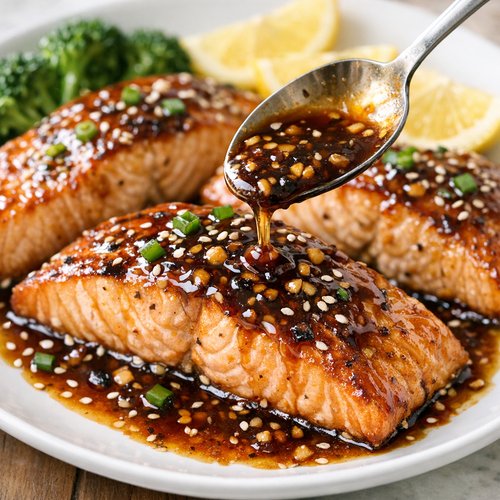
Using your spatula, carefully transfer each salmon fillet to your serving plate. Spoon that beautiful sauce over the top—don’t waste a drop. The sauce is liquid gold and tastes AMAZING poured over the fish and any sides you’re serving.
Step 12: Finish With Sesame Seeds and Chives
Sprinkle ½ tablespoon of sesame seeds over each fillet and top with 1 tablespoon of fresh sliced chives or scallions. These finishing touches add texture, crunch, and a bright fresh flavor that makes this dish feel complete. The sesame seeds toast slightly from the residual heat of the fish, bringing out their nutty flavor.
Take a moment. Look at what you made. You just cooked restaurant-quality salmon. Seriously.
How to Tell If You Did It Right
Success in cooking is about recognizing specific visual and sensory cues. Here’s what a perfect Honey Soy Salmon Recipe looks like:
- The Crust is Golden and Slightly Caramelized – Not white, not brown, but that perfect golden color that shows the fish was seared properly. The exterior should look almost glossy from the sauce.
- The Sauce Clings to the Fish – It shouldn’t be watery or pooling on the plate. It should coat the salmon like a light glaze. When you spoon it, it’s thick enough to cling to the fish.
- The Aroma is Sweet and Savory – You should smell caramelized honey, the saltiness of soy, and garlic. If it smells burnt, your heat was too high.
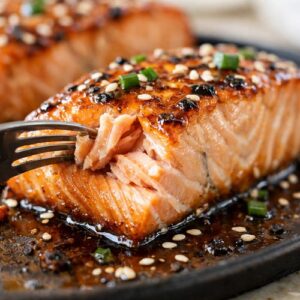
- The Texture is Moist Inside – When you take a fork to it, the fish should flake easily but still have moisture. It shouldn’t be dry or rubbery. If it is, you cooked it too long.
- The Flavor is Balanced – One taste should hit you with sweetness, saltiness, and brightness all at once. Nothing should overpower the others.
What Went Wrong? Beginner Fixes
- Your Salmon Stuck to the Pan and Broke Apart – This happens when either the pan isn’t hot enough or the fish wasn’t dry enough before cooking. Next time: pat the fish extra dry and make sure your oil is shimmering before the salmon goes in. If this happened but you still want to eat it, just push the pieces together on your plate and top with sauce—it’s still delicious.
- The Outside is Burnt But the Inside is Raw – Your heat was too high. Next time, use medium heat or just under medium-high. This takes longer but gives you better control. Alternatively, you can sear on high heat for less time (2-3 minutes per side) and finish in a 400°F oven for 4-5 minutes.
- Your Sauce Is Too Thick or Burned – The pan was too hot when you added the sauce, or you let it reduce for too long. Next time, lower your heat slightly before adding sauce and add water immediately if it thickens too quickly. A thin sauce is better than a burned one.
- Your Salmon is Dry and Overcooked – You cooked it too long. Salmon cooks fast—watch it like a hawk. Next time, check for doneness at the 6-minute mark instead of 8-10 minutes. Remember: it’s easier to cook it a bit longer if needed, but you can’t uncook an overcooked fish.
- The Flavors Taste Flat or One-Dimensional – Your garlic probably wasn’t minced finely enough, or you didn’t let the sauce properly infuse. Next time, use fresh minced garlic and let the sauce cook for the full minute. Also, taste as you go—this teaches your palate what balanced flavors should taste like.
Expert’s Nutritional Tip
As a registered dietitian, let me highlight something CRITICAL about salmon: it’s one of the few foods naturally rich in omega-3 fatty acids, specifically EPA and DHA. These compounds are crucial for heart health, brain function, and reducing inflammation in your body. One serving of this Honey Soy Salmon Recipe provides approximately 2.5 grams of EPA + DHA, which meets the American Heart Association’s weekly recommendation when eaten twice per week.
The honey in this sauce adds natural sweetness without needing refined sugar, and raw honey contains trace amounts of enzymes and minerals (though cooking denatures most enzymes, it’s still a cleaner choice than processed sweeteners). However, the sodium from soy sauce is notable—about 500mg per serving—so if you’re watching sodium intake, use reduced-sodium soy sauce or decrease the amount to 1½ tablespoons.
From my kitchen to yours: I often tell clients that eating salmon twice weekly, prepared this way, is one of the single best investments you can make in your long-term health. It’s delicious AND deeply nourishing.
Make-Ahead Guide: Meal Prep Like a Pro
One of my favorite tricks from cooking in a tiny NYC apartment is prepping as much as possible in advance. Here’s how to make this recipe even easier:
- Prep the Sauce the Morning Of – Whisk together your honey, soy sauce, vinegar, and minced garlic up to 8 hours ahead. Store in a small container in the fridge. Just stir before using. The flavors actually meld and intensify, so this is better than making it fresh.
- Buy Pre-Minced Garlic If You’re Pressed for Time – I’m a purist and prefer fresh-minced, but pre-minced garlic from a jar works in a pinch. Use about 1 teaspoon to replace one fresh clove.
- Prep Your Garnishes in Advance – Slice your chives or scallions in the morning and store in a small container with a damp paper towel. They’ll stay fresh all day.
- Buy Pre-Skinned Salmon Fillets – Most supermarkets sell these. Saves 2 minutes and reduces one potential worry point for beginners.
CAN YOU MAKE THIS AHEAD AND REHEAT? Technically yes, but salmon reheats best within 2-3 hours of cooking, and the texture suffers slightly. I recommend making this fresh each time—it only takes 20 minutes, so it’s genuinely faster than reheating.
Your Next Steps After Mastering This
Once you’ve made Honey Soy Salmon Recipe a few times and feel confident, you’re ready to level up. The skills you’ve learned—pan-searing, gauging heat, creating pan sauces, and cooking fish—transfer directly to other proteins and dishes.
Next, try the same pan-searing technique with Beef And Noodle Stir Fry Recipe, which teaches you how to manage higher heat and quick cooking. You could also explore Beef Teriyaki Recipe With Teriyaki Sauce, which uses a similar Asian-inspired sauce profile. Once you’re comfortable with pan sauces, you can apply this knowledge to chicken, pork, or even vegetables.
The real skill you’re building is INTUITION—learning to read your food, trust your instincts, and adjust based on what you see and smell. That’s the foundation of confident cooking.
Can I Store Honey Soy Salmon Recipe?
Refrigerator Storage: Leftover salmon keeps in an airtight container for 3-4 days. Store the sauce separately if possible—it reheats better that way. Cold salmon is actually delicious on salads or with rice the next day.
Freezer Storage: You can freeze cooked salmon for up to 2 months, though the texture becomes less ideal. I recommend freezing without sauce and adding fresh sauce when you reheat. Thaw overnight in the refrigerator before eating.
Best Method: Store salmon skin-side down in a shallow container. This prevents it from drying out. When reheating, use a gentle oven at 275°F for 8-10 minutes rather than microwaving, which dries out fish.
SAFETY WARNING: Never leave cooked salmon at room temperature for more than 2 hours. Bacteria can develop rapidly in fish products.
Nutrition Information
Based on USDA FoodData Central database for salmon fillet (6oz/170g, cooked) plus sauce ingredients, per serving (1 fillet with sauce):
- Calories: 285
- Protein: 32g – Critical for muscle maintenance and satiety
- Total Fat: 16g – Mostly healthy unsaturated fats including omega-3s
- Saturated Fat: 3.5g
- Omega-3 Fatty Acids (EPA + DHA): 2.5g – Heart-healthy anti-inflammatory compounds
- Carbohydrates: 12g – Primarily from honey in the sauce
- Fiber: 0g
- Sodium: 510mg – About 22% of daily value from the soy sauce
- Potassium: 480mg – Supports heart health and blood pressure regulation
- Selenium: 35mcg – Important antioxidant mineral
Nutritional Takeaway: This is a protein-rich, nutrient-dense meal that’s appropriate for most diets. It’s naturally gluten-free if you use tamari instead of regular soy sauce. One serving provides excellent satiety with under 300 calories—perfect for balanced nutrition.
What Can I Serve With Honey Soy Salmon Recipe?
Salmon is incredibly versatile, and pairing it with the right sides elevates the whole meal. Here are my favorite combinations from cooking in New York’s diverse neighborhoods:
- Steamed Jasmine or Brown Rice – The mild, slightly sweet rice absorbs the honey-soy sauce beautifully. Cooked rice also stretches the meal if you’re feeding multiple people.
- Sautéed Bok Choy or Broccoli – A quick sauté in the same garlicky, savory flavor profile complements salmon perfectly. Plus, dark leafy greens add iron and nutrients.
- Roasted Asparagus or Green Beans – Toss with a bit of sesame oil and serve alongside. The slight char on roasted vegetables mirrors the salmon’s golden crust.
- Simple Cucumber Salad – A light, refreshing contrast. Toss sliced cucumbers with rice vinegar, sesame oil, and a pinch of salt. This is common in Asian cuisine for good reason.
- Cauliflower Rice or Zucchini Noodles – For a lower-carb meal, these absorb the sauce beautifully and keep the focus on the salmon.
- Edamame – Steamed and lightly salted, they add protein, fiber, and fun texture to the plate.
Honestly, steamed rice plus one vegetable is my formula for balanced meals. It’s simple, customizable, and works with any season or preference.
Seasonal Variations
Spring: Add fresh ginger (¼ teaspoon minced) to the sauce for brightness. Serve over asparagus. Ginger brings warmth and aids digestion, perfect for spring transition eating.
Summer: Add a splash of fresh lime juice (½ teaspoon) to the sauce for citrus notes. Serve chilled alongside a cucumber salad for a light summer dinner.
Fall: Add a pinch of five-spice powder (⅛ teaspoon) to the sauce for warmth and complexity. Serve over roasted sweet potato or regular potato for heartier comfort.
Winter: Add a tiny pinch of cayenne pepper (⅛ teaspoon) to the sauce for gentle heat. Serve over hot rice with sautéed spinach for a warming, nourishing meal.

Honey Soy Salmon Recipe
Ingredients
Equipment
Method
- Remove your salmon fillets from the refrigerator and place them on a clean plate. Set a timer for 20 minutes. This is CRUCIAL and often skipped by beginners. Why? Cold fish cooks unevenly—the outside burns while the inside stays cold and raw. Room temperature fish cooks evenly throughout, giving you that perfect medium-rare center. Yes, 20 minutes feels long, but it's non-negotiable for success. Use this time to prep everything else.
- While your salmon is coming to temperature, prepare your garlic. Take one large garlic clove (or two small ones) and remove the papery skin. Place it on your cutting board and press it gently with the flat side of your knife—this loosens the skin and makes mincing easier. Chop it into tiny pieces, roughly the size of a pea. The smaller and more uniform your pieces, the better the flavor distributes. Don't worry about being perfect—just small is the goal.
- In a small mixing bowl, combine 4 tablespoons honey, 2 tablespoons soy sauce, 1 tablespoon white vinegar, and your minced garlic. Use a whisk or fork and stir until everything is completely combined. The honey might be thick, so you might need to whisk vigorously for about 15-20 seconds. You're looking for a smooth, uniform mixture with no streaks of honey. Set this bowl aside—you'll use it in a few minutes. The sauce should smell aromatic and balanced: sweet from the honey, salty from the soy, and bright from the vinegar.
- This is the secret step that separates restaurant-quality salmon from soggy home-cooked salmon. Your salmon fillets likely have some moisture on the surface. Take paper towels and gently pat BOTH sides of each fillet until they're completely dry. I mean really dry—no visible moisture at all. This moisture prevents the golden crust from forming. Spend a full 30 seconds on this step. It feels silly, but I PROMISE it makes a difference. SAFETY WARNING: Make sure your salmon is thawed completely if frozen. Any ice crystals can cause dangerous splattering in the hot pan.
- Sprinkle a pinch of sea salt and a few grinds of black pepper on both sides of each fillet. Don't oversalt—remember, your sauce has soy sauce which is already salty. You're just adding a whisper of seasoning to highlight the salmon's natural flavor. A good rule: if you can see the salt and pepper crystals, you've added enough.
- Place your non-stick skillet on the stove and turn the heat to medium-high, or just under medium-high if your stove runs hot. This is where many beginners struggle because every stove is different. Here's how to know when your pan is ready: drizzle in your 2 tablespoons of olive oil and wait about 60 seconds. The oil should shimmer and move easily across the pan. It shouldn't be smoking—if it's smoking, turn down the heat slightly. You want the oil hot enough to create a crust, but not so hot that it burns the fish. The pan is ready when a tiny piece of salmon sizzles immediately when it hits the surface. SAFETY WARNING: Hot oil can cause serious burns. Keep your hands and face away from the pan. Never leave the pan unattended once oil is heating.
- Carefully place your first salmon fillet in the center of the pan. You should hear an immediate, satisfying sizzle. If there's no sizzle, your pan isn't hot enough—remove the fillet and wait another 30 seconds. Once the fillet is in, DO NOT MOVE IT. This is hard for beginners because you want to fidget, but resist. Leave it completely alone for 3-4 minutes. During this time, the bottom is developing that gorgeous golden crust. Set a timer. You can cook the second fillet in a separate pan if you have one, or wait until the first one is flipped. (If cooking one fillet at a time is easier for your mental load, do that—there's no shame in working with smaller portions while learning.) While you're waiting, do a visual check: you should see the edges of the fillet starting to turn opaque. That's the fish cooking from the heat. The bottom might feel slightly firm when you gently nudge it with your spatula.
- After 3-4 minutes, check the bottom of your salmon. It should be golden brown—not white, not pale, but genuinely golden. If it's still pale, wait another 30-60 seconds. Once it's golden, slide your spatula under the fillet completely. You want full support underneath before you lift. With confidence, flip it in one smooth motion. The fillet should flip easily. If it's sticking, wait 30 more seconds—it's not ready to flip yet. REALITY CHECK: If your fillet breaks a little during flipping, that's okay. It happens. Just push the pieces back together in the pan and keep going. You'll still eat a delicious dinner. Now cook the second side for 2-3 minutes until it's also golden. Your salmon is cooking through at this point—you're not searing anymore, you're finishing the cook.

- After the second side has been cooking for 2-3 minutes and is golden, pour your prepared sauce directly over the salmon fillets. The pan will be very hot, and the sauce will immediately start to sizzle and bubble. This is EXACTLY what you want. The honey will caramelize, the vinegar will reduce, and the whole thing will come together into a glossy glaze. You'll smell something absolutely incredible—that's the Maillard reaction happening, the chemistry that makes food delicious. Let the sauce cook for about 1 minute, gently spooning it over the salmon to coat both sides. Watch it closely—it will thicken as it cooks. This is a good sign.
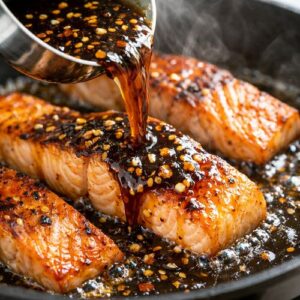
- Here's how to tell if your salmon is cooked to perfection: look at the side edge of each fillet. You should see the fish gradually turning from translucent (raw) to opaque (cooked) as you move from the edge toward the center. For medium-rare—which is my preference and restaurant-standard—you want the very center to still have a tiny bit of translucency, while most of the fish is opaque. If your sauce thickens too much before your salmon reaches your preferred doneness, add water 1 tablespoon at a time to loosen it up. Keep cooking until the salmon is done to your liking. If you prefer well-done salmon (and some people do!), cook it longer. There's no wrong preference here. DONENESS GUIDE: Medium-rare: slight transparency in the very center (2-3 more minutes). Medium: completely opaque throughout but still moist (1-2 more minutes). Well-done: completely opaque and firm throughout (2-3 more minutes).
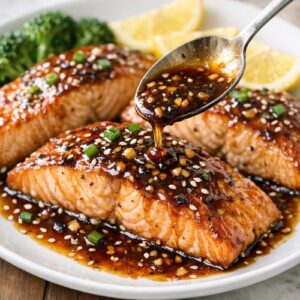
- Using your spatula, carefully transfer each salmon fillet to your serving plate. Spoon that beautiful sauce over the top—don't waste a drop. The sauce is liquid gold and tastes AMAZING poured over the fish and any sides you're serving.
- Sprinkle ½ tablespoon of sesame seeds over each fillet and top with 1 tablespoon of fresh sliced chives or scallions. These finishing touches add texture, crunch, and a bright fresh flavor that makes this dish feel complete. The sesame seeds toast slightly from the residual heat of the fish, bringing out their nutty flavor. Take a moment. Look at what you made. You just cooked restaurant-quality salmon. Seriously.
Notes
FAQs
Can I Use Frozen Salmon?
Absolutely yes, but thaw it completely first. Place frozen fillets in the refrigerator overnight (best method) or in cold water for 30 minutes (quick method). Make sure all ice crystals are gone before patting dry. Frozen salmon is often fresher than “fresh” salmon at the grocery store, so don’t feel bad using it. Just thaw properly and you’ll get the same result.
What if I Don’t Have Soy Sauce?
Use tamari (gluten-free soy sauce alternative) or liquid aminos as a 1:1 swap. If you have neither, use 1 tablespoon of worcestershire sauce mixed with ½ teaspoon salt. It won’t be identical, but it’s tasty. What you’re looking for is saltiness and umami (savory depth).
Can I Make This With Other Fish?
Yes! This sauce works beautifully with trout, halibut, sea bass, or even cod. Each cooks slightly differently—thinner, whiter fish cooks faster, so reduce time by 1-2 minutes per side. The sauce is truly adaptable.
My Pan Smokes When I Cook—Is That Normal?
Some smoking is normal and actually desirable (that’s the Maillard reaction creating flavor). However, if it’s heavy smoke, your heat is too high or your oil is burning. Turn down the heat immediately and let the pan cool slightly. Heavy smoke means burnt food tastes bitter. A light wisping is good; heavy smoke is bad. Every stove is different, so adjust based on what you see and smell.
Is This Recipe Healthy for Weight Loss?
Yes, at approximately 285 calories per serving with 32 grams of protein, this is a filling, nutrient-dense meal perfect for weight management. The protein keeps you satisfied longer than carbs alone. Pair it with vegetables (non-starchy, low-calorie) and moderate portions of grain, and you have an excellently balanced weight-loss meal. Salmon’s omega-3s also support metabolic health.
Can I Cook This for Two People in One Pan?
Yes, as long as your pan is large enough that the fillets don’t touch. A 12-inch pan usually fits two standard fillets with space. If they touch, they’ll steam instead of sear, and you won’t get that golden crust. Alternatively, cook them in two batches—honestly, it’s less stressful for beginners anyway.