There’s something incredibly satisfying about a cheeseburger sizzling away in a cast iron skillet. The sound of meat hitting hot metal is music to a home cook’s ears. A good cheeseburger doesn’t just belong on a plate—it deserves a sidekick that elevates the meal to the next level.
For me, that side is a fresh Italian pasta salad bursting with colorful veggies and a tangy dressing. As the flavors mingle in your mouth, you realize this combination is pure magic. Let’s dive into the delicious world of Cast Iron Skillet Cheeseburgers.

What is Cast Iron Skillet Cheeseburgers?
Cast iron skillets are timeless tools that have been in kitchens for centuries. They heat evenly and retain warmth, creating a perfect environment for searing meat. A cheeseburger cooked in this way revels in juicy goodness.
The rich flavor of beef harmonizes with melted cheese, creating a classic dish to satisfy any mealtime craving.
Making cheeseburgers in a cast iron skillet allows for a quick cook while achieving that coveted crust. It’s an easy cooking method that doesn’t require a grill but still results in that unforgettable flavor.
The Ingredients
Kosher salt, to taste
Freshly ground black pepper, to taste
1 teaspoon unsalted butter
10 ounces sirloin steak tips, chopped into 1-inch cubes
6 ounces boneless beef short ribs, diced into 1-inch pieces
1 tablespoon Worcestershire sauce
4 slices cheddar cheese
To Serve/Garnish:
Toasted hamburger buns, lightly buttered and toasted until golden
Fresh lettuce
Tomato slices
Crispy bacon strips
Thinly sliced red onion
Sliced dill pickles
Homemade burger sauce

How to Make Cast Iron Skillet Cheeseburgers?
Crafting cheeseburgers in a cast iron skillet is straightforward. This process involves browning the beef, melting cheese to perfection, and assembling the burgers. Now, let’s jump into the details.
Step-by-Step Directions
Step 1: Prepare the Beef Mixture
First things first, let’s create the beef blend. I usually combine sirloin steak tips and short ribs for a balanced flavor and texture.
- In a bowl, mix the chopped sirloin steak with the diced short ribs.
- Add a pinch of kosher salt and freshly ground black pepper.
- Don’t forget the Worcestershire sauce—it adds a punch! Mix until well incorporated.
Step 2: Shape the Patties
With the mixture ready, it’s time to shape the patties.
- Divide the beef mixture into equal portions. Aim for about 4 ounces each for a manageable size.
- Gently roll them into balls, then flatten them into patties about ¾ inch thick.
Don’t overwork the meat; a gentle hand keeps those juices inside.
Step 3: Heat the Skillet
Now we need the skillet hot and ready.
- Place your cast iron skillet on the stovetop over medium-high heat.
- Add the teaspoon of unsalted butter and let it melt. Swirl it around to coat the pan evenly.
Step 4: Cook the Patties
It’s showtime!
- Carefully place the patties in the skillet. You should hear a satisfying sizzle. Don’t overcrowd the skillet; cook in batches if necessary.
- Cook for about 4-5 minutes on one side before flipping. You’re looking for a nice crust to form.
- After flipping, place a slice of cheese on each patty, and cover with a lid. This helps the cheese melt beautifully.
Step 5: Assemble the Burgers
Now, let’s put it all together!
- While the cheese is melting, toast the hamburger buns in the same skillet for an extra layer of flavor.
- Once the cheese is gooey and the buns are golden, it’s time to build your burger.
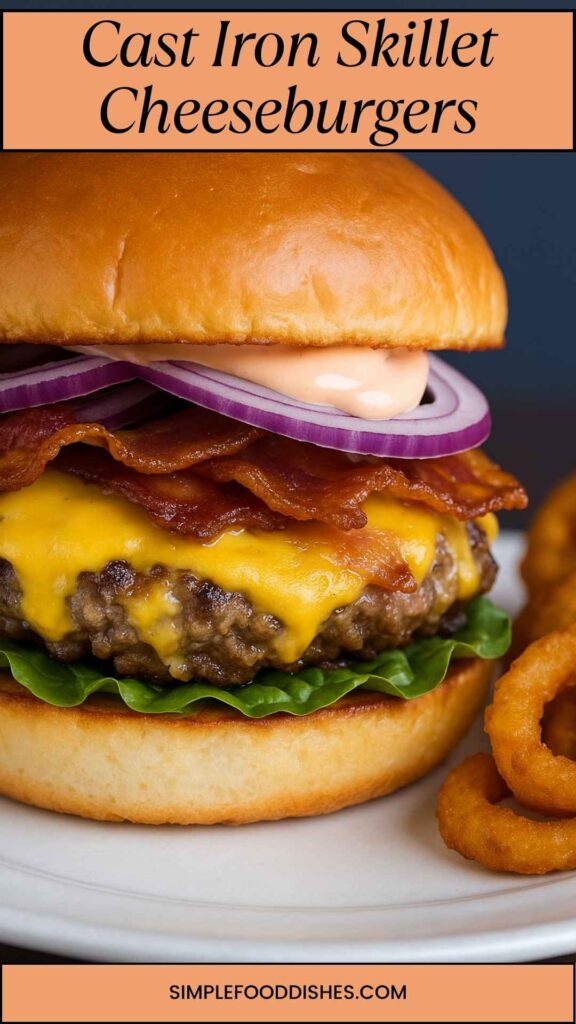
Start with the bottom bun, layer fresh lettuce, a burger patty with melted cheddar, crispy bacon strips, tomato slices, red onion, and pickles. Drizzle with your homemade burger sauce. Cap it off with the top bun.
Notes
Here are some tips to elevate your cheeseburger game:
- Don’t overcook your beef. Aim for medium-rare for juicy results.
- Let the patties rest for a few minutes before serving to retain more juiciness.
- Experiment with cheese! Try Swiss, pepper jack, or blue cheese for different flavors.
- Consider adding herbs to the beef mixture for added depth. Chopped parsley or chives work wonderfully.
- Adjust the seasonings according to your palate; a little garlic powder or onion powder can add great dimension.
Storage Tips
If you find yourself with leftovers (though I doubt it!), here’s how to store them:
- Cool the patties completely before placing them in an airtight container.
- Refrigerate for up to 3 days. Reheat in the skillet or microwave.
- For longer storage, freeze. Wrap each patty in plastic wrap and place them in a freezer bag, lasting up to 3 months.
Serving Suggestions
Now that you have these delicious cheeseburgers ready, consider serving them with these sides:
- Classic French Fries: These crispy delights are always a hit. Their saltiness balances well with the rich flavors of the burger.
- Coleslaw: The crunch and tanginess of coleslaw cuts through the richness of the burger and adds a refreshing bite.
- Grilled Corn on the Cob: Nothing screams summer like sweet, grilled corn brushed with a little butter.
- Potato Salad: A creamy side that pairs perfectly with burgers, especially at outdoor gatherings.
- Pickle Bar: Provide a variety of pickles—dill, bread and butter, spicy—allowing guests to customize their burger experience.
What Other Substitutes Can I Use in Cast Iron Skillet Cheeseburgers?
If you’re looking to switch things up or accommodate different dietary needs, try these substitutes:
- Ground Turkey: A leaner alternative. While it’s not as juicy, adding some olive oil can help retain moisture.
- Plant-based Crumbles: Perfect for vegetarians. Brands like Beyond Meat or Impossible Burger work wonderfully to mimic the texture of beef.
- Veggie Patties: For those who are fully plant-based, use a hearty veggie burger packed with beans and grains.
- Ground Bison: A slightly sweeter alternative that’s leaner than beef but still packs a ton of flavor.
- Lamb: For a Mediterranean twist, use ground lamb seasoned with herbs like mint and oregano for a unique flavor profile.

Conclusion
Cast Iron Skillet Cheeseburgers can turn a simple meal into a flavorful feast. Whether you prefer classic toppings or adventurous variants, each bite evokes warmth and satisfaction. As you fire up that skillet and start cooking, remember that great meals are about the experience.
The laughter, the stories shared, and the flavors enjoyed all contribute to making food memorable. So gather your friends, cook up these tasty cheeseburgers, and let the good times roll!
You’ll also like the following recipes!

Cast Iron Skillet Cheeseburgers – Simple Food Dishes
Description
There's something incredibly satisfying about a cheeseburger sizzling away in a cast iron skillet. The sound of meat hitting hot metal is music to a home cook’s ears. A good cheeseburger doesn’t just belong on a plate—it deserves a sidekick that elevates the meal to the next level.
Ingredients
To Serve/Garnish:
Instructions
Step 1: Prepare the Beef Mixture
-
First things first, let’s create the beef blend. I usually combine sirloin steak tips and short ribs for a balanced flavor and texture.
- In a bowl, mix the chopped sirloin steak with the diced short ribs.
- Add a pinch of kosher salt and freshly ground black pepper.
- Don't forget the Worcestershire sauce—it adds a punch! Mix until well incorporated.
- In a bowl, mix the chopped sirloin steak with the diced short ribs.
Step 2: Shape the Patties
-
With the mixture ready, it’s time to shape the patties.
- Divide the beef mixture into equal portions. Aim for about 4 ounces each for a manageable size.
- Gently roll them into balls, then flatten them into patties about ¾ inch thick.
Don’t overwork the meat; a gentle hand keeps those juices inside.
- Divide the beef mixture into equal portions. Aim for about 4 ounces each for a manageable size.
Step 3: Heat the Skillet
-
Now we need the skillet hot and ready.
- Place your cast iron skillet on the stovetop over medium-high heat.
- Add the teaspoon of unsalted butter and let it melt. Swirl it around to coat the pan evenly.
- Place your cast iron skillet on the stovetop over medium-high heat.
Step 4: Cook the Patties
-
It’s showtime!
- Carefully place the patties in the skillet. You should hear a satisfying sizzle. Don’t overcrowd the skillet; cook in batches if necessary.
- Cook for about 4-5 minutes on one side before flipping. You’re looking for a nice crust to form.
- After flipping, place a slice of cheese on each patty, and cover with a lid. This helps the cheese melt beautifully.
- Carefully place the patties in the skillet. You should hear a satisfying sizzle. Don’t overcrowd the skillet; cook in batches if necessary.
Step 5: Assemble the Burgers
-
Now, let’s put it all together!
- While the cheese is melting, toast the hamburger buns in the same skillet for an extra layer of flavor.
- Once the cheese is gooey and the buns are golden, it’s time to build your burger.
Start with the bottom bun, layer fresh lettuce, a burger patty with melted cheddar, crispy bacon strips, tomato slices, red onion, and pickles. Drizzle with your homemade burger sauce. Cap it off with the top bun.
- While the cheese is melting, toast the hamburger buns in the same skillet for an extra layer of flavor.
Nutrition Facts
Servings 4
- Amount Per Serving
- Calories 242kcal
- % Daily Value *
- Total Fat 12.9g20%
- Saturated Fat 4.8g24%
- Trans Fat 0.4g
- Cholesterol 76mg26%
- Sodium 471mg20%
- Total Carbohydrate 9g3%
- Dietary Fiber 1g4%
- Sugars 1g
- Protein 22g44%
* Percent Daily Values are based on a 2,000 calorie diet. Your daily value may be higher or lower depending on your calorie needs.
Note
- Don’t overcook your beef. Aim for medium-rare for juicy results.
- Let the patties rest for a few minutes before serving to retain more juiciness.
- Experiment with cheese! Try Swiss, pepper jack, or blue cheese for different flavors.
- Consider adding herbs to the beef mixture for added depth. Chopped parsley or chives work wonderfully.
- Adjust the seasonings according to your palate; a little garlic powder or onion powder can add great dimension.