Before diving into the delightful world of classic fudge, let’s talk about what beverages and snacks pair wonderfully with this rich treat. Classic fudge is incredibly versatile, fitting in perfectly with many flavors.
1. Coffee: A rich mocha or dark roast can balance the sweetness of fudge like a well-matched dance partner.
2. Black Tea: A strong Earl Grey or English Breakfast tea provides a welcome contrast to fudge’s creamy texture.
3. Ice Cream: A scoop of vanilla bean ice cream cradling a piece of fudge creates a beautiful harmony of flavors.
4. Milk: For kids and the young at heart, a glass of cold milk is the classic pairing—sweet and satisfying!
5. Nut Butters: Spread a thin layer of almond or peanut butter on your fudge for an extra punch of flavor.

What is Classic Fudge?
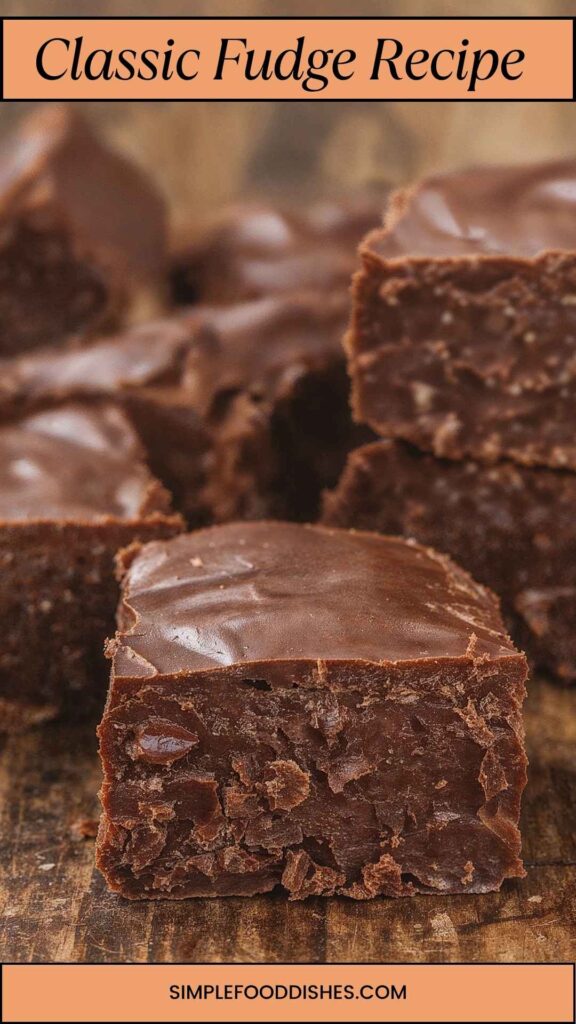
Classic fudge is a confection made primarily of sugar, butter, and milk. It’s typically boiled to a soft-ball stage and then beaten until creamy. The result is a smooth, sweet treat that melts in your mouth. The beauty of fudge lies in its simplicity. With just a handful of ingredients, you can create a rich, indulgent dessert that feels special.
The origins of fudge are somewhat murky, but it’s believed to have started in the United States back in the late 19th century. A popular theory suggests it was first made in Baltimore. Over the years, fudge has evolved into various flavors and styles. Chocolate remains king, but peanut butter, maple, and even fruity flavors have emerged.
Why You’ll Love This Classic Fudge
The love for classic fudge goes beyond the taste. Here are several reasons that make it a beloved treat:
1. Simplicity: With just a few ingredients, you can whip up a batch in no time.
2. Versatility: You can experiment with flavors, mix-ins, and toppings to suit any occasion.
3. Texture: The velvety consistency creates an unparalleled mouthfeel, making every bite deeply satisfying.
4. Nostalgia: Fudge often evokes fond memories of family gatherings, holidays, and special moments.
5. Easy to Gift: Packaged beautifully, fudge can be a great homemade gift for friends and family.
Eating fudge is more than just a treat; it’s an experience. It elicits memories, conversations, and warmth among friends and family.
The Ingredients You Will Need to Make Classic Fudge
To embark on this fudge-making journey, you’ll want to gather the following essential ingredients:
- 1 1/2 cups whole milk (at room temperature)
- 2/3 cup Dutch-processed unsweetened cocoa powder (this elevates the chocolate flavor)
- 1/4 cup salted butter (softened to enhance mixability)
- 1/4 teaspoon instant espresso powder (this enhances the chocolate depth)
- 3 cups granulated cane sugar (the sweet cornerstone of fudge)
- 1 teaspoon pure vanilla extract (for that nostalgic home-baked taste)
Having quality ingredients is key, particularly the cocoa powder and vanilla extract. They make a significant difference in flavor.

Directions
Step 1: Prepare Your Tools
Start by gathering your equipment. You’ll need a heavy-bottomed saucepan to prevent burning the mixture. Also, have a candy thermometer to check the sugar mixture’s temperature and a wooden spoon for stirring. Don’t forget a parchment-lined baking dish for the fudge to set.
Step 2: Combine Ingredients
In your saucepan, combine the whole milk, cocoa powder, softened butter, and granulated sugar. Stir gently over medium heat until the sugar dissolves completely. It’s crucial to avoid boiling at this stage to maintain the smooth texture.
Step 3: Cook the Mixture
Once the sugar has dissolved, increase the heat. Bring the mixture to a boil without stirring. Keep an eye on it; you’ll want to reach the soft-ball stage, which is about 235°F (112°C). Using a candy thermometer helps here! A little patience goes a long way.
Step 4: Beat the Mixture
After you’ve reached the desired temperature, remove the saucepan from heat. Let it cool for about five minutes. You don’t want to burn your hands! Then, stir in the vanilla extract and espresso powder. Now, the fun part begins—you’ll need to beat the mixture. I prefer using a handheld mixer because it cuts down the time and effort. Beat until it thickens and loses its glossy sheen.
Step 5: Pour Into the Dish
Now you’re ready to pour the fudge into your prepared baking dish. Use a spatula to smooth it out evenly. Let it sit at room temperature for about 4 hours or until it firms up completely.
Step 6: Cut and Serve
Once the fudge has set, cut it into small squares and enjoy! There’s nothing quite like the first taste of freshly made fudge.
Notes
Here are some helpful tips to ensure your fudge turns out perfectly:
Use Fresh Ingredients: Always ensure your milk and butter are fresh. Expired ingredients can lead to off flavors.
Avoid Humidity: Fudge-making is sensitive to moisture. On a humid day, your fudge may struggle to set correctly.
Take Your Time: Don’t rush the cooking process. Allow your fudge mixture to reach the correct temperature gradually.
Beating is Key: Properly beating the fudge mixture is crucial. This step helps create that creamy texture.
Chill for Best Result: If you’re in a hurry, refrigeration can help speed up the firming process.
Storage Tips
Storing your fudge properly is vital to maintaining its quality. Keep the following points in mind:
Room Temperature: Store fudge in an airtight container at room temperature away from direct sunlight. It can last for up to two weeks.
Refrigeration: To extend the shelf life, store it in the fridge; it can last up to a month. Adjust serving temperatures to enjoy the treat at its best.
Freezing: For longer storage, wrap fudge tightly in wax paper and aluminum foil before placing it in a freezer-safe container. It can last for up to three months in the freezer. Thaw it in the fridge when you’re craving a treat.
Serving Suggestions
Fudge can be enjoyed in various ways. Here are some delicious ideas:
1. As A Standalone Dessert: Enjoy a piece of fudge on its own with a cup of coffee for a delightful afternoon treat.
2. With Ice Cream: Crumble fudge over vanilla ice cream for a sweet topping that enhances the dessert.
3. S’mores Fudge: Layer pieces of fudge with graham crackers and marshmallows for an elevated s’mores experience.
4. Gift Giving: Package diced fudge in decorative boxes for thoughtful gifts. Perfect for holidays or birthdays.
5. Fudge Brownies: Incorporate fudge into brownie batter for an extra gooey treat that will wow your guests.
What Other Substitutes Can I Use in Classic Fudge?
While classic fudge is beloved for its traditional recipe, there are ways to switch it up. Here are some substitutes you can explore:
1. Nut Milk: Substitute whole milk with almond or cashew milk for a dairy-free option. The taste will differ slightly, but it remains delicious.
2. Coconut Oil: Use coconut oil in place of butter for a dairy-free fudge. You might get a subtle coconut flavor in the final product.
3. Alternative Sweeteners: Replace granulated sugar with coconut sugar or agave syrup for a lower glycemic option. Be sure to adjust the quantities accordingly.
4. Flavored Extracts: Instead of vanilla, experiment with mint, almond, or orange extracts to create fun flavor variations.
5. Add-Ins: Mix in nuts, dried fruits, or even crushed candy bars for extra texture and flavor.

Conclusion
Classic fudge is not just a treat; it’s a delightful experience that can be shared with loved ones. The combination of simplicity, nostalgia, and versatility makes this confection a favorite across generations. By creating your own fudge, you’re not only indulging in a sweet bite but also making memories in the kitchen.
With the techniques and tips shared here, you have everything you need to whip up a batch of this classic confection. So roll up those sleeves, gather your ingredients, and let the magic unfold. Whether you prefer it on its own or as part of other desserts, classic fudge is sure to satisfy. Enjoy this timeless treat and happy fudge-making!
You’ll also like the following recipes!
- Hummingbird Cake Recipe
- Best Ever Potato Salad Recipe
- No Bake Chocolate Peanut Butter Oatmeal Cookies Recipe

Classic Fudge Recipe – Simple Food Dishes
Description
Fudge is one of those desserts that magically transports you back in time. Is it the smooth texture or the rich, sweet taste that makes it feel like a comforting hug? I remember the first time I tried making fudge. The kitchen was filled with the scent of melting chocolate, and my excitement was palpable. Since then, it’s been a staple for every holiday and family gathering.
In this exploration, we’re diving into what makes classic fudge tick. From the ingredients to the steps necessary for the perfect fudge, I’ll share everything I’ve learned along the way. Whether you’re a seasoned baker or a kitchen novice, you’ll find something worthwhile. Let's uncover why this timeless treat holds a special place in our hearts—and our stomachs!
Ingredients
Instructions
Step 1: Prepare Your Tools
-
Start by gathering your equipment. You’ll need a heavy-bottomed saucepan to prevent burning the mixture. Also, have a candy thermometer to check the sugar mixture's temperature and a wooden spoon for stirring. Don't forget a parchment-lined baking dish for the fudge to set.
Step 2: Combine Ingredients
-
In your saucepan, combine the whole milk, cocoa powder, softened butter, and granulated sugar. Stir gently over medium heat until the sugar dissolves completely. It’s crucial to avoid boiling at this stage to maintain the smooth texture.
Step 3: Cook the Mixture
-
Once the sugar has dissolved, increase the heat. Bring the mixture to a boil without stirring. Keep an eye on it; you’ll want to reach the soft-ball stage, which is about 235°F (112°C). Using a candy thermometer helps here! A little patience goes a long way.
Step 4: Beat the Mixture
-
After you’ve reached the desired temperature, remove the saucepan from heat. Let it cool for about five minutes. You don't want to burn your hands! Then, stir in the vanilla extract and espresso powder. Now, the fun part begins—you’ll need to beat the mixture. I prefer using a handheld mixer because it cuts down the time and effort. Beat until it thickens and loses its glossy sheen.
Step 5: Pour Into the Dish
-
Now you’re ready to pour the fudge into your prepared baking dish. Use a spatula to smooth it out evenly. Let it sit at room temperature for about 4 hours or until it firms up completely.
Step 6: Cut and Serve
-
Once the fudge has set, cut it into small squares and enjoy! There’s nothing quite like the first taste of freshly made fudge.
Nutrition Facts
Servings 20
- Amount Per Serving
- Calories 95kcal
- % Daily Value *
- Total Fat 2.5g4%
- Saturated Fat 1.5g8%
- Cholesterol 6mg2%
- Sodium 21mg1%
- Total Carbohydrate 19g7%
- Dietary Fiber 1g4%
- Sugars 17g
- Protein 1g2%
* Percent Daily Values are based on a 2,000 calorie diet. Your daily value may be higher or lower depending on your calorie needs.
Note
- Use Fresh Ingredients: Always ensure your milk and butter are fresh. Expired ingredients can lead to off flavors.
- Avoid Humidity: Fudge-making is sensitive to moisture. On a humid day, your fudge may struggle to set correctly.
- Take Your Time: Don’t rush the cooking process. Allow your fudge mixture to reach the correct temperature gradually.
- Beating is Key: Properly beating the fudge mixture is crucial. This step helps create that creamy texture.
- Chill for Best Result: If you’re in a hurry, refrigeration can help speed up the firming process.