When you think of Danish pastries, what comes to mind? Perhaps a steaming cup of coffee or a delightful cup of tea?
These pastries pair beautifully with either. The richness of the buttery layers complements the smooth bitterness of coffee, while the sweetness plays well with the subtle flavors in tea.
For an added touch, serve your pastries with a dollop of whipped cream or a scoop of vanilla ice cream on the side.
Let’s take a moment to savor the experience. Picture this: It’s a sunny morning, and you’re enjoying a crunch of flaky pastry. The jam spills out just a bit. That moment of pure joy is what Danish pastries are all about.
There’s something about these little pieces of heaven that feels both special and comforting. So, let’s dive deeper into this culinary delight.

What Are Danish Pastries?
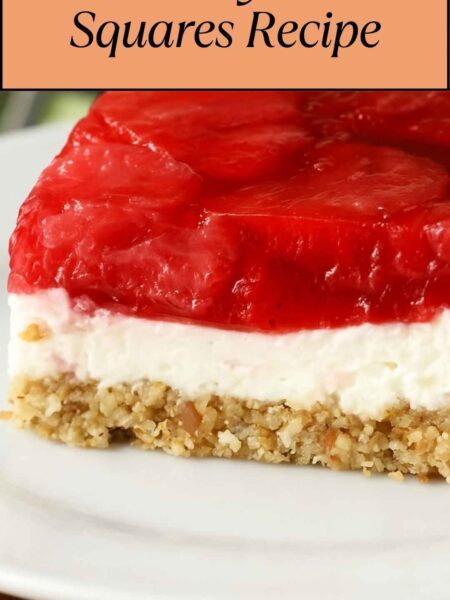
Danish pastries are a type of flaky pastry that’s layered and often filled with sweet ingredients like fruit, cream cheese, or almond paste. They boast a golden-brown color and are known for their intricate shapes.
The dough used is similar to a puff pastry, but it includes yeast, making it slightly different in texture. The yeast gives it that delightful rise, and the butter provides richness.
These pastries can be found in bakeries around the world, but their distinct origins can be traced back to Denmark.
They’re often enjoyed during breakfast or as a sweet snack, making them versatile for any occasion.
How Do They Taste?
Now, let’s talk about the flavors. Picture your favorite dough melting in your mouth. The first bite? You notice the crispiness, a slight crunch giving way to soft, airy layers.
The fillings burst with sweetness, whether creamy cheese or fruity preserves. The taste is undeniably rich, yet it feels light, like a gentle cloud floating away.
For those who love variety, Danish pastries can be filled with an array of flavors. Some are studded with almonds, while others are topped with glaze. It’s pure magic in every bite!
Why You’ll Love This?
Why should you make these pastries? Well, they’re not only delicious, but they also bring a certain elegance to your table.
Making them at home is an achievable challenge and provides a sense of accomplishment. The reactions from family and friends as they take their first bites? Priceless.
These pastries can be filled with whatever strikes your fancy. Want something fruity? Go for it. Prefer a creamy filling? You got it. The possibilities are endless.
Ingredients
Let’s get down to the essentials. Here’s what you need:
For the Dough
5½ cups plain all-purpose flour
1½ cups whole milk, warmed
2 large eggs
2 cups unsalted butter, softened and divided
½ cup fine granulated sugar
4½ teaspoons rapid-rise yeast
1½ teaspoons kosher salt
1 teaspoon lemon zest
2 teaspoons pure vanilla extract
For the Cheese Filling
1 large egg
8 ounces cream cheese, softened to room temperature
½ teaspoon almond extract
3 tablespoons granulated sugar
¼ teaspoon fine sea salt
For the Fruit Filling
1 cup fruit preserves, jam, or canned pie filling of choice
For the Egg Wash
1 tablespoon water
1 egg white
For the Glaze
2 tablespoons milk
1½ cups powdered sugar

Step-by-Step Directions
Making Danish pastries can feel like a labor of love, but it’s totally worth it. Follow these steps closely for best results.
Step 1: Prepare the Yeast Mixture
First, combine the warm milk and yeast in a bowl. Let it sit for about 5 minutes until it foams. This means your yeast is alive and ready to work its magic.
Step 2: Mix the Dough
In a large mixing bowl, combine your flour, sugar, salt, and lemon zest. Make a well in the center, and add the foamy yeast mixture and eggs. Mix until just combined.
Step 3: Add the Butter
Next, it’s time to slowly incorporate 1 cup of the softened butter into the dough. Do this by slicing it into small pieces and mixing it in until well incorporated.
Step 4: Knead the Dough
Turn the dough out onto a floured surface and knead for about 5 minutes. It should be smooth and elastic. Place it in a greased bowl, cover, and let rise in a warm place until doubled, about 1 hour.
Step 5: Roll It Out
Once the dough has risen, punch it down and roll it out into a large rectangle. Spread the remaining butter (1 cup) on two-thirds of the dough. Fold the unbuttered third over the middle, then fold the remaining third over that. You have just created a butter layer within the dough!
Step 6: Chill and Roll Again
Wrap the dough in plastic and refrigerate for 30 minutes. Repeat the rolling and folding process two more times, chilling in between. This creates those fabulous flaky layers.
Step 7: Prepare the Fillings
While the dough is chilling, mix the cheese filling ingredients in one bowl and set up your fruit preserves nearby. Choose your favorites—this is where the fun happens!
Step 8: Cut and Fill the Pastry
Roll out the chilled dough into a large rectangle, then cut it into squares. Place a dollop of cheese filling or fruit preserves in the center of each square.
Step 9: Shape the Pastries
Fold the corners of the squares over the filling, pinching to seal. You can leave them as triangles, or shape them into spirals—your choice!
Step 10: Second Rise and Egg Wash
Place the shaped pastries on a baking sheet lined with parchment paper. Cover and let them rise again for about 30 minutes.
Preheat your oven to 375°F. Mix the egg white and water for the egg wash, and brush it over the pastries.
Step 11: Bake
Bake for 15-20 minutes, or until they’re golden brown and puffed up. The smell will be irresistible!
Step 12: Glaze Them
Let the pastries cool slightly on a wire rack. Mix the glaze ingredients and drizzle over the warm pastries. Enjoy!
Tips for Making Danish Pastries
Here are some handy tips to make your pastry-making journey smoother:
- Chill the Dough: Keep your butter cold to achieve those flaky layers.
- Don’t Rush the Rises: Allow the dough to rise fully. This helps with lightness and texture.
- Experiment with Fillings: Mix and match! Try different jams or even chocolate for a fun twist.
- Be Gentle with the Dough: Handle it carefully to maintain the layers you’ve worked hard to create.
- Check Your Oven Temperature: Ovens can vary, so keep an eye on your pastries to avoid over-baking.
How Do You Store Danish Pastries?
To keep the freshness, store any leftovers in an airtight container at room temperature for up to three days. For long-term storage, consider freezing them. Wrap each one in plastic wrap and place them in a freezer bag.
They can last up to three months in the freezer. When you’re ready to enjoy them again, thaw in the fridge and reheat in the oven.
What Other Substitutes Can You Use in Danish Pastries?
If you’re missing some ingredients or looking to switch things up, these substitutes can come in handy:
- Greek Yogurt Instead of Cream Cheese: Cream cheese provides richness, but Greek yogurt can give a tangy flavor while keeping it creamy.
- Almond Milk for Whole Milk: If you’re lactose intolerant, almond milk works just as well with the dough.
- Honey Instead of Sugar: A natural sweetener that adds depth to the flavor.
- Coconut Oil in Place of Butter: For a dairy-free option, use coconut oil, though it slightly alters the flavor.
- Store-Bought Puff Pastry: In a pinch, store-bought puff pastry can replace homemade dough to save time.

Conclusion
Danish pastries truly represent a delightful fusion of flavor, texture, and craftsmanship. From the layering of the dough to the sweet fillings, making these treats at home can be transformative.
The magic lies in not just the baking but the joy they bring to those who indulge in them. So roll up your sleeves, and enjoy the process!
With a little patience and creativity, you’ll not only impress yourself but everyone who gets to enjoy your creations. Happy baking!
You’ll also like the following recipes!


Danish Pastries – Simple Food Dishes
Description
Ah, Danish pastries! A quintessential treat that combines flaky goodness with sweet fillings and creamy textures. As a food enthusiast, I've spent years experimenting in the kitchen, and I can confidently say that mastering Danish pastries was one of my favorite culinary adventures.
They originate from Denmark and have a rich history intertwined with European baking traditions. Each bite is an experience, full of flavor and nostalgia.
If you’ve ever wondered how to make these delightful pastries at home, you're in for a treat. Trust me, the process is not as daunting as it might seem.
I've documented every detail so you can have your own successful pastry-making adventure at home.
Ingredients
For the Dough
For the Cheese Filling
For the Fruit Filling
For the Egg Wash
For the Glaze
Instructions
Step 1: Prepare the Yeast Mixture
-
First, combine the warm milk and yeast in a bowl. Let it sit for about 5 minutes until it foams. This means your yeast is alive and ready to work its magic.
Step 2: Mix the Dough
-
In a large mixing bowl, combine your flour, sugar, salt, and lemon zest. Make a well in the center, and add the foamy yeast mixture and eggs. Mix until just combined.
Step 3: Add the Butter
-
Next, it's time to slowly incorporate 1 cup of the softened butter into the dough. Do this by slicing it into small pieces and mixing it in until well incorporated.
Step 4: Knead the Dough
-
Turn the dough out onto a floured surface and knead for about 5 minutes. It should be smooth and elastic. Place it in a greased bowl, cover, and let rise in a warm place until doubled, about 1 hour.
Step 5: Roll It Out
-
Once the dough has risen, punch it down and roll it out into a large rectangle. Spread the remaining butter (1 cup) on two-thirds of the dough. Fold the unbuttered third over the middle, then fold the remaining third over that. You have just created a butter layer within the dough!
Step 6: Chill and Roll Again
-
Wrap the dough in plastic and refrigerate for 30 minutes. Repeat the rolling and folding process two more times, chilling in between. This creates those fabulous flaky layers.
Step 7: Prepare the Fillings
-
While the dough is chilling, mix the cheese filling ingredients in one bowl and set up your fruit preserves nearby. Choose your favorites—this is where the fun happens!
Step 8: Cut and Fill the Pastry
-
Roll out the chilled dough into a large rectangle, then cut it into squares. Place a dollop of cheese filling or fruit preserves in the center of each square.
Step 9: Shape the Pastries
-
Fold the corners of the squares over the filling, pinching to seal. You can leave them as triangles, or shape them into spirals—your choice!
Step 10: Second Rise and Egg Wash
-
Place the shaped pastries on a baking sheet lined with parchment paper. Cover and let them rise again for about 30 minutes.
Preheat your oven to 375°F. Mix the egg white and water for the egg wash, and brush it over the pastries.
Step 11: Bake
-
Bake for 15-20 minutes, or until they’re golden brown and puffed up. The smell will be irresistible!
Step 12: Glaze Them
-
Let the pastries cool slightly on a wire rack. Mix the glaze ingredients and drizzle over the warm pastries. Enjoy!
Nutrition Facts
Servings 36
- Amount Per Serving
- Calories 229kcal
- % Daily Value *
- Total Fat 11.3g18%
- Saturated Fat 6.8g34%
- Cholesterol 44mg15%
- Sodium 184mg8%
- Total Carbohydrate 28g10%
- Dietary Fiber 1g4%
- Sugars 10g
- Protein 4g8%
* Percent Daily Values are based on a 2,000 calorie diet. Your daily value may be higher or lower depending on your calorie needs.
Note
- Chill the Dough: Keep your butter cold to achieve those flaky layers.
- Don’t Rush the Rises: Allow the dough to rise fully. This helps with lightness and texture.
- Experiment with Fillings: Mix and match! Try different jams or even chocolate for a fun twist.
- Be Gentle with the Dough: Handle it carefully to maintain the layers you’ve worked hard to create.
- Check Your Oven Temperature: Ovens can vary, so keep an eye on your pastries to avoid over-baking.