Before we dive into the sweet details of this recipe, let’s gather some ideas on what to enjoy with your No Bake Oreo Dessert. This indulgent treat pairs excellently with a simple cup of coffee or a rich hot chocolate.
The bitterness of the coffee beautifully balances the sweetness of the dessert. If you’re hosting a casual gathering, consider serving slices alongside fresh strawberries or raspberries for a pop of fruity freshness.
Ice cream is another delightful companion; a scoop of vanilla bean can melt perfectly atop this creamy layered dessert.

What Is No Bake Oreo Dessert?
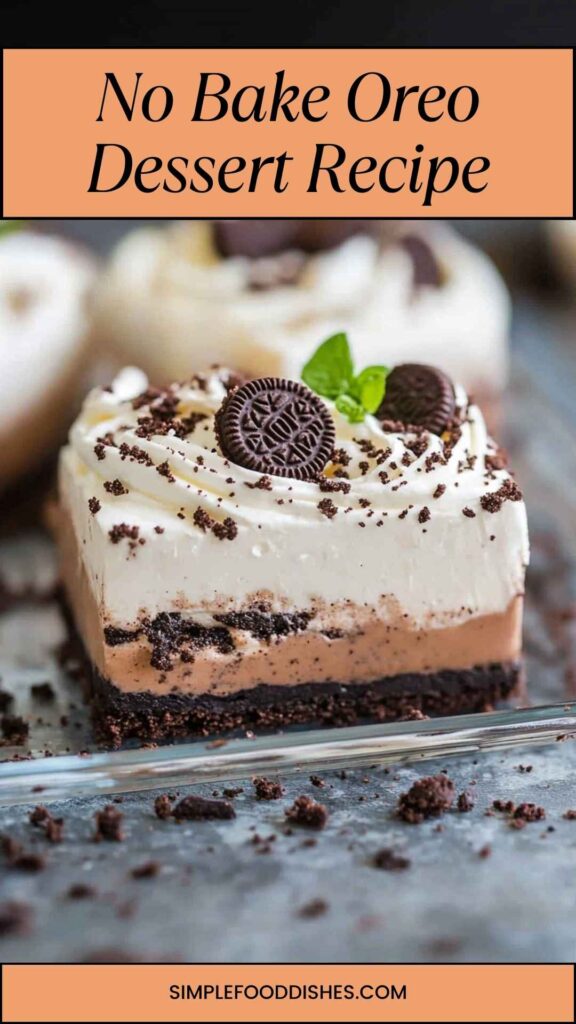
The No Bake Oreo Dessert is a delightful creation that layers crunch and creaminess—think of it as a cross between a cheesecake and an icebox cake.
Typically, it features a crushed Oreo cookie crust, a rich cream cheese layer, a luscious chocolate pudding layer, and a cloud-like topping. It’s assembled in only a few steps with minimal cooking required.
This dessert is great for someone like me who loves to indulge while keeping it hassle-free.
What Is the Flavor Profile of This Dish?
In terms of taste, this dessert is a robust blend of rich chocolate, smooth cream, and the signature sweetness of Oreos.
Each layer contributes something special: the cream cheese layer is rich and slightly tangy, thanks to the cream cheese, while the pudding layer adds an intensified chocolate flavor. The crunch of the Oreo crust rounds it all out.
Together, these flavors create a decadent experience that is creamy yet sturdy, rich yet balanced.
What Makes This Recipe Different From Other No Bake Oreo Desserts?
All No Bake Oreo Desserts are not created equal. What distinguishes my version is the addition of instant coffee powder in the pudding layer. This subtle addition elevates the chocolate flavor, bringing out depth that you might not expect.
Less common than the regular recipes, it highlights the chocolate notes beautifully, making each bite ever so satisfying. Plus, the use of Double Stuffed Oreos? Need I say more? The extra cream adds another layer of lusciousness!
Ingredients You’ll Need
To get rolling with this sweet treat, gather the following ingredients:
For the Cream Cheese Layer:
- 8 ounces of softened cream cheese
- 8-ounce tub of whipped topping
- 1 cup of powdered sugar
- 1 teaspoon of vanilla extract
For the Pudding Layer:
- 5 ounces of instant chocolate pudding mix
- 1 tablespoon of instant coffee powder
- 3 cups of cold milk
For the Crust:
- 15 ounces of Double Stuffed Oreo Cookies
- 1 tablespoon of brown sugar
- ½ cup of unsalted butter, melted and allowed to cool slightly
For the Topping:
- 8-ounce tub of whipped topping
- A pinch of sea salt

Step by Step Directions
Step 1: Create the Oreo Crust
To start, begin by crushing the Double Stuffed Oreo Cookies. You can use a food processor for a fine crumb, or place them in a zip-top bag and pound them with a rolling pin.
Once you have your lovely crumbs, mix them with brown sugar and melted butter until it looks like wet sand.
Press this mixture into the bottom of a 9×13 inch pan, making sure to pack it tightly. This crust will serve as the foundation for all that creamy goodness. Set it aside to firm up.
Step 2: Prepare the Cream Cheese Layer
In a mixing bowl, beat the softened cream cheese until it’s smooth. Add in the powdered sugar and vanilla extract, mixing until combined. Then, gently fold in the whipped topping until it’s fully incorporated and fluffy.
This mixture should be light and airy. Spread this cream cheese layer evenly on top of the crust, smoothing it out with a spatula. Now, we have our first delightful layer!
Step 3: Make the Chocolate Pudding Layer
In another bowl, combine the instant chocolate pudding mix and cold milk. Add the instant coffee powder as well.
Whisk this together until the pudding thickens—a glorious chocolatey mixture that can’t be resisted. Pour this layer over the cream cheese layer, smoothing it out carefully.
Step 4: Add the Topping
Finally, it’s time to top it off. Spread the remaining whipped topping across the chocolate pudding layer.
This will give your dessert its appealing, creamy look. For a finishing touch, sprinkle a pinch of sea salt atop the whipped topping to enhance the flavors and add a bit of flair.
Step 5: Chill and Serve
Cover the pan with plastic wrap and allow your dessert to chill in the refrigerator for at least 4 hours—or overnight if you can wait that long! This setting time allows the flavors to meld beautifully. When you’re ready to serve, cut it into squares and enjoy the delightful layers.
Tips On Making No Bake Oreo Dessert
Here are some essential tips for making this dessert even better:
- Use Fresh Ingredients: For the best flavor and texture, make sure your cream cheese is fresh and at room temperature. It makes blending much easier.
- Pudding Choice: Since we are going all out for flavor, consider using high-quality chocolate pudding mix for a richer taste.
- Chill Longer: If you can resist, chilling overnight will help the layers set nicely and flavors blend together more.
- Experiment with Toppings: Get creative! Try adding crushed Oreos on top or a drizzle of chocolate syrup for an extra wow factor.
- Portion Control: This dessert is rich! Consider serving smaller portions if you’re worried about a sugar overload.
How Can I Store This No Bake Oreo Dessert?
Proper storage is key. Cover your dessert tightly with plastic wrap or aluminum foil, and store it in the fridge. It should last about 3 to 5 days. The chilling time enhances the flavor, so feel free to make it ahead!
Substitutions for Ingredients
Sometimes your kitchen might not have all the necessary ingredients. Here are some substitutes you might find useful:
- Cream Cheese Substitute: Consider Greek Yogurt or Mascarpone cheese. They’ll provide similar texture with a slight tang.
- Whipped Topping Replacement: You can make your own by whipping heavy cream with a bit of sugar until it forms stiff peaks.
- Oreo Alternative: If you’re looking for a different flavor, Graham crackers or Chocolate wafer cookies can work well for the crust.
- Coffee Powder Alternative: If you don’t have instant coffee on hand, espresso powder or even a dash of vanilla extract can add a unique twist.

Conclusion
The No Bake Oreo Dessert is an unforgettable treat that combines simplicity with indulgence. Whether it’s a summer gathering or a cozy night at home, this dessert has you covered. Don’t let its ease fool you; it looks stunning and tastes divine.
Embrace the joy of dessert without the oven’s heat, and share this delightful recipe with anyone who loves a good sweet fix.
Remember, every layer tells a story—one that started from a simple idea of mixing cookies, cream, and a bit of love. Trust me, this will become a go-to recipe in your household. Enjoy!
You’ll also like the following recipes!
- Easy Buffalo Chicken Dip Copycat Recipe
- How to Make Classic Burger Sauce
- Best Simple Chipotle Chicken Recipe

No Bake Oreo Dessert Recipe – Simple Food Dishes
Description
Ah, the No Bake Oreo Dessert! It’s like a hug in a pan. Every time I make it, a wave of nostalgia sweeps over me, as memories of delightful summer evenings with friends come flooding back.
It's creamy, crunchy, and utterly satisfying—all without needing to turn on the oven. This dessert contributes to my mission of bringing joy to the kitchen without the fuss.
Every bite transports you back to childhood, where cookies and cream reigned supreme. The best part? It’s incredibly simple to whip up, making it a fantastic option for gatherings or cozy nights in. So, without further ado, let’s unpack this delicious dessert.
Ingredients
For the Cream Cheese Layer:
For the Pudding Layer:
For the Crust:
For the Topping:
Instructions
Step 1: Create the Oreo Crust
-
To start, begin by crushing the Double Stuffed Oreo Cookies. You can use a food processor for a fine crumb, or place them in a zip-top bag and pound them with a rolling pin.
Once you have your lovely crumbs, mix them with brown sugar and melted butter until it looks like wet sand.
Press this mixture into the bottom of a 9x13 inch pan, making sure to pack it tightly. This crust will serve as the foundation for all that creamy goodness. Set it aside to firm up.
Step 2: Prepare the Cream Cheese Layer
-
In a mixing bowl, beat the softened cream cheese until it's smooth. Add in the powdered sugar and vanilla extract, mixing until combined. Then, gently fold in the whipped topping until it’s fully incorporated and fluffy.
This mixture should be light and airy. Spread this cream cheese layer evenly on top of the crust, smoothing it out with a spatula. Now, we have our first delightful layer!
Step 3: Make the Chocolate Pudding Layer
-
In another bowl, combine the instant chocolate pudding mix and cold milk. Add the instant coffee powder as well.
Whisk this together until the pudding thickens—a glorious chocolatey mixture that can't be resisted. Pour this layer over the cream cheese layer, smoothing it out carefully.
Step 4: Add the Topping
-
Finally, it’s time to top it off. Spread the remaining whipped topping across the chocolate pudding layer.
This will give your dessert its appealing, creamy look. For a finishing touch, sprinkle a pinch of sea salt atop the whipped topping to enhance the flavors and add a bit of flair.
Step 5: Chill and Serve
-
Cover the pan with plastic wrap and allow your dessert to chill in the refrigerator for at least 4 hours—or overnight if you can wait that long! This setting time allows the flavors to meld beautifully. When you're ready to serve, cut it into squares and enjoy the delightful layers.
Nutrition Facts
Servings 12
- Amount Per Serving
- Calories 482kcal
- % Daily Value *
- Total Fat 26.4g41%
- Saturated Fat 14g70%
- Cholesterol 34mg12%
- Sodium 473mg20%
- Total Carbohydrate 56g19%
- Dietary Fiber 1g4%
- Sugars 46g
- Protein 7g15%
* Percent Daily Values are based on a 2,000 calorie diet. Your daily value may be higher or lower depending on your calorie needs.
Note
- Use Fresh Ingredients: For the best flavor and texture, make sure your cream cheese is fresh and at room temperature. It makes blending much easier.
- Pudding Choice: Since we are going all out for flavor, consider using high-quality chocolate pudding mix for a richer taste.
- Chill Longer: If you can resist, chilling overnight will help the layers set nicely and flavors blend together more.
- Experiment with Toppings: Get creative! Try adding crushed Oreos on top or a drizzle of chocolate syrup for an extra wow factor.
- Portion Control: This dessert is rich! Consider serving smaller portions if you’re worried about a sugar overload.