Before diving into the soft and fluffy white bread recipe, let’s talk about how you can elevate your bread experience. This bread is a blank canvas. You can pair it with anything from sandwiches to hearty soups or breakfast spreads.
Imagine slathering a thick layer of butter on a warm slice or stuffing it with your favorite deli meats and fresh veggies for lunch. You could toast it for a creamy avocado spread or craft a classic PB&J.
Alternatively, serve it alongside a bowl of steaming tomato soup or chicken noodle soup for the ultimate comfort food pairing.

What is Soft and Fluffy White Bread?
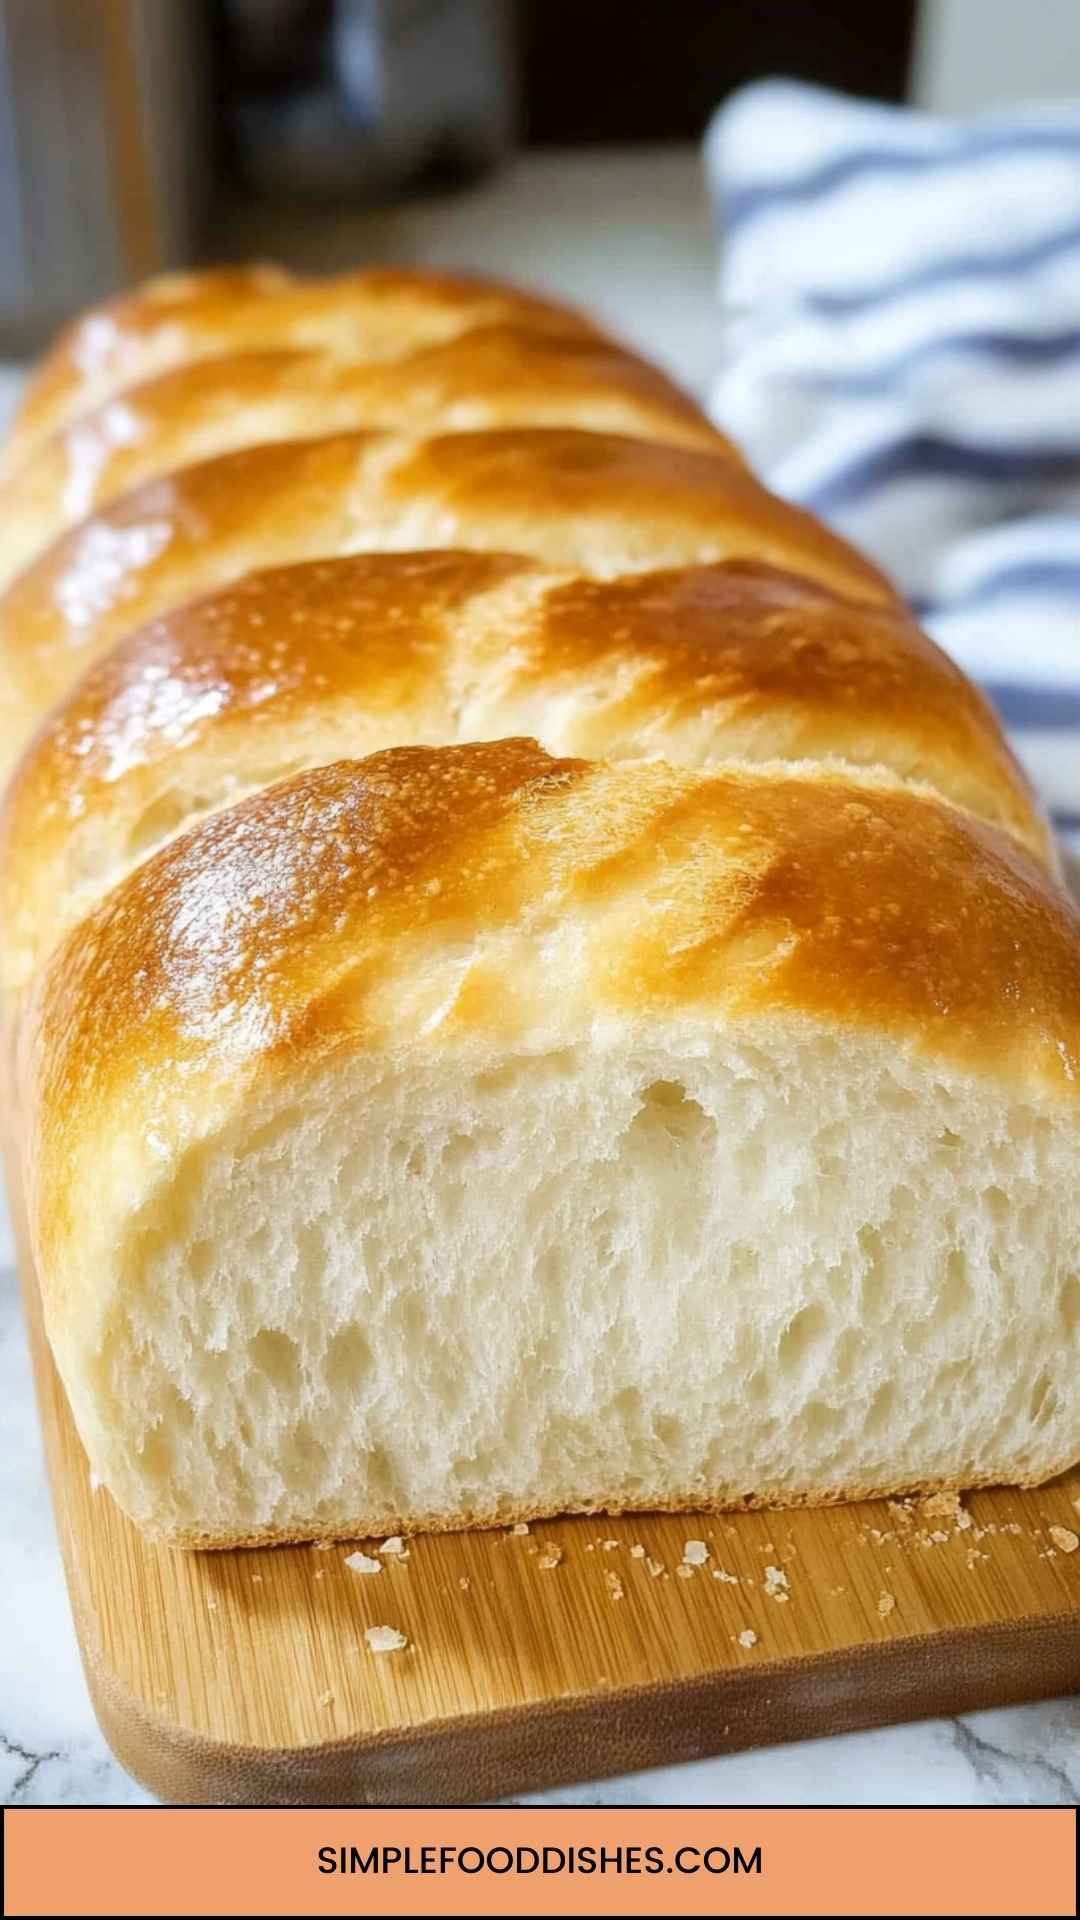
Soft and fluffy white bread is just that—light, airy, and slightly chewy with a tender crumb. It appears golden on the outside, with a delicate crust that just begs to be broken. The color comes from all-purpose flour, yeast, and a few other simple ingredients.
This bread is versatile enough for toast, sandwiches, or even French toast, adding a comforting element to any meal.
Here’s a fun fact: the texture comes from kneading and the fermentation process which allows the gluten to develop fully.
This is why homemade bread often has that distinct softness and flavor that you just can’t find in store-bought loaves. Making bread at home is surprisingly rewarding, and once you try it, you might never want to buy store-bought again.
Why This Recipe Works
Why should you trust this recipe? Well, I’ve been baking bread for years and have perfected this soft and fluffy white bread recipe. Here’s what makes it tick:
1. Quality Ingredients Matter: The right ingredients set the foundation. By using all-purpose flour and instant yeast, we ensure that the bread rises well and has the ideal texture.
2. Temperature is Key: Warm water activates the yeast. It’s the magic ingredient that gets the dough rising. Not too hot and not too cold. Just warm enough to gently wake the yeast up from its slumber.
3. Kneading for Success: Kneading helps develop gluten, which creates that soft, chewy texture. This recipe emphasizes the importance of kneading just the right amount to avoid dense bread.
4. Patience Pays Off: Allowing the dough to rise twice is crucial for flavor and texture. Many beginner bakers rush this step, but trust me, it’s worth the wait. It makes all the difference in creating that soft and fluffy loaf we all crave.
Ingredients You’ll Need To Make This Dish
Here’s what you need for this baking adventure:
- 4 ½ cups all-purpose flour, divided
- 1 ⅔ cups warm water, separated
- 2 ¼ teaspoons instant or active dry yeast
- 1 teaspoon of granulated sugar
- 1 tablespoon of honey
- 1 teaspoon of sea salt
- 1 ½ tablespoons unsalted butter, cut into small cubes at room temperature
- 1 tablespoon olive oil
- 1 teaspoon garlic powder
- 1 ½ tablespoons melted butter, for glazing
How To Make This Soft and Fluffy White Bread?
Ready to roll up those sleeves and bake? Let’s break it down step by step.
Step 1: Activate the Yeast
Start by combining ⅔ cup of warm water (about 110°F or 43°C) with the sugar and yeast in a bowl. Allow this mixture to sit for about 5-10 minutes until it’s frothy and bubbly.
This indicates that your yeast is alive and kicking; skip this step, and you might be left with dense bricks.
Step 2: Gather Dry Ingredients
In a large mixing bowl, combine 4 cups of the all-purpose flour, sea salt, and garlic powder. Mix well. The garlic powder adds a hint of flavor, but feel free to skip it if you prefer pure white bread.
Step 3: Combine Wet and Dry Ingredients
Once your yeast is frothy, add it to the dry ingredients along with the remaining warm water, honey, butter, and olive oil. Mix until a shaggy dough forms. It should look messy but don’t fret!
Step 4: Knead the Dough
Transfer the dough to a lightly floured surface. Knead for about 8-10 minutes, adding flour as needed to keep it slightly sticky but manageable. You’re aiming for a smooth and elastic texture.
Step 5: First Rise
Place the dough in a greased bowl, cover it with a damp cloth, and let it rise in a warm place until it doubles in size—roughly 1 to 1.5 hours.
Step 6: Shape the Loaf
Once risen, gently punch the dough down to release the air. Transfer it back to your floured surface and shape it into a loaf. Place it into a greased 9×5-inch loaf pan.
Step 7: Second Rise
Cover the shaped loaf with a cloth again and let it rise for another 30-45 minutes, until it puffs up again.
Step 8: Bake
Preheat your oven to 375°F (190°C). Brush the top of the loaf with melted butter for that beautiful color. Bake for 30-35 minutes, or until it sounds hollow when tapped on the bottom. Don’t forget to smell the aroma filling your kitchen—it’s heavenly!
Step 9: Cool and Enjoy
Once baked, remove the loaf and let it cool on a wire rack. Trying to slice it while hot may result in a squished loaf, so be patient!
Tips & Tricks
Here are some expert tips to ensure your bread is a success:
- Check Your Yeast: Always check the expiration date on your yeast. Expired yeast may not rise.
- Don’t Rush the Rises: Allow the dough to rise fully for the best texture. Rushing it could lead to a dense loaf.
- Knead Smart: If your dough is too sticky, add a little flour but avoid over-kneading which can make your bread tough.
- Warm Environment: If your kitchen is chilly, turn on the oven to the lowest setting for a few minutes and then turn it off. Place the dough inside for a cozy rising spot.
- Brush with Cold Water: Alternatively, brushing the loaf with cold water before baking can create a lovely crust while it bakes.
How Do You Store The Leftovers?
Store your leftover soft and fluffy white bread in an airtight container or wrap it tightly in plastic wrap. It should last for about 3-5 days at room temperature. For longer storage, slice and freeze the loaf. This way, you can have fresh bread on hand anytime you want. Just thaw a slice, pop it in the toaster, and you’re good to go!
What Sides Would Complement Soft and Fluffy White Bread?
Certain sides truly elevate the experience of enjoying soft and fluffy bread.
1. Hearty Soups: A rich potato leek or creamy tomato basil soup complements the bread perfectly. The warmth of the soup invites you to dip that first slice in.
2. Fresh Salads: Pair this bread with a vibrant garden salad. The crunchy veggies contrast nicely with the soft texture of the bread.
3. Cheese Platters: Create a small cheese plate. Soft cheeses, like Brie or goat cheese, marry well with the bread, turning it into an elegant appetizer or snack.
What Alternatives Can You Use for the Ingredients if They Are Not Present in Your Kitchen?
Sometimes you may find yourself lacking some ingredients. Here’s how to improvise:
1. Flour Alternatives: Use bread flour for a chewier texture or whole wheat flour for a nuttier flavor. Adjust water quantity, as these flours may absorb more.
2. Honey Substitute: If you don’t have honey, maple syrup or agave nectar can replace it effectively.
3. Olive Oil Substitute: Canola or vegetable oil can be used in place of olive oil without compromising flavor significantly.
4. Butter Alternative: For a dairy-free option, use coconut oil or a plant-based margin to maintain that rich taste.

Conclusion
Crafting your own soft and fluffy white bread is not just a rewarding baking experience; it’s a journey back to comforting memories and a way to create new ones. Freshly baked bread can elevate any meal and bring warmth to your table.
With this recipe and your loving hands, you’ve got the power to make a loaf that your family will enjoy for days. Try this bread recipe, experiment with it, and watch it bring smiles and satisfaction.
So, are you ready to bring your kitchen to life with the smell of warm bread? Let’s get kneading!
You’ll also like the following recipes!
- Old Fashioned Bread And Butter Pickles Copycat Recipe
- How to Make Simple Dutch Apple Pie
- Best Easy Mini No Bake Key Lime Pie Recipe

Soft And Fluffy White Bread Recipe – Simple Food Dishes
Description
Soft and fluffy white bread has a way of bringing people together. Its comforting texture and subtle flavor make it a staple in many households. Growing up, the smell of freshly baked bread wafting through our kitchen became my food memory highlight.
There’s just something magical about slicing into a loaf and watching it spring back, waiting to be slathered with butter or transformed into a delectable sandwich.
This bread is not just food; it's an experience. It’s a simple pleasure that ties in family traditions, gatherings, and even quiet moments of solitude with a good book. There's nothing quite like a warm slice of white bread fresh from the oven, right?
Join me on this delightful journey into the world of soft and fluffy white bread, and let’s create a loaf that you can be proud of.
Ingredients
Instructions
Step 1: Activate the Yeast
-
Start by combining ⅔ cup of warm water (about 110°F or 43°C) with the sugar and yeast in a bowl. Allow this mixture to sit for about 5-10 minutes until it’s frothy and bubbly.
This indicates that your yeast is alive and kicking; skip this step, and you might be left with dense bricks.
Step 2: Gather Dry Ingredients
-
In a large mixing bowl, combine 4 cups of the all-purpose flour, sea salt, and garlic powder. Mix well. The garlic powder adds a hint of flavor, but feel free to skip it if you prefer pure white bread.
Step 3: Combine Wet and Dry Ingredients
-
Once your yeast is frothy, add it to the dry ingredients along with the remaining warm water, honey, butter, and olive oil. Mix until a shaggy dough forms. It should look messy but don’t fret!
Step 4: Knead the Dough
-
Transfer the dough to a lightly floured surface. Knead for about 8-10 minutes, adding flour as needed to keep it slightly sticky but manageable. You're aiming for a smooth and elastic texture.
Step 5: First Rise
-
Place the dough in a greased bowl, cover it with a damp cloth, and let it rise in a warm place until it doubles in size—roughly 1 to 1.5 hours.
Step 6: Shape the Loaf
-
Once risen, gently punch the dough down to release the air. Transfer it back to your floured surface and shape it into a loaf. Place it into a greased 9x5-inch loaf pan.
Step 7: Second Rise
-
Cover the shaped loaf with a cloth again and let it rise for another 30-45 minutes, until it puffs up again.
Step 8: Bake
-
Preheat your oven to 375°F (190°C). Brush the top of the loaf with melted butter for that beautiful color. Bake for 30-35 minutes, or until it sounds hollow when tapped on the bottom. Don't forget to smell the aroma filling your kitchen—it's heavenly!
Step 9: Cool and Enjoy
-
Once baked, remove the loaf and let it cool on a wire rack. Trying to slice it while hot may result in a squished loaf, so be patient!
Nutrition Facts
Servings 2
- Amount Per Serving
- Calories 1224kcal
- % Daily Value *
- Total Fat 19.8g31%
- Saturated Fat 11g56%
- Trans Fat 0.4g
- Cholesterol 40mg14%
- Sodium 1266mg53%
- Total Carbohydrate 226g76%
- Dietary Fiber 9g36%
- Sugars 11g
- Protein 31g62%
* Percent Daily Values are based on a 2,000 calorie diet. Your daily value may be higher or lower depending on your calorie needs.
Note
- Check Your Yeast: Always check the expiration date on your yeast. Expired yeast may not rise.
- Don’t Rush the Rises: Allow the dough to rise fully for the best texture. Rushing it could lead to a dense loaf.
- Knead Smart: If your dough is too sticky, add a little flour but avoid over-kneading which can make your bread tough.
- Warm Environment: If your kitchen is chilly, turn on the oven to the lowest setting for a few minutes and then turn it off. Place the dough inside for a cozy rising spot.
- Brush with Cold Water: Alternatively, brushing the loaf with cold water before baking can create a lovely crust while it bakes.


