
Chicken Breast With Gravy Recipe
This post contains affiliate links. As an Amazon Associate I earn from qualifying purchases.
You’ve probably tried the oven method, the slow cooker version, and that dry pan-seared chicken that left you disappointed. Here’s why THIS stovetop approach wins: it creates silky, restaurant-quality gravy in the SAME pan while keeping your chicken impossibly moist and golden. I discovered this technique years ago while experimenting in my tiny NYC kitchen, and it’s become my go-to when I need something elegant but effortless. The beauty? It delivers professional results without the fuss of juggling multiple pans or waiting hours for something to cook through.
Chicken Breast With Gravy Recipe: Which Method Actually Works Best?
I’ve tested literally every approach to cooking chicken with gravy—roasted in the oven, slow-cooked for hours, poached in broth, even sous vide (yes, really). As a registered dietitian in New York City, I’ve seen how different cooking methods affect nutrient retention and texture, and I’ve personally tested them all to find what actually delivers the best results for busy people like us.
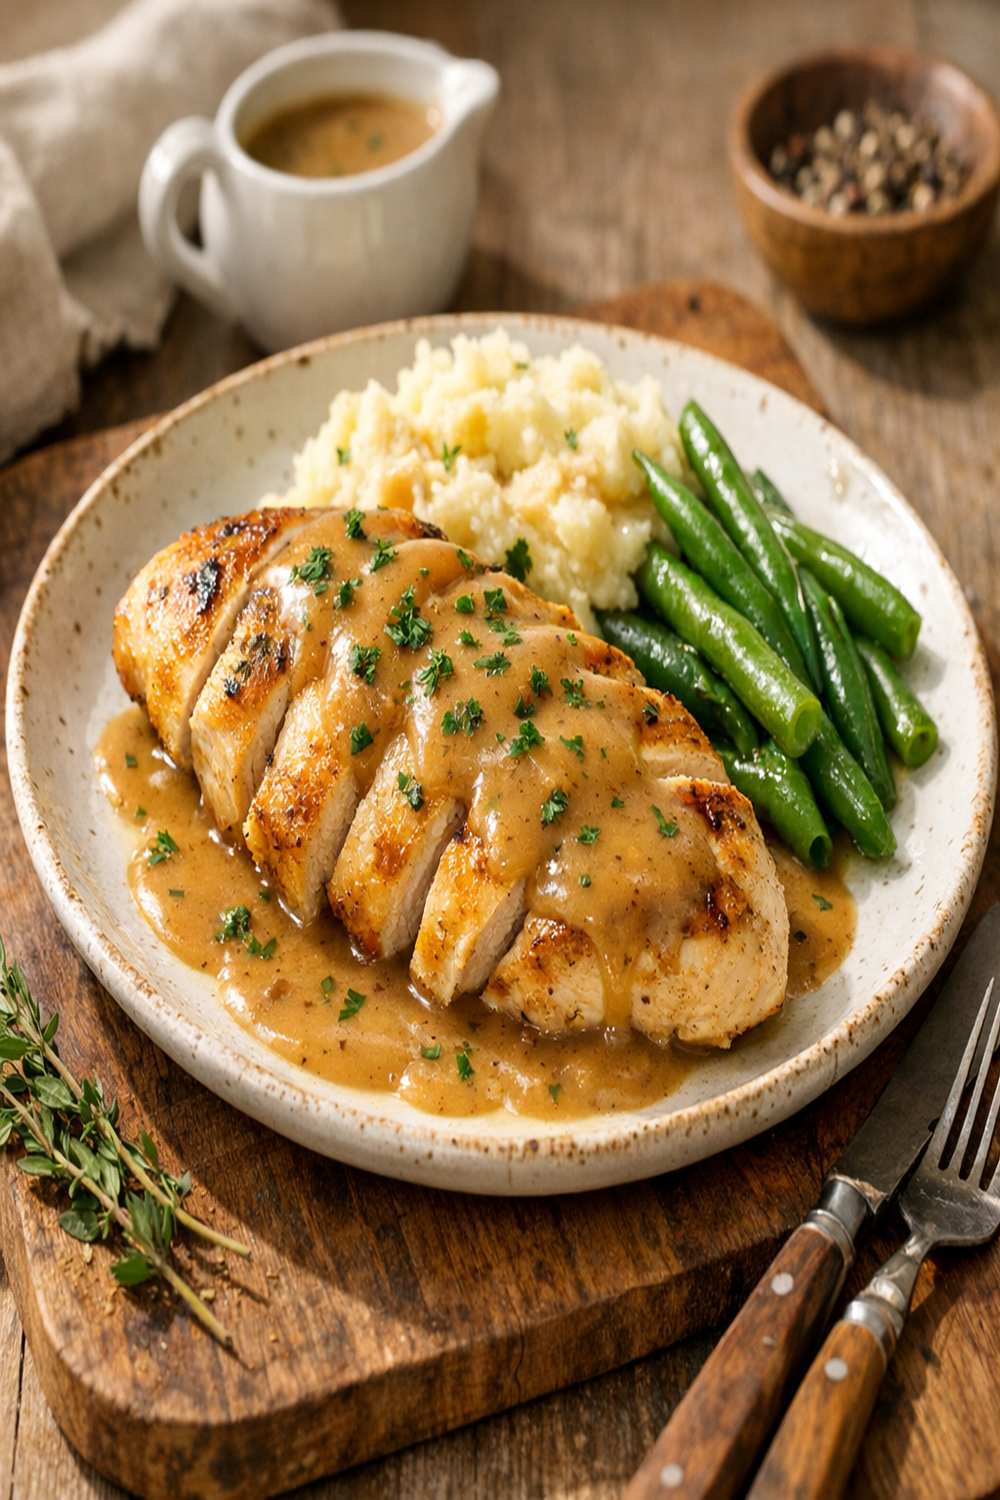
The Methods Compared: A Honest Breakdown
Let me give you the REAL comparison here, not the Instagram version. I’m breaking down the three most common approaches so you can decide what works for YOUR life.
- Oven Roasting Method – You get beautiful browning and hands-off cooking time, which sounds amazing. BUT here’s the problem: your chicken often cooks faster than the gravy thickens, leaving you with separated, watery sauce. Plus, you’re dirtying a baking sheet and stovetop pan. Cleanup is annoying, and the whole process takes 35-40 minutes including prep.
- Slow Cooker Method – Total time investment is huge (6-8 hours), and the chicken texture becomes soft and stringy rather than tender with a slight bite. The gravy ends up thin and weak-tasting because all those flavors get diluted in liquid. I reserve this for meal prep, honestly—not for dinner night when you want something GOOD.
- Skillet Sear + Pan Gravy Method (This Recipe) – You’re searing chicken in butter and oil for a golden crust (that’s where flavor lives), then building silky gravy right there in the hot pan while the chicken finishes cooking. Everything happens in ONE skillet in under 30 minutes. The chicken stays moist because it’s never left alone, and the gravy is thick, flavorful, and ready when the chicken is done. Single pan cleanup? YES PLEASE.
Why This Version Beats the Rest
Here’s what separates this approach from everything else: the emulsion technique. When you melt butter and whisk flour into it (that’s your roux), you’re creating a thickening base that actually bonds with the broth instead of clumping or separating. I’ve watched too many people pour cold broth into hot flour and end up with lumpy, broken gravy. THIS method changes everything.
The sensory experience is completely different too. You get chicken with a caramelized, golden exterior that’s tender and juicy inside—not rubbery, not dry. The gravy clings to every bite with a velvety texture. It tastes like something you’d order at a restaurant, but you made it in 28 minutes while still having time to pour a drink and set the table.
From a nutritional standpoint, this method preserves more B vitamins and minerals in the chicken because you’re cooking at a moderate temperature and not exposing the meat to prolonged high heat. The cooking time is SHORT, which means nutrient degradation is minimized.
The Ingredients
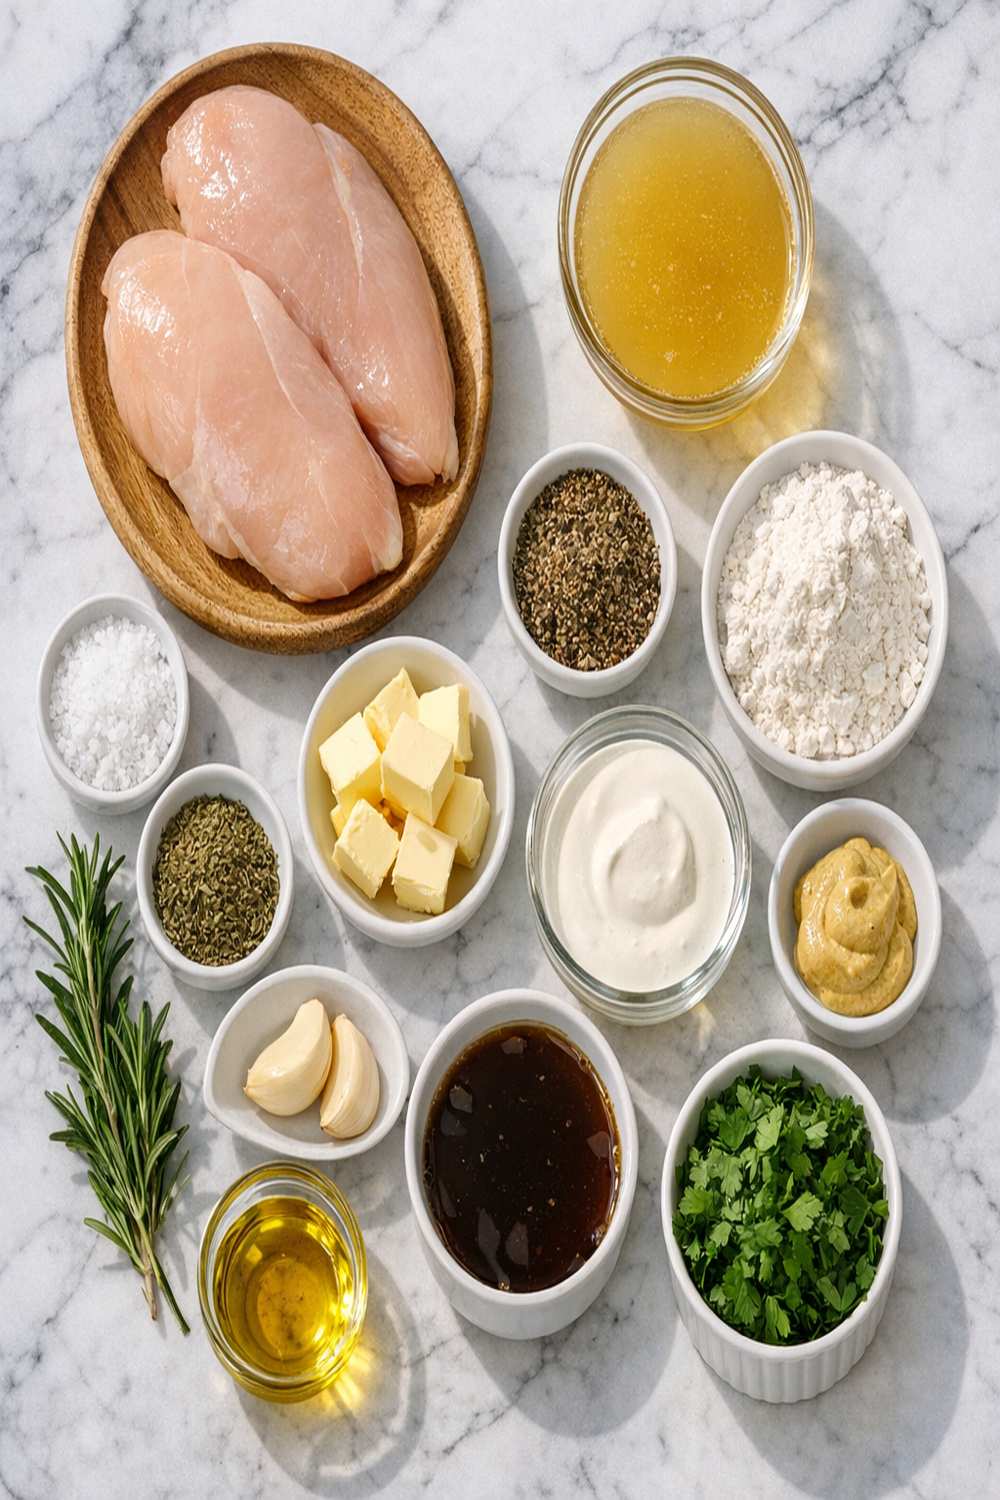
The ingredient list here is deliberately simple, but each one does heavy lifting. I’ve removed unnecessary additions (cream is NOT required here—the roux creates richness on its own) and kept flavor-building seasonings that actually MATTER. Here’s what you’re working with:
- 2 large boneless, skinless chicken breasts (about 8 ounces each, the foundation of everything)
- ¼ teaspoon onion powder (deepens savory notes without added moisture)
- 3 tablespoons unsalted butter (divided—1 tablespoon for the initial sear, 2 tablespoons for the gravy roux)
- Salt and freshly ground black pepper (to taste, essential for bringing out natural chicken flavor)
- 2 tablespoons all-purpose flour (unbleached if possible, for the roux base)
- ¼ teaspoon dried Italian seasoning (oregano and basil balanced together)
- 1 tablespoon extra-virgin olive oil (pairs with butter for better searing and higher smoke point)
- 1¼ cups low-sodium chicken broth (homemade is ideal, but quality store-bought works fine)
- ½ teaspoon garlic powder (more reliable than fresh garlic for even distribution)
- 1 tablespoon fresh flat-leaf parsley (optional but transforms the final presentation)
Serves: 2 as a main course, or 4 with adequate sides
How to Make the Best Version of Chicken Breast With Gravy Recipe
I’m walking you through each step like I’m standing right there in your kitchen. These aren’t just instructions—they’re the REASONS why this method creates magic.
Step 1: Butterfly and Season Your Chicken Strategically
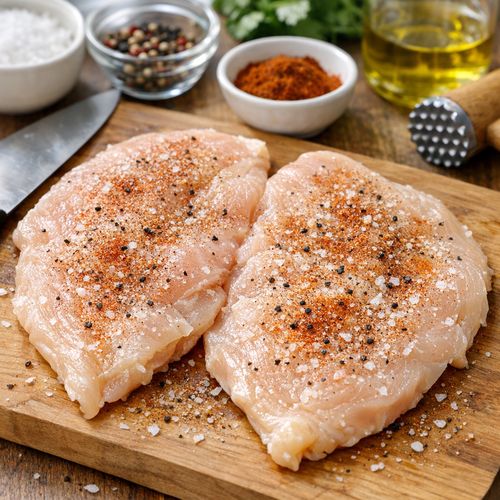
Here’s where most people mess up: they either cook thick, uneven breasts that are raw in the middle and overdone on the edges, OR they pound them until they’re paper-thin and dry out instantly. Instead, place each chicken breast on a cutting board and carefully slice lengthwise, creating two thinner cutlets from each breast. You now have four pieces instead of two, and they’re approximately ½-inch thick—the PERFECT thickness for this method.
Critical detail: Use a sharp knife and let gravity do the work. Don’t hack at it like you’re angry at the chicken. This keeps the meat’s structure intact.
Now season generously on both sides with salt, pepper, and the garlic powder. Don’t be shy—proper seasoning at this stage means flavorful chicken throughout.
Step 2: Heat Your Pan Correctly
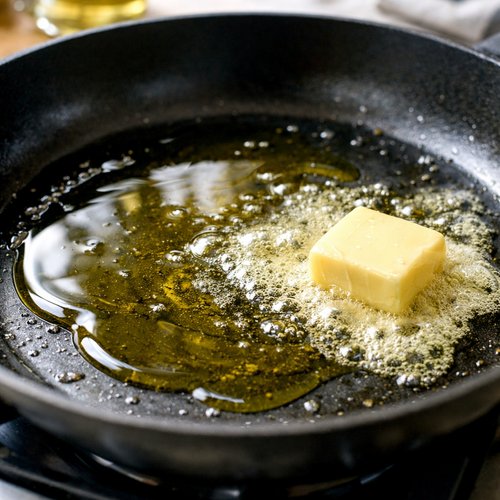
This is CRUCIAL and where patience pays off. Add both the olive oil and 1 tablespoon of butter to your skillet over medium-high heat. Let it heat for 2-3 minutes—you want the butter foaming and the oil shimmering, not smoking. If you skip this step and throw cold chicken into a lukewarm pan, you’ll get steamed chicken instead of seared chicken. Big difference.
Temperature check: A drop of water should sizzle and evaporate immediately, not sit there like a sad puddle.
Step 3: Sear for the Golden Crust
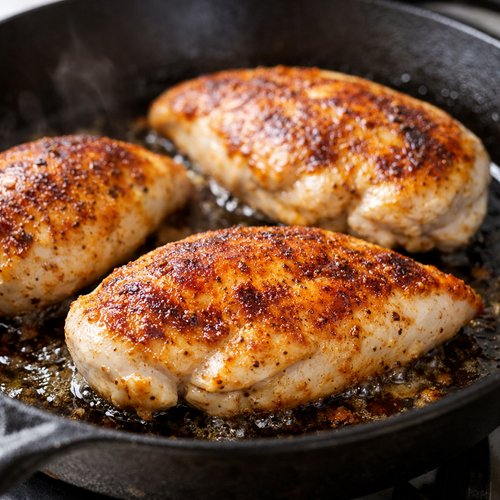
Place each chicken piece in the hot pan without moving it. Let it sit untouched for 4-5 minutes. This is where browning happens—the Maillard reaction creates those deep, savory flavors that make your mouth water. You’ll see the edges turn golden and the meat will release naturally from the pan when it’s ready.
Flip once, and sear the other side for another 4-5 minutes until the second side is golden. The chicken isn’t fully cooked yet—it’s around 145-150°F internally. That’s OKAY. Transfer to a clean plate and set aside.
Do NOT skip this searing step. This is literally the difference between restaurant-quality chicken and sad, pale poached chicken.
Step 4: Build Your Roux Base
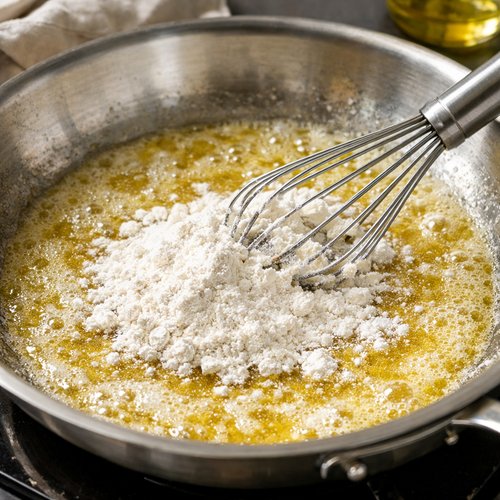
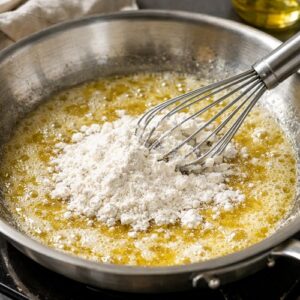
Reduce the heat to medium. Add the remaining 2 tablespoons of butter to the hot pan. Once it melts (about 30 seconds), immediately add the flour, whisking constantly for about 1 minute. You’re looking for a smooth, paste-like consistency. This is your roux—the foundation of silky, lump-free gravy.
Temperature matters here: If your heat is too high, you’ll get a grainy, broken roux. Too low, and it won’t cook through properly. Medium heat is the sweet spot.
Step 5: Create the Silky Gravy
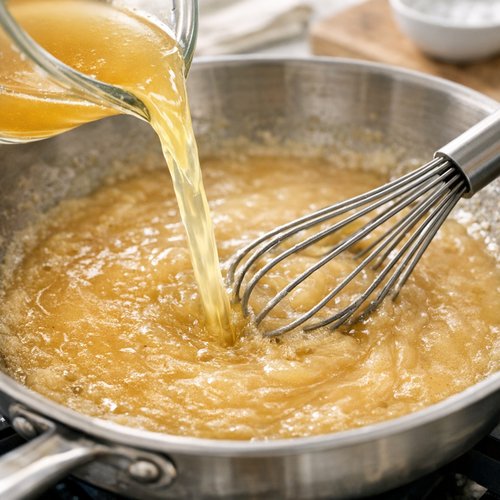
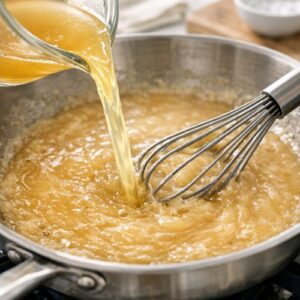
Here’s where the magic happens. Slowly pour the chicken broth into the roux while whisking constantly. I’m talking slow—give yourself a full minute to incorporate the liquid. This gradual incorporation prevents lumps from forming and creates an emulsion where the flour and broth bond seamlessly.
SAFETY WARNING: The pan is HOT and the liquid will steam. Keep your face and hands back, and always whisk away from your body.
Keep whisking until the gravy is completely smooth. You might see a few tiny lumps at first—don’t panic. Keep whisking for another 30 seconds and they’ll disappear. The mixture should look like thin pancake batter.
Step 6: Season the Gravy
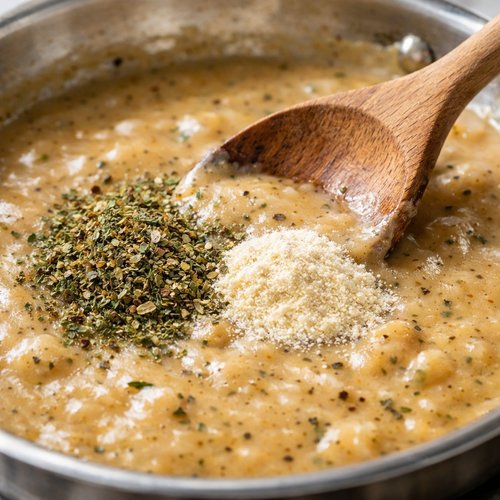
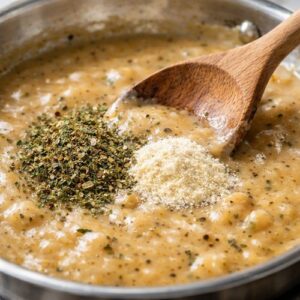
Stir in the Italian seasoning and onion powder. These dried herbs bloom in the heat and distribute evenly—way better than fresh herbs here because they won’t break down and create weird texture issues. Let this bubble gently for about 1 minute so the flavors develop.
Step 7: Cook Chicken Through While Building Sauce Consistency
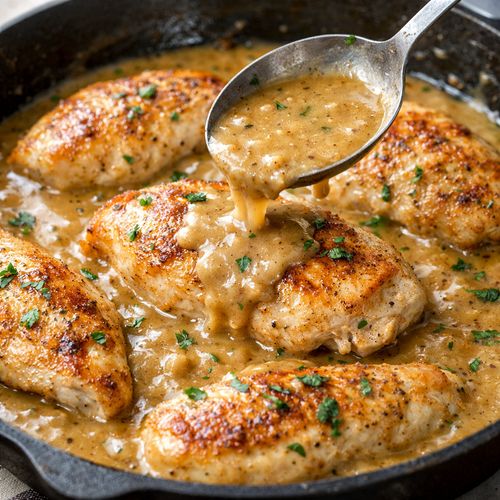
Place the seared chicken (and ANY juices that collected on the plate—don’t waste that flavor!) back into the skillet with the gravy. You want gentle movement here—medium to medium-low heat with the sauce just barely bubbling at the edges. NOT a rolling boil.
Cook for another 4-5 minutes, turning the chicken pieces once halfway through, until they reach 165°F internally (use an instant-read thermometer—no guessing). The gravy will thicken as it simmers and coats the chicken beautifully.
CRITICAL SAFETY NOTE: Chicken MUST reach 165°F to be safe. There are no exceptions or shortcuts here. Undercooked chicken carries serious foodborne illness risk. Check the thickest part of each piece.
If the gravy thickens before the chicken is cooked through, reduce the heat further. If the chicken is cooked but the gravy is still thin, turn up the heat slightly for a minute or two to concentrate it—but watch carefully so it doesn’t over-reduce.
Step 8: Finish and Serve Immediately
Taste your gravy and adjust seasoning with salt and pepper as needed. Top with fresh parsley if you have it—the brightness cuts through the richness and makes this look like something from a cookbook. Serve immediately while everything is hot and the chicken is at peak tenderness.
Side-by-Side Results: What to Expect
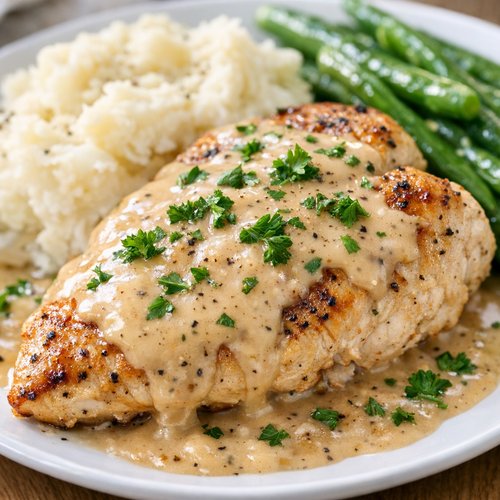
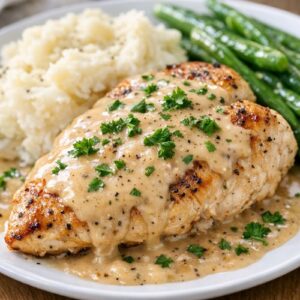
Here’s exactly what you’ll see when you finish this recipe versus other methods: Your chicken will have a caramelized, mahogany-brown exterior with a tender, juicy interior that’s pale pink/white at the center—that’s properly cooked poultry. It should have a slight resistance when you cut it, not mushy, not tough. That’s the sweet spot.
The gravy will be silky, medium-brown, and glossy—it’ll cling to the back of a spoon and coat your chicken without pooling excessively on the plate. When you taste it, you’ll get deep savory notes from the seared chicken fond mixed with buttery richness and herbal undertones. NOT thin and watery like slow-cooker versions. NOT separated with grease on top like some oven methods.
Oven-roasted chicken with gravy often leaves you with beautiful chicken BUT thin, weak-tasting sauce because the pan drippings get diluted. Slow-cooker versions give you tender chicken but the long, moist cooking creates a softer texture that’s less appealing. THIS method gives you both—optimal texture AND amazing gravy—in 30 minutes.
When to Use Each Method
- Tuesday night when you have 30 minutes max – Use THIS method (skillet sear + pan gravy). You’ll have dinner on the table in time for an actual evening rather than eating at 8 PM.
- Sunday afternoon when you’re meal prepping for the week – Slow cooker wins here because you set it and forget it for 6 hours while you handle other tasks. The less-than-ideal texture doesn’t matter as much when you’re shredding it for lunches anyway.
- When you’re feeding a crowd (6+ people) and need to scale up easily – Oven roasting becomes more practical because you can cook multiple breasts at once. Your skillet has size limits, but a sheet pan doesn’t.
Can I Store Chicken Breast With Gravy Recipe?
YES, and it’s actually wonderful as leftovers because the gravy keeps the meat moist. Store in an airtight container in the refrigerator for up to 3 days. The gravy may thicken slightly as it cools because of the flour content—just whisk in a tablespoon of broth when reheating to loosen it up.
To reheat: Transfer to a skillet over medium heat, adding a splash of broth or water, and warm for 5-7 minutes until it reaches temperature. Alternatively, microwave in a covered bowl for 2-3 minutes, stirring halfway through.
DO NOT freeze this dish. The gravy separates when frozen and thawed, and the chicken texture suffers. Make it fresh when you can—it’s fast enough that freezing isn’t necessary.
Nutrition Information
Per serving (one chicken cutlet with gravy, based on 4 servings): approximately 285 calories, 31g protein, 12g fat (4g saturated), 5g carbohydrates, 0g fiber, and 650mg sodium. Based on USDA FoodData Central database for skinless chicken breast and standard butter/flour measurements.
The protein content here is EXCEPTIONAL—you’re getting nearly 60% of your daily needs in a single serving. The carbohydrates come entirely from the flour in the roux, which is minimal and provides structure rather than empty calories. This is a genuinely balanced, nutrient-dense meal that keeps you satisfied.
Expert’s Nutritional Tip: The combination of protein-rich chicken with fat from butter and oil creates optimal satiety. Your body processes this meal slowly, meaning stable blood sugar and sustained energy rather than the afternoon crash you’d get from high-carb alternatives. As a dietitian, I choose THIS when I need to stay focused through back-to-back client sessions.
What Can I Serve With Chicken Breast With Gravy Recipe?
The beauty of this dish is its versatility. The gravy is rich enough to elevate simple sides, and the chicken is flavorful enough to stand alone if needed. Here are my favorite pairings:
- Creamy mashed potatoes or cauliflower mash – Let that gravy do what it does best. The starch soaks up every drop of sauce. If you’re making mashed potatoes, reserve a cup of the potato cooking water to thin your gravy if needed.
- Roasted vegetables (asparagus, green beans, Brussels sprouts) – Roast at 425°F for 15-20 minutes while your chicken cooks. The vegetables’ natural sweetness balances the savory gravy perfectly.
- Simple egg noodles or pasta – Toss with butter and fresh parsley, then top with chicken and gravy. This is comfort-food perfection and uses minimal extra dishes.
- Steamed broccoli with lemon – Fresh, bright, and cuts through the richness of the gravy without competing for attention.
- Crusty bread or dinner rolls – For soaking up every last drop of sauce. I’m not even sorry about it.
Common Mistakes to Avoid
Mistake #1: Not letting the pan get hot enough before searing. You’ll get steamed chicken instead of seared chicken, missing all that delicious browning. The pan MUST be hot enough that butter foams immediately and water drops evaporate in under a second.
Mistake #2: Moving the chicken around in the pan while it’s searing. You’re disrupting the browning process and creating steam instead of crust. Place it down and LEAVE IT for 4-5 minutes. This is hard for anxious cooks, but trust the process.
Mistake #3: Whisking the broth in too quickly when creating the roux. This creates lumps, and once lumps form, they’re incredibly hard to dissolve. Go slowly—it takes one minute to pour in 1¼ cups of liquid while whisking. Your future self will thank you.
Mistake #4: Skipping the searing step and going straight to poaching in broth. I see this constantly when people want to “save time.” It doesn’t save time—you still end up with boring, pale, flavorless chicken. The searing takes 10 minutes total and creates 80% of your dish’s appeal.
Make-Ahead Guide
1-2 hours ahead: Butterfly your chicken and season it. Store in an airtight container in the refrigerator. This lets the seasoning penetrate the meat and gives you one fewer step when you’re actually cooking.
Morning of: Measure out your butter, flour, broth, and seasonings into separate small bowls. Store the broth in the fridge, keep herbs and spices at room temperature. This “mise en place” prep (a kitchen technique I learned from French culinary basics) means you’re literally just executing the recipe when dinner time hits—zero scrambling.
Not recommended: Don’t cook the chicken ahead and reheat it before finishing the gravy. The meat continues cooking as you build the sauce, creating that perfect junction of texture. Reheated chicken then simmered in gravy again becomes tough.
Seasonal Variations
Spring (April-May): Replace the Italian seasoning with ¼ teaspoon dried tarragon and add 2 tablespoons fresh lemon juice to the finished gravy. Top with fresh dill instead of parsley. The brightness matches spring’s energy.
Summer (June-August): Make this with fresh herbs—use 1 tablespoon fresh tarragon or basil in place of dried Italian seasoning, and ½ teaspoon fresh thyme. Add 3-4 sliced mushrooms to the pan while searing the chicken for earthy depth.
Fall (September-November): Add ¼ teaspoon dried sage and a pinch of nutmeg to your gravy. Use apple cider instead of a quarter of your chicken broth for subtle sweetness that pairs beautifully with roasted root vegetables.
Winter (December-February): Increase the garlic powder to ¾ teaspoon and add ¼ teaspoon black pepper for warmth and depth. A splash of cognac or white wine in the gravy (add it after the roux, let it simmer 1 minute to cook off alcohol) creates restaurant-level sophistication.

Chicken Breast With Gravy Recipe
Ingredients
Method
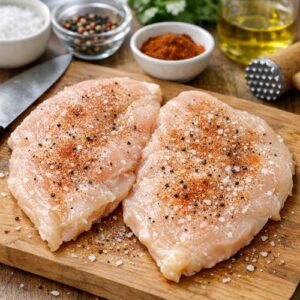
- Here's where most people mess up: they either cook thick, uneven breasts that are raw in the middle and overdone on the edges, OR they pound them until they're paper-thin and dry out instantly. Instead, place each chicken breast on a cutting board and carefully slice lengthwise, creating two thinner cutlets from each breast. You now have four pieces instead of two, and they're approximately ½-inch thick—the PERFECT thickness for this method. Critical detail: Use a sharp knife and let gravity do the work. Don't hack at it like you're angry at the chicken. This keeps the meat's structure intact. Now season generously on both sides with salt, pepper, and the garlic powder. Don't be shy—proper seasoning at this stage means flavorful chicken throughout.
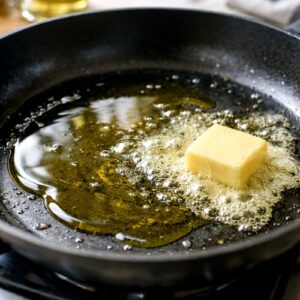
- This is CRUCIAL and where patience pays off. Add both the olive oil and 1 tablespoon of butter to your skillet over medium-high heat. Let it heat for 2-3 minutes—you want the butter foaming and the oil shimmering, not smoking. If you skip this step and throw cold chicken into a lukewarm pan, you'll get steamed chicken instead of seared chicken. Big difference. Temperature check: A drop of water should sizzle and evaporate immediately, not sit there like a sad puddle.
- Place each chicken piece in the hot pan without moving it. Let it sit untouched for 4-5 minutes. This is where browning happens—the Maillard reaction creates those deep, savory flavors that make your mouth water. You'll see the edges turn golden and the meat will release naturally from the pan when it's ready. Flip once, and sear the other side for another 4-5 minutes until the second side is golden. The chicken isn't fully cooked yet—it's around 145-150°F internally. That's OKAY. Transfer to a clean plate and set aside. Do NOT skip this searing step. This is literally the difference between restaurant-quality chicken and sad, pale poached chicken.

- Reduce the heat to medium. Add the remaining 2 tablespoons of butter to the hot pan. Once it melts (about 30 seconds), immediately add the flour, whisking constantly for about 1 minute. You're looking for a smooth, paste-like consistency. This is your roux—the foundation of silky, lump-free gravy. Temperature matters here: If your heat is too high, you'll get a grainy, broken roux. Too low, and it won't cook through properly. Medium heat is the sweet spot.
- Here's where the magic happens. Slowly pour the chicken broth into the roux while whisking constantly. I'm talking slow—give yourself a full minute to incorporate the liquid. This gradual incorporation prevents lumps from forming and creates an emulsion where the flour and broth bond seamlessly. SAFETY WARNING: The pan is HOT and the liquid will steam. Keep your face and hands back, and always whisk away from your body. Keep whisking until the gravy is completely smooth. You might see a few tiny lumps at first—don't panic. Keep whisking for another 30 seconds and they'll disappear. The mixture should look like thin pancake batter.
- Stir in the Italian seasoning and onion powder. These dried herbs bloom in the heat and distribute evenly—way better than fresh herbs here because they won't break down and create weird texture issues. Let this bubble gently for about 1 minute so the flavors develop.
- Place the seared chicken (and ANY juices that collected on the plate—don't waste that flavor!) back into the skillet with the gravy. You want gentle movement here—medium to medium-low heat with the sauce just barely bubbling at the edges. NOT a rolling boil. Cook for another 4-5 minutes, turning the chicken pieces once halfway through, until they reach 165°F internally (use an instant-read thermometer—no guessing). The gravy will thicken as it simmers and coats the chicken beautifully. CRITICAL SAFETY NOTE: Chicken MUST reach 165°F to be safe. There are no exceptions or shortcuts here. Undercooked chicken carries serious foodborne illness risk. Check the thickest part of each piece. If the gravy thickens before the chicken is cooked through, reduce the heat further. If the chicken is cooked but the gravy is still thin, turn up the heat slightly for a minute or two to concentrate it—but watch carefully so it doesn't over-reduce.

- Taste your gravy and adjust seasoning with salt and pepper as needed. Top with fresh parsley if you have it—the brightness cuts through the richness and makes this look like something from a cookbook. Serve immediately while everything is hot and the chicken is at peak tenderness.
FAQs
Can I use chicken thighs instead of breasts?
YES, and honestly thighs are MORE forgiving because they have higher fat content and stay moist longer. You’ll need to increase cooking time to 6-7 minutes per side because thighs are thicker. Make sure they reach 165°F internal temperature. The gravy-making process stays identical. Just note that thighs have darker meat, so your finished dish will look slightly different but taste BETTER in my opinion.
What if my gravy breaks or becomes lumpy?
This happens when temperature is too high or when liquid gets added too quickly. If you end up with lumps, pour the gravy through a fine-mesh strainer into a separate bowl. Return the strained gravy to the pan, discard the lumps, and finish cooking. Prevention is easier than fixing: whisk constantly and go slow when adding broth. Also, keep your heat at medium, not medium-high.
How do I know when the chicken is actually done?
Use an instant-read thermometer—place it into the thickest part of the cutlet without touching bone. It must read 165°F minimum. This is non-negotiable for food safety. Visual cues (no pink, juices running clear) are less reliable than a thermometer. I use one every single time without exception.
Can I make this ahead completely and just reheat?
You can store it for up to 3 days as mentioned, but I don’t recommend cooking it fully ahead and then reheating right before serving. The chicken will cook during the initial braising (steps 7-8), and reheating it again in the same gravy tends to make it slightly tough because it’s cooked twice. If you MUST do this, cool the chicken completely before storing and reheat very gently (low heat, 5-7 minutes) to minimize additional cooking.
What’s the difference between this method and using cream of chicken soup?
Cream of chicken soup is a shortcut, sure, but it’s processed, often high in sodium (400+ mg per can), and frankly tastes like “canned soup”—there’s no way around that flavor. When you make gravy from scratch with butter, flour, and quality broth, you’re creating something that’s genuinely better, lower in sodium, and contains zero weird additives. Plus, it takes the same amount of time since you’re not opening cans. I would never go back to the canned stuff.
More Recipes You’ll Love
- Boneless Skinless Chicken Strip Recipe – Crispy, flavorful strips that use the same searing technique for maximum browning.
- Best Chicken Gravy Recipe – If you want to explore gravy variations beyond this dish, this recipe explores depth and regional techniques.
- Bao Recipe Chicken – Soft, pillowy buns that are perfect for serving alongside this chicken if you want to get creative.
This chicken breast with gravy recipe isn’t just another weeknight dinner—it’s the method I reach for when I want impressive, restaurant-quality results without the intimidation factor. The combination of perfectly seared chicken with silky, flavorful gravy made in a single pan proves that elegant food doesn’t require complicated techniques or hours of your time. You’re just searing, building a simple roux, and letting heat and patience do the heavy lifting. That’s literally it. And the results? They speak for themselves every single time. Whether you’re cooking for yourself, a partner, or a small family, this approach delivers consistency and flavor that’ll make you feel like a confident cook. Let’s make cooking a breeze!
