
Chinese Pepper Beef Recipe
This post contains affiliate links. As an Amazon Associate I earn from qualifying purchases.
Listen, I get it—Sunday evenings used to stress me OUT. I’d stand in my tiny Manhattan kitchen wondering how I was going to eat well all week while juggling back-to-back client appointments and running around the city. Then I discovered that THIS Chinese pepper beef dish could literally transform my entire week. Make this once on Sunday and eat well all week with minimal effort. The beauty? It’s PACKED with lean protein, adapts to whatever sides you have on hand, and tastes even BETTER as leftovers. Whether you’re pairing it with Cantonese fried rice or serving it over noodles, this recipe is your secret weapon for staying on track nutritionally without spending hours cooking.
Chinese Pepper Beef Recipe Meal Prep: Cook Once, Eat All Week
I’ll never forget the moment I realized meal prep wasn’t about deprivation—it was about FREEDOM. I was working with a client who was constantly grabbing takeout from the place downstairs, spending $18 per meal, eating foods that didn’t align with her nutritional goals. One Sunday, I walked her through prepping this exact pepper beef recipe. She cooked it once, portioned it into five containers, and suddenly she had lunch AND dinner options ready to go.
By Wednesday, she texted me: “Lisa, I’ve saved like $50 and I actually know what’s in my food.” That’s when it clicked for me—meal prep isn’t tedious kitchen work. It’s STRATEGIC cooking. It’s taking control of your nutrition, your wallet, and your week all at once.
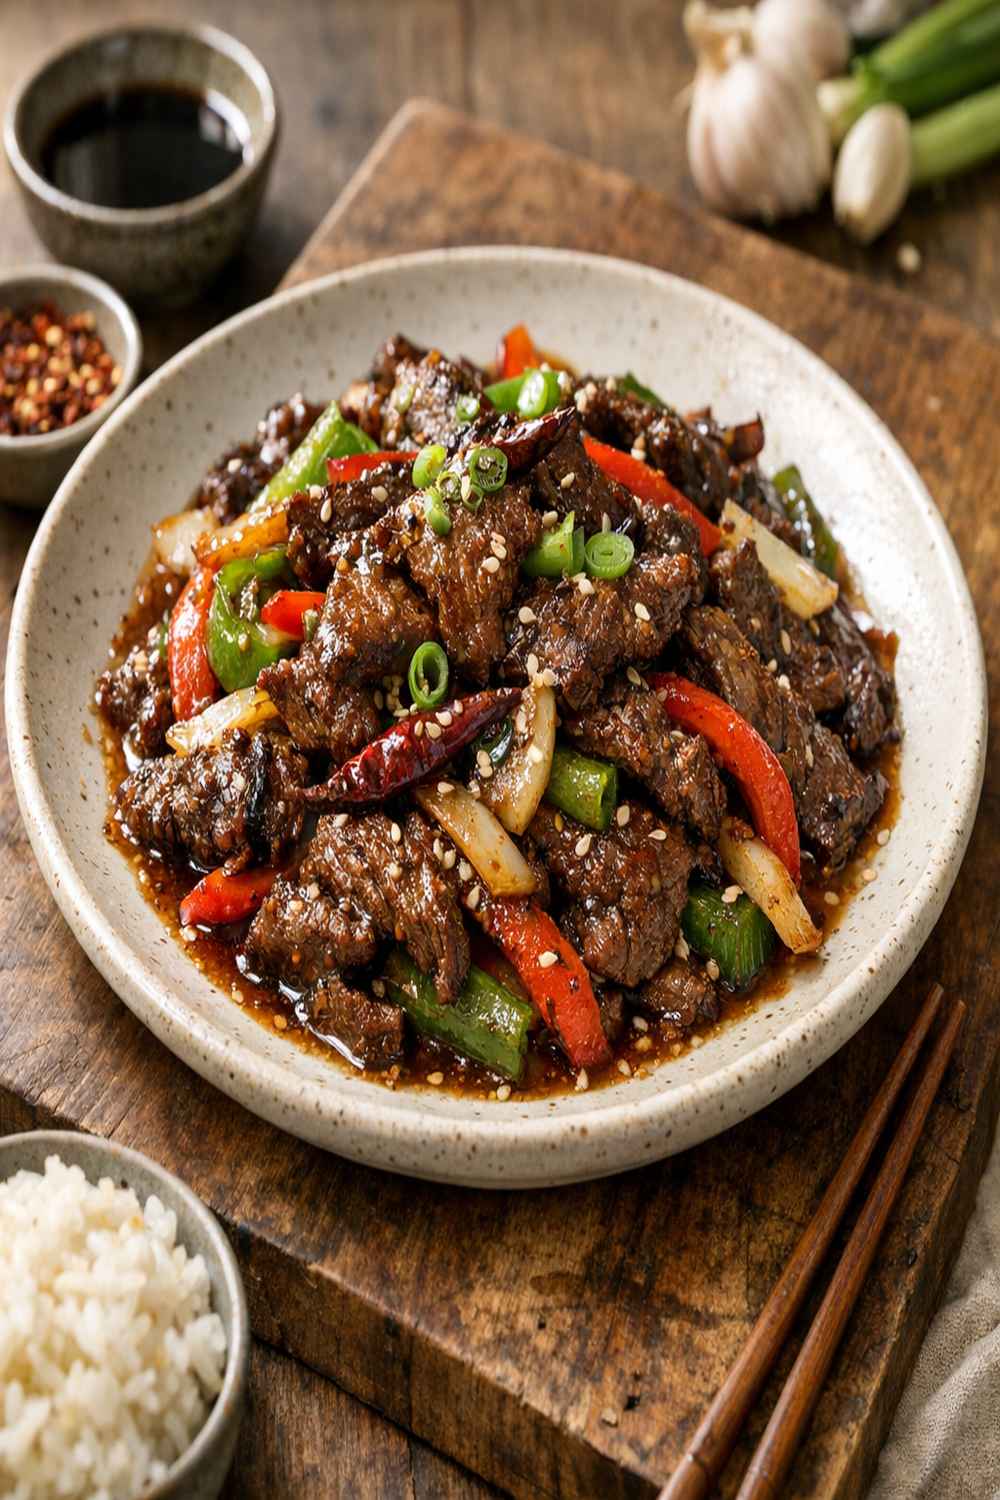
Why This Recipe Is Perfect for Meal Prep
- Saves 45-60 minutes across your entire week – Cook once on Sunday instead of standing at your stove Wednesday, Thursday, AND Friday nights. You get back TIME that you can actually enjoy.
- Stays fresh and delicious for 4-5 days – The sauce actually deepens in flavor as it sits, and the beef maintains its tender texture when stored properly. No mushy, sad leftovers here.
- Works with literally ANY side you have – Pair it with white rice, brown rice, quinoa, noodles, or even lettuce wraps. One recipe, infinite meal combinations means zero boredom throughout the week.
Your Weekly Meal Plan With This Recipe
Here’s exactly how I use one batch of this pepper beef across multiple meals throughout the week. This isn’t just “eat the same thing five times”—this is SMART rotating so your palate stays engaged and you actually look forward to eating what you’ve prepared.
- Monday Lunch: Classic Bowl – Serve over white rice with a side of steamed broccoli. The beef is still warm-adjacent from storage, and the peppery sauce coats everything perfectly.
- Tuesday Dinner: Noodle Night – Toss the pepper beef with lo mein noodles and a splash of the stored sauce. Add fresh green onions on top for crunch and a pop of color.
- Wednesday Lunch: Lettuce Wrap Station – Warm the beef, serve it in butter lettuce leaves, and let the sauce drip down your hands. It’s interactive, it’s FUN, and it changes the entire eating experience from Monday’s bowl.
- Thursday Dinner: Fried Rice Remix – Chop up the pepper beef and fold it into day-old rice with scrambled eggs, frozen peas, and soy sauce. You’ve created an entirely NEW meal from the same ingredient.
- Friday Lunch: Quick Wrap – Warm the remaining beef and wrap it in a whole wheat tortilla with bell peppers and a drizzle of hoisin. Quick, satisfying, and you’re already thinking about the weekend.
The Ingredients – Scaled for a Full Week
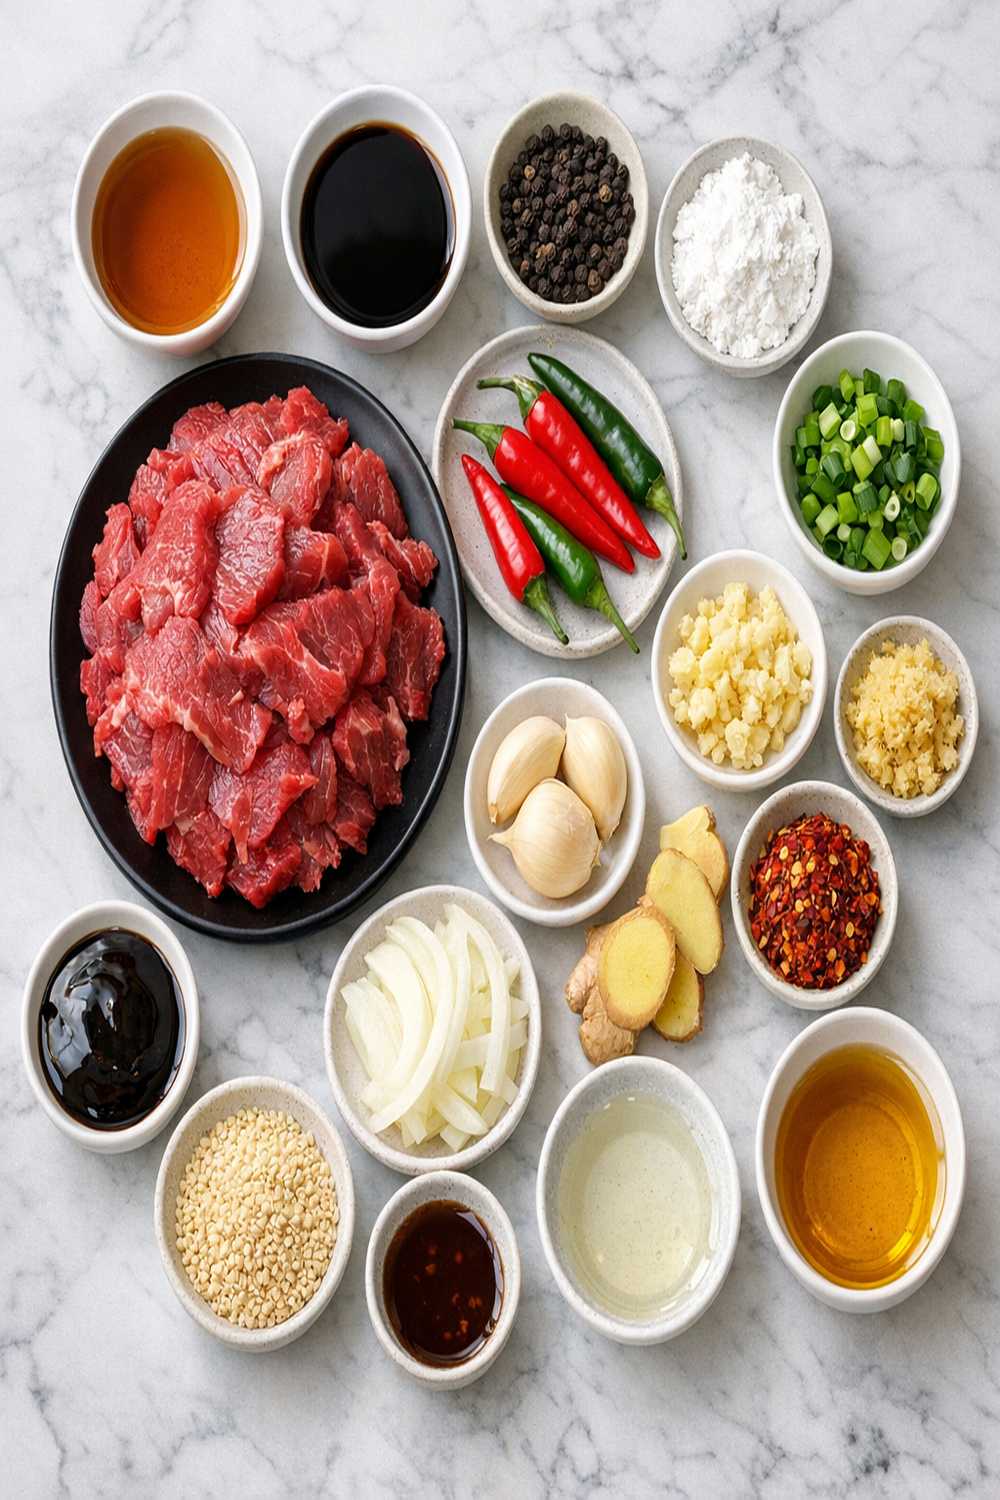
This ingredient list is scaled to create approximately 8 servings—enough for multiple meals throughout your week. I’ve included storage notes because knowing how each ingredient holds up over time is KEY to successful meal prep. Fresh ingredients behave differently when stored, and understanding that makes all the difference between “wow, this is still delicious” and “ugh, I’m throwing this out.”
- 3 tablespoons cracked black peppercorns (crack these FRESH right before cooking; pre-cracked peppercorns lose potency)
- 2.5 cups bell pepper (mix of red and green; the color holds better than you’d think when stored in airtight containers)
- 2.5 teaspoons potato starch (acts as a natural thickener AND keeps the beef from sticking; crucial for meal prep success)
- 2 tablespoons oyster sauce (opens a depth of umami that intensifies over days; store in the original bottle)
- 1.75 pounds beef tenderloin or sirloin steak (cut into ¾-inch cubes; keeps its texture beautifully for 5 days when stored properly in an airtight container)
- 2.5 teaspoons soy sauce (goes rancid-adjacent if left open; measure what you need and reseal immediately)
- 3.5 cups yellow onion (about 3-4 medium onions, cut into ½-inch squares; onions actually IMPROVE with a day or two of storage as their sweetness develops)
- 2 teaspoons white pepper (optional but HIGHLY recommended; adds another dimension without overwhelming heat)
- 2.5 teaspoons toasted sesame oil (HIGH-IMPACT flavor; a tiny amount creates richness without heaviness)
- 3 tablespoons Shaoxing wine (the alcohol cooks off, leaving complex flavor; a little goes a long way)
- 1 ounce garlic (about 6-7 large cloves, finely chopped; garlic flavor intensifies over 3-4 days, so consider adding fresh garlic on days 4-5 if you prefer milder flavor)
- 2.5 tablespoons vegetable oil (for cooking; use a neutral oil like canola or grapeseed)
The Meal Prep Process: How to Make Chinese Pepper Beef Recipe in Bulk
This isn’t just cooking instructions—this is a SYSTEM. When you’re meal prepping for a full week, efficiency matters. I’ve designed this process so you’re not jumping around your kitchen chaotically. Every step builds on the last one, and you’re never waiting around for something to finish before moving forward.
Step 1: Crack and Toast Your Peppercorns
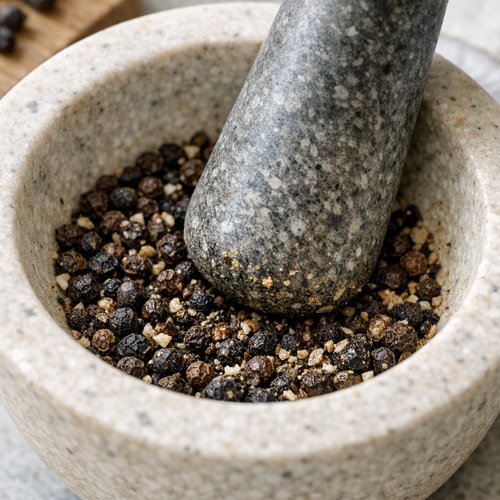
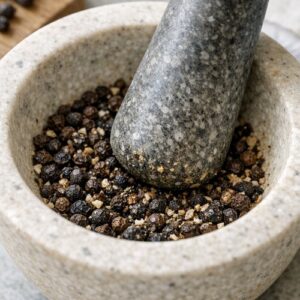
Place all 3 tablespoons of whole black peppercorns in a mortar and use steady pressure with your pestle to crack them coarsely. If you don’t have a mortar and pestle—which honestly, many New Yorkers don’t have space for—put the peppercorns in a heavy freezer bag and use a rolling pin or the bottom of a heavy pan to crush them. This takes about 2 minutes, and YES, it matters.
Here’s my insider tip: FRESH-CRACKED peppercorns are NON-NEGOTIABLE for this recipe. The volatile oils that give black pepper its bite and complexity dissipate rapidly once cracked. If you crack these the night before, you’ll lose 40% of their impact. Crack them RIGHT before you start cooking. Divide the cracked pepper into two portions—one for the marinade and one for garnishing at the end.
Step 2: Build Your Marinade and Start Beef Soaking
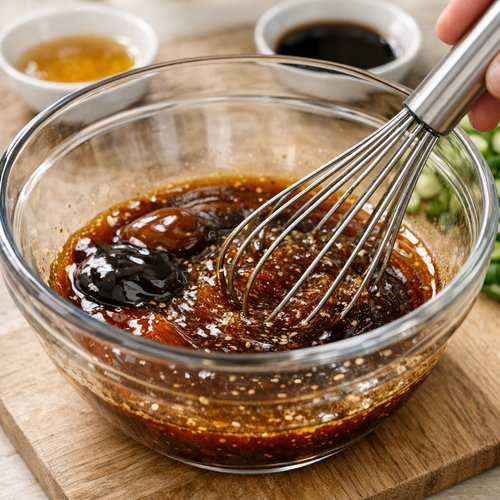
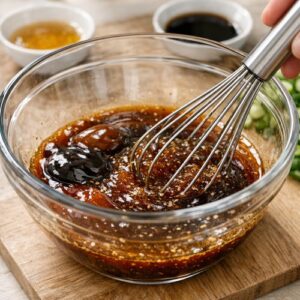
In a large mixing bowl, whisk together 2 tablespoons oyster sauce, 3 tablespoons Shaoxing wine, 2.5 teaspoons soy sauce, 2.5 teaspoons toasted sesame oil, and most of your cracked black pepper (save about ½ teaspoon for garnish). The mixture should smell INCREDIBLE—savory, deep, slightly sweet.
Add 2.5 teaspoons potato starch and whisk VIGOROUSLY until there are absolutely no lumps remaining. Potato starch clumps will create weird texture pockets in your beef, so take 30 seconds here to get it smooth. Now add your 1.75 pounds of cubed beef tenderloin and stir until every single piece is coated in the marinade.
While the beef marinates, start prepping your vegetables. Having everything chopped and ready to go is called “mise en place,” and it’s the DIFFERENCE between controlled, efficient cooking and chaos. Chop your onions into ½-inch squares, slice your bell peppers into similar-sized chunks, and mince your garlic. Store these in separate containers so you can ADD them quickly when the time comes.
Step 3: Heat Your Pan and Brown the Beef in Batches
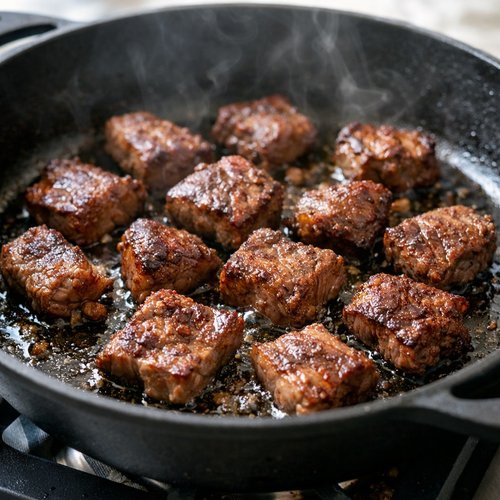
Here’s the reality of meal prep: you’re cooking larger quantities, which means your pan can only hold so much beef at once. DO NOT overcrowd your pan. Use a large skillet (12-inch is ideal) and heat it over medium-high heat until it’s genuinely HOT. You want to feel warmth radiating when you hold your hand 2 inches above the surface.
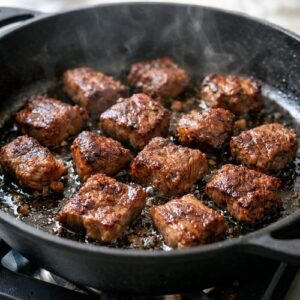
Add 2.5 tablespoons of vegetable oil and let it shimmer for about 45 seconds. Using tongs, add the beef in a SINGLE LAYER, leaving as much of the marinade in the bowl as possible. This is crucial—excess liquid on the meat creates steam instead of a proper sear.
Let the beef sit undisturbed for 2-3 minutes. RESIST the urge to move it around. You want those golden-brown caramelized edges, which come from contact and heat, not from constant stirring. Flip each piece and cook the second side for another 2-3 minutes until it’s browned.
The beef doesn’t need to be fully cooked through at this point—it’s going to finish cooking when you add the vegetables and sauce. Transfer the browned beef to a clean plate and repeat with any remaining beef. This process takes about 12-15 minutes total depending on how much beef you’re cooking.
Step 4: Cook Vegetables and Build Sauce
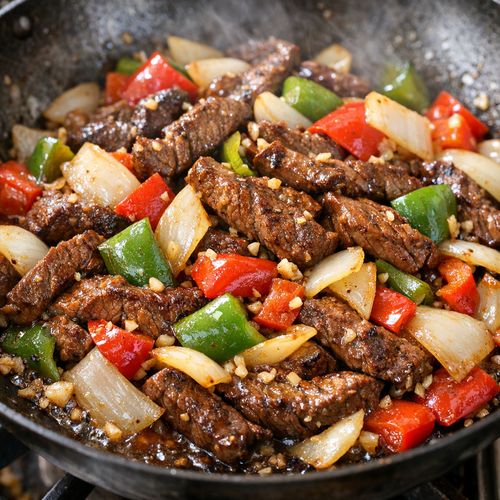
Return all the browned beef to the pan along with all your chopped onions, bell peppers, and garlic. Turn the heat to HIGH. This is where the recipe COMES ALIVE. The vegetables will start to soften, the garlic will become fragrant, and everything will begin melding into one cohesive dish.
Stir and toss constantly for about 4-5 minutes. You’re looking for the onions to transition from opaque white to translucent, which signals that they’re starting to caramelize and release their natural sugars. The peppers should still have a tiny bit of firmness—you’re not going for mushy vegetables here.
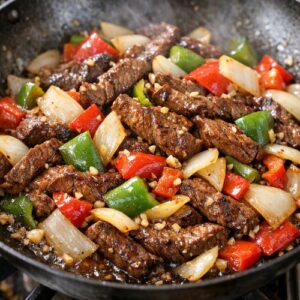
Once the onions reach that translucent stage, add the remaining marinade that’s still sitting in your bowl. Toss EVERYTHING together for about 2-3 minutes. The sauce will coat the beef and vegetables, thickening slightly from the potato starch. The whole dish should look glossy and BEAUTIFUL, with a rich brown sauce clinging to every piece.
Step 5: Cool and Portion for Storage
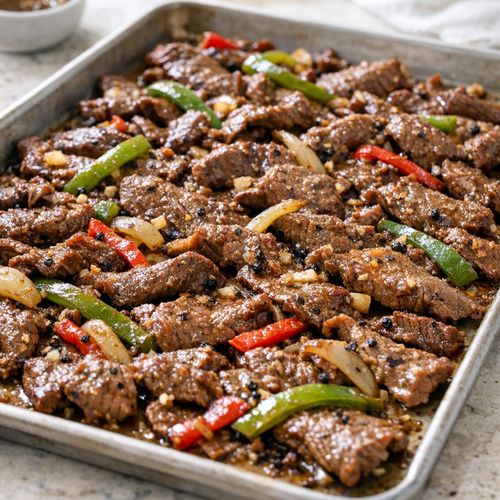
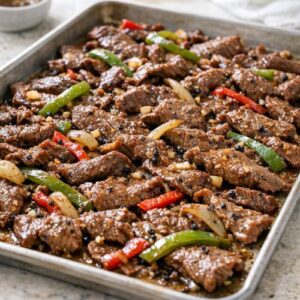
Spread the cooked pepper beef onto a sheet pan or large platter and let it cool to room temperature for about 15-20 minutes. This is IMPORTANT for food safety—you don’t want to trap heat inside airtight containers, which creates condensation and can compromise texture and shelf life.
While it cools, wash and dry your storage containers. I use glass containers with locking lids because they don’t retain odors, they don’t stain, and I can actually SEE what’s inside without opening them.
Once cooled, divide the pepper beef into 8 equal portions. If you’re eating lunch AND dinner most days, I recommend doing 4 larger portions instead—it’s simpler math and you’re less likely to mess up your portions. Store each portion with an appropriate amount of sauce. The sauce is FLAVOR, so don’t skimp on it.
Storage and Organization System
- Glass storage containers with locking lids – These are NON-NEGOTIABLE for meal prep success. They don’t absorb odors like plastic does, they don’t leach chemicals when you reheat, and they’re durable enough to last literally years. Pyrex and OXO make excellent versions.
- Portion strategy: Create diversity in portion sizes – Don’t make all 8 portions identical. Make 3 larger portions for nights when you want beef as your main protein, and 5 smaller portions for when you’re mixing it into rice or noodles. This flexibility prevents decision fatigue and waste.
- Label with date AND contents using waterproof tape – Write “Pepper Beef – Made Sunday, use by Thursday” on masking tape on the side of each container. This takes 30 seconds and prevents you from opening containers wondering “is this still good?” The answer is always YES if you dated it properly.
How to Reheat Without Losing Quality
The BIGGEST mistake people make with meal prep beef is reheating it like it’s a leftover—microwaving it in a closed container until it’s steaming hot. That’s how you end up with dry, tough meat. Here’s how I reheat this pepper beef to maintain that tender texture and vibrant flavor.
Day 1-2 (Monday-Tuesday): Stovetop method – Place your portion in a non-stick skillet over medium heat. Don’t cover it. Let it warm through for 3-4 minutes, stirring occasionally. The uncovered pan allows steam to escape, which means the exterior of the beef doesn’t get rubbery. This method takes 4 minutes total and keeps the texture PERFECT.
Day 3-4 (Wednesday-Thursday): Microwave with ventilation – If you’re at work and need to reheat at your desk, transfer the pepper beef to a microwave-safe container and heat on 50% power for 2-3 minutes. The reduced power setting prevents hot spots and explosive heating. Leave the container uncovered or loosely covered with a paper towel—never seal it with a lid. Stir halfway through.
Day 5 (Friday): Use it fresh and cold or in a quick stir-fry – By Friday, your pepper beef is PERFECT for chopped salads, lettuce wraps, or quick fried rice. You don’t need to reheat it if you’re mixing it into something else that’s hot. The residual heat from the rice or noodles will warm it gently.
CRITICAL SAFETY WARNING: Never leave cooked beef sitting at room temperature for more than 2 hours. Never reheat the same portion twice. If you take a container out of the fridge, use it within that meal—don’t put leftovers back into storage. This prevents bacterial growth and foodborne illness.
Can I Freeze Chinese Pepper Beef Recipe?
YES, absolutely—but there’s a RIGHT way to do this. I often cook a double batch on Sunday, eat half the week, and freeze the other half for the following week when life gets chaotic.
Let the pepper beef cool completely to room temperature first—this usually takes 20-30 minutes on a sheet pan. Portion it into individual meal-prep containers or freezer bags. If you use freezer bags, flatten them as much as possible so they stack neatly and thaw faster. Label EVERYTHING with the date and contents.
Frozen pepper beef lasts for 2-3 months while maintaining good quality. After that, it’s still technically safe, but the texture begins to degrade and ice crystals can make the beef seem stringy.
Thawing method: Move the frozen container to your refrigerator the night before you want to eat it. It will thaw slowly and safely, usually within 12-16 hours depending on portion size. NEVER thaw at room temperature—that’s how you invite bacterial growth. Once thawed, use it within 3 days.
If you’re in a rush and forgot to thaw, you can reheat directly from frozen using the stovetop method—just add an extra 3-4 minutes to the cooking time. The sauce will help the beef warm through evenly.
Nutrition Information
Per serving (based on 8 servings from the full recipe): approximately 285 calories, 22 grams protein, 16 grams fat, 8 grams carbohydrates, 1.5 grams fiber, and 520 milligrams sodium.
Here’s what EXCITES me about this dish from a nutrition standpoint: you’re getting HIGH-QUALITY protein from beef tenderloin, which contains all nine essential amino acids your body can’t produce on its own. Beef is also one of the best dietary sources of bioavailable iron—the kind your body actually absorbs efficiently—plus B vitamins that support energy metabolism.
The black pepper in this recipe contains piperine, a compound that studies show may enhance nutrient absorption and support digestive health. The sesame oil contributes heart-healthy monounsaturated fats. The vegetables add fiber, vitamins, and phytonutrients. This isn’t just delicious—it’s NUTRITIONALLY STRATEGIC.
From a meal prep perspective, this single recipe approach can reduce your weekly sodium intake compared to ordering takeout (which averages 800-1,200 mg per meal), and it gives you CONTROL over ingredient quality. You’re choosing grass-fed beef or conventional, you’re controlling the sauce ratios, you’re not getting hidden sugars or additives.
For meal preppers tracking macros, this recipe delivers excellent protein-to-calorie ratios—you’re getting nearly 8 grams of protein per 100 calories, which supports muscle maintenance and satiety throughout the day.
What to Pair With Chinese Pepper Beef Recipe Throughout the Week
Eating the same protein all week doesn’t mean eating the same MEAL all week. This is where pairing strategy comes in. By rotating your sides and toppings, you’re preventing palate fatigue and keeping your nervous system engaged. You’re also hitting different micronutrients from varied vegetables.
Monday: White rice + steamed broccoli – Classic, clean, simple. The white rice pairs beautifully with the peppery sauce, and steamed broccoli adds crunch and cruciferous nutrition.
Tuesday: Lo mein noodles with scallions – This is where you’re mixing your pepper beef into noodles for an entirely different eating experience. Fresh scallions on top add brightness and onion flavor without being overdone.
Wednesday: Butter lettuce wraps with hoisin – The beef becomes an interactive meal here. Lettuce wraps feel FANCY and different, which matters psychologically when you’re eating something you prepped days ago.
Thursday: Fried rice with eggs and peas – Your pepper beef becomes a component of Cantonese-style fried rice, giving you a completely different dish that uses the same ingredient base.
Friday: Whole wheat tortilla wrap with peppers and hoisin – Lighter, fresher, forward-looking toward the weekend. This doesn’t feel like leftovers—it feels intentional.

Chinese Pepper Beef Recipe
Ingredients
Method
- Place all 3 tablespoons of whole black peppercorns in a mortar and use steady pressure with your pestle to crack them coarsely. If you don't have a mortar and pestle—which honestly, many New Yorkers don't have space for—put the peppercorns in a heavy freezer bag and use a rolling pin or the bottom of a heavy pan to crush them. This takes about 2 minutes, and YES, it matters. Here's my insider tip: FRESH-CRACKED peppercorns are NON-NEGOTIABLE for this recipe. The volatile oils that give black pepper its bite and complexity dissipate rapidly once cracked. If you crack these the night before, you'll lose 40% of their impact. Crack them RIGHT before you start cooking. Divide the cracked pepper into two portions—one for the marinade and one for garnishing at the end.
- In a large mixing bowl, whisk together 2 tablespoons oyster sauce, 3 tablespoons Shaoxing wine, 2.5 teaspoons soy sauce, 2.5 teaspoons toasted sesame oil, and most of your cracked black pepper (save about ½ teaspoon for garnish). The mixture should smell INCREDIBLE—savory, deep, slightly sweet. Add 2.5 teaspoons potato starch and whisk VIGOROUSLY until there are absolutely no lumps remaining. Potato starch clumps will create weird texture pockets in your beef, so take 30 seconds here to get it smooth. Now add your 1.75 pounds of cubed beef tenderloin and stir until every single piece is coated in the marinade. While the beef marinates, start prepping your vegetables. Having everything chopped and ready to go is called "mise en place," and it's the DIFFERENCE between controlled, efficient cooking and chaos. Chop your onions into ½-inch squares, slice your bell peppers into similar-sized chunks, and mince your garlic. Store these in separate containers so you can ADD them quickly when the time comes.
- Here's the reality of meal prep: you're cooking larger quantities, which means your pan can only hold so much beef at once. DO NOT overcrowd your pan. Use a large skillet (12-inch is ideal) and heat it over medium-high heat until it's genuinely HOT. You want to feel warmth radiating when you hold your hand 2 inches above the surface. Add 2.5 tablespoons of vegetable oil and let it shimmer for about 45 seconds. Using tongs, add the beef in a SINGLE LAYER, leaving as much of the marinade in the bowl as possible. This is crucial—excess liquid on the meat creates steam instead of a proper sear. Let the beef sit undisturbed for 2-3 minutes. RESIST the urge to move it around. You want those golden-brown caramelized edges, which come from contact and heat, not from constant stirring. Flip each piece and cook the second side for another 2-3 minutes until it's browned. The beef doesn't need to be fully cooked through at this point—it's going to finish cooking when you add the vegetables and sauce. Transfer the browned beef to a clean plate and repeat with any remaining beef. This process takes about 12-15 minutes total depending on how much beef you're cooking.
- Return all the browned beef to the pan along with all your chopped onions, bell peppers, and garlic. Turn the heat to HIGH. This is where the recipe COMES ALIVE. The vegetables will start to soften, the garlic will become fragrant, and everything will begin melding into one cohesive dish. Stir and toss constantly for about 4-5 minutes. You're looking for the onions to transition from opaque white to translucent, which signals that they're starting to caramelize and release their natural sugars. The peppers should still have a tiny bit of firmness—you're not going for mushy vegetables here. Once the onions reach that translucent stage, add the remaining marinade that's still sitting in your bowl. Toss EVERYTHING together for about 2-3 minutes. The sauce will coat the beef and vegetables, thickening slightly from the potato starch. The whole dish should look glossy and BEAUTIFUL, with a rich brown sauce clinging to every piece.
- Spread the cooked pepper beef onto a sheet pan or large platter and let it cool to room temperature for about 15-20 minutes. This is IMPORTANT for food safety—you don't want to trap heat inside airtight containers, which creates condensation and can compromise texture and shelf life. While it cools, wash and dry your storage containers. I use glass containers with locking lids because they don't retain odors, they don't stain, and I can actually SEE what's inside without opening them. Once cooled, divide the pepper beef into 8 equal portions. If you're eating lunch AND dinner most days, I recommend doing 4 larger portions instead—it's simpler math and you're less likely to mess up your portions. Store each portion with an appropriate amount of sauce. The sauce is FLAVOR, so don't skimp on it.
FAQs
Can I use a different cut of beef instead of tenderloin?
Absolutely. Tenderloin is premium but pricey. For meal prep budgeting, sirloin, flank steak, or even skirt steak work beautifully. The marinade’s acidity (from the Shaoxing wine and soy) breaks down muscle fibers, making less-tender cuts perfectly acceptable. Just cut everything into uniform pieces so cooking time stays consistent. Budget sirloin will cost 30-40% less and honestly tastes FANTASTIC in this application.
How long can I actually keep this in the fridge before it goes bad?
The USDA guideline is 3-4 days for cooked beef, and I stick to that religiously. However, because this dish is heavily sauced and stored in airtight containers, I’ve confidently eaten it on day 5 with no issues. That said, on day 4, check for any off-smells or slimy texture—trust your senses. When in doubt, throw it out. Food safety isn’t worth the risk.
What if I don’t have Shaoxing wine—can I substitute?
Dry sherry or even white wine works as a substitute, though the flavor profile shifts slightly. Avoid cooking wine from the grocery store—it has added sodium and tastes metallic. If you have neither, use 1 tablespoon rice vinegar mixed with 2 tablespoons water as a pinch. It changes the dish, but it’s still delicious. For meal prep purposes, Shaoxing wine is worth buying once—it lasts forever in your pantry and transforms multiple Asian recipes.
Can I make this without the sesame oil to reduce calories?
Technically yes, but I wouldn’t recommend it from a flavor standpoint. Sesame oil is used in SUCH small quantities (2.5 teaspoons for 8 servings = barely 3 calories per serving) that removing it doesn’t meaningfully impact your nutrition. The toasted sesame flavor is essential to the authenticity and depth of this dish. This is where I advocate for QUALITY FATS over fat reduction—those few calories of sesame oil deliver massive flavor impact and satiety without being “unhealthy.”
How do I prevent the beef from getting tough during meal prep cooking?
Two things: first, don’t overcook the beef initially—it’s going to finish cooking when the vegetables are added. Second, store it IN the sauce. The sauce acts as a protective barrier, keeping moisture locked in. When you reheat, use the stovetop method (not microwave), which heats gently and evenly. Beef toughness in meal prep usually comes from overcooking initially or reheating in a closed microwave where steam makes it rubber-textured.
Common Mistakes to Avoid
Mistake 1: Overcrowding the pan while browning beef – I see people throw all the beef into a crowded pan wondering why it steams instead of sears. The pan needs space. Brown in batches. YES, it takes longer. YES, it creates better results. Caramelization requires direct heat contact, not steam.
Mistake 2: Skipping the potato starch or using cornstarch instead – Potato starch is finer and creates a more delicate sauce texture. Cornstarch works but can create a slightly pasty sauce over multiple days. Lumpy starch? That’s the worst. Whisk it into liquid FIRST, alone, until it’s perfectly smooth before adding to the marinade.
Mistake 3: Not actually letting marinade sit – Marinating beef for even 30 minutes makes a difference. The acid and salt begin breaking down muscle proteins and distributing flavor. If you’re prepping, let it sit for 10-15 minutes while you chop vegetables. Don’t skip this just to move faster.
Mistake 4: Reheating with the lid sealed – This creates steam that makes the beef rubbery. Uncovered stovetop reheating prevents this. Even microwaving with a paper towel instead of a lid makes a difference. Steam = texture disaster.
Seasonal Variations
Spring/Summer Version – Add fresh ginger (about ½ teaspoon minced) to the marinade and garnish with fresh cilantro and lime. Serve over quinoa instead of rice for a lighter feel. Add cucumber slices as a cooling component—the peppery beef contrasts beautifully with cool cucumber.
Fall/Winter Version – Increase the black pepper slightly (go for 4 tablespoons cracked pepper instead of 3) and add ½ teaspoon white pepper for subtle heat. Serve over sweet potato instead of white rice. The sweet potato’s natural sweetness balances the pepper intensity perfectly during colder months when heavier food feels grounding.
Year-Round Variation – Add a splash of hoisin sauce (about 1 tablespoon) to the marinade for extra sweetness and depth. This shifts the flavor toward a more Cantonese preparation. The hoisin adds natural umami and keeps the dish interesting if you’re rotating it frequently throughout the month.
Expert’s Nutritional Tip
Here’s what I tell my clients as a registered dietitian: the black peppercorns in this dish aren’t just flavor—they’re a bioavailability booster. The piperine in black pepper increases your body’s ability to absorb the iron from beef by up to 200%. This means you’re not just eating iron; you’re actually UTILIZING that iron more efficiently for energy and oxygen transport.
In meal prep context, this matters because you’re committing to eating the same protein all week. By choosing a dish that’s naturally enhanced nutrient absorption, you’re getting MORE nutritional value from the same food. That’s strategic eating.
Make-Ahead Guide
Here’s my exact Sunday prep timeline for this recipe (assuming you have 90 minutes to yourself):
Minutes 0-10: Mise en place – Chop ALL vegetables. Crack your peppercorns. Measure all wet ingredients. Get everything prepped and visible on your counter. This removes decision-making during cooking.
Minutes 10-15: Build marinade and start soaking beef – Whisk together sauce, add beef, set timer for 15 minutes while you continue prepping.
Minutes 15-30: Heat pan and brown beef in batches – This requires your active attention. Brown, transfer to plate, brown more.
Minutes 30-40: Cook vegetables and combine everything – Everything comes together here. Takes about 8-10 minutes of active cooking.
Minutes 40-60: Cool on sheet pan while you wash dishes – This is strategic: your food cools while you clean, which saves you time at the end.
Minutes 60-90: Portion and label – Divide into containers, label with dates, photograph for your meal plan (seriously—visual meal planning helps you stick to eating prepped food).
You’re done. Entire week’s protein = complete in 90 minutes. That’s EFFICIENCY.
More Meal Prep Recipes You’ll Love
- Best Beef Noodle Recipe – Another cooked-once protein perfect for weekly rotation that pairs beautifully with the pepper beef on different days
- Bao Recipe Chicken – If you want to change proteins but keep the Asian-inspired meal prep theme
- Tom Yum Fried Rice Recipe – A complementary side dish you can prep alongside your pepper beef for maximum variety
You now have the ability to take back control of your week through INTENTIONAL, strategic cooking. This pepper beef recipe isn’t just food—it’s freedom from takeout indecision, it’s nutritional confidence, it’s the ability to eat well even when life gets chaos. Every Sunday you spend 90 minutes in your kitchen, you’re buying yourself back 45-60 minutes throughout the week, plus you’re investing in your energy, your digestion, and your health.
The hardest part is showing up and doing it once. Once you’ve made this recipe and tasted how GOOD homemade pepper beef tastes compared to takeout, you’ll never go back. You’ll be the person in the office whose lunch smells incredible, who has energy stable throughout the afternoon, who actually enjoys eating what they prepared.
Let’s make cooking a breeze!
