
Classic Cottage Pie Recipe
This post contains affiliate links. As an Amazon Associate I earn from qualifying purchases.
You know that Classic Cottage Pie Recipe from your favorite British pub in Manhattan? The one with the impossibly creamy mashed potato topping and that rich, deeply savory meat sauce that keeps you coming back week after week? Here’s the secret to making it at home, BETTER. I’ve reverse-engineered this dish countless times, and I’m about to hand you the exact blueprint.
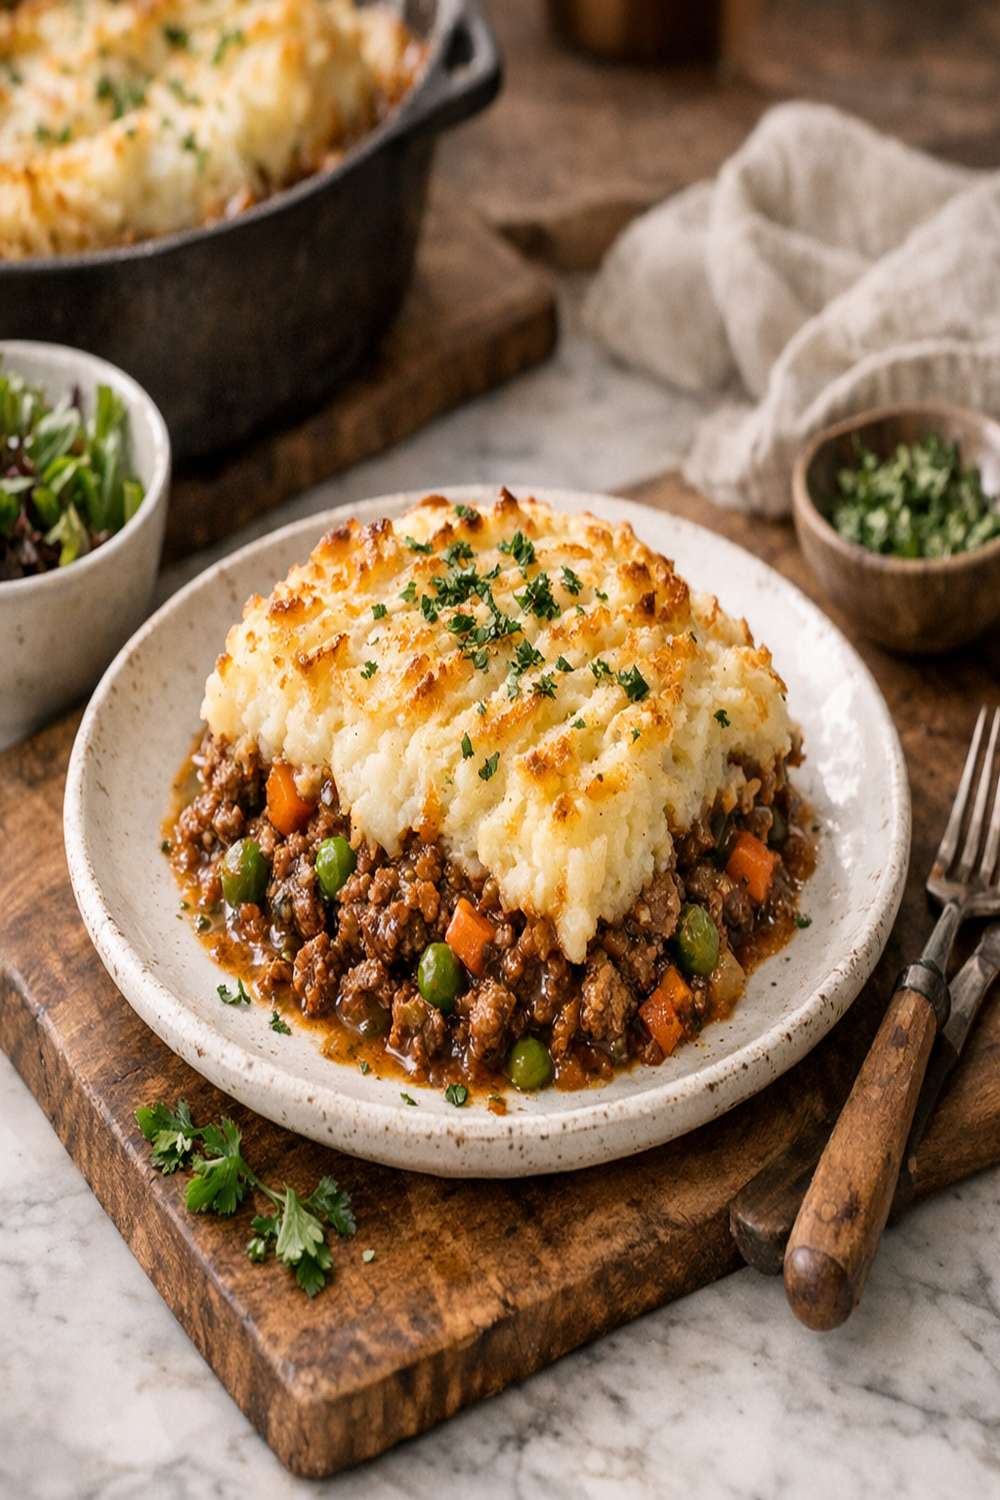
Copycat Classic Cottage Pie Recipe That Tastes Better Than the Restaurant Version
I became OBSESSED with cottage pie about three years ago when a friend dragged me to a cozy spot in the West Village. I’m talking about ordering it every single visit obsessed. As a registered dietitian, I started analyzing every bite—the texture of the meat, the seasoning depth, the way that potato crust turned golden and crispy at the edges. My mission became clear: crack the code and make it better in my own kitchen where I could control the ingredient quality and customize it to my nutritional standards.
After dozens of tests and consultations with some seriously talented home cooks in my network, I’ve figured out EXACTLY what separates a mediocre cottage pie from one that tastes like it came from a Michelin-starred kitchen. And the best part? It’s not complicated. It’s all about technique, timing, and understanding why each step matters.
What Makes the Restaurant Version So Addictive
Restaurant cottage pie has an almost magical quality, and it’s not an accident. Every element is intentional. The meat sauce coats your mouth with umami richness. The potato topping is impossibly creamy yet sturdy enough to hold its shape. There’s a subtle sweetness balanced with savory depth that keeps you reaching for another forkful.
After deconstructing this dish repeatedly, I’ve identified the specific techniques that make restaurants’ versions so irresistible:
- Slow-simmered meat sauce with wine and Worcestershire – the restaurant doesn’t rush this step. They let the meat braise low and slow, allowing flavors to intensify and the sauce to reduce into something concentrated and silky.
- Cream and cheese in the potato topping – this is non-negotiable. The cheddar melts into the mash, adding richness and depth that plain potatoes simply cannot achieve.
- Herb-forward seasoning – thyme and bay leaves aren’t an afterthought; they’re fundamental to the flavor profile, infusing the entire dish with subtle complexity.
- Proper browning technique on the beef – restaurants brown their meat in batches to ensure maximum surface contact with heat, creating that deep Maillard reaction flavor.
How This Homemade Version Compares
Let me be honest with you: homemade and restaurant versions have different strengths. The restaurant wins on consistency and speed (they make this every single day). But YOUR kitchen? You WIN on ingredient quality, freshness, and customization. You can use grass-fed beef if that matters to you. You can add more vegetables. You can adjust seasoning to YOUR taste, not some corporate standard.
Plus, making this yourself costs a fraction of what restaurants charge. We’re talking about a dish that serves 8-10 people for under $25 in ingredients. That same portion at a restaurant? $18-24 per person. The homemade version is fresher because you’re eating it within hours of preparation, not sitting under heat lamps. And here’s what I LOVE most—you control the sodium level and fat composition, which matters if you’re watching your nutrition like I am.
The Ingredients – Reverse-Engineered
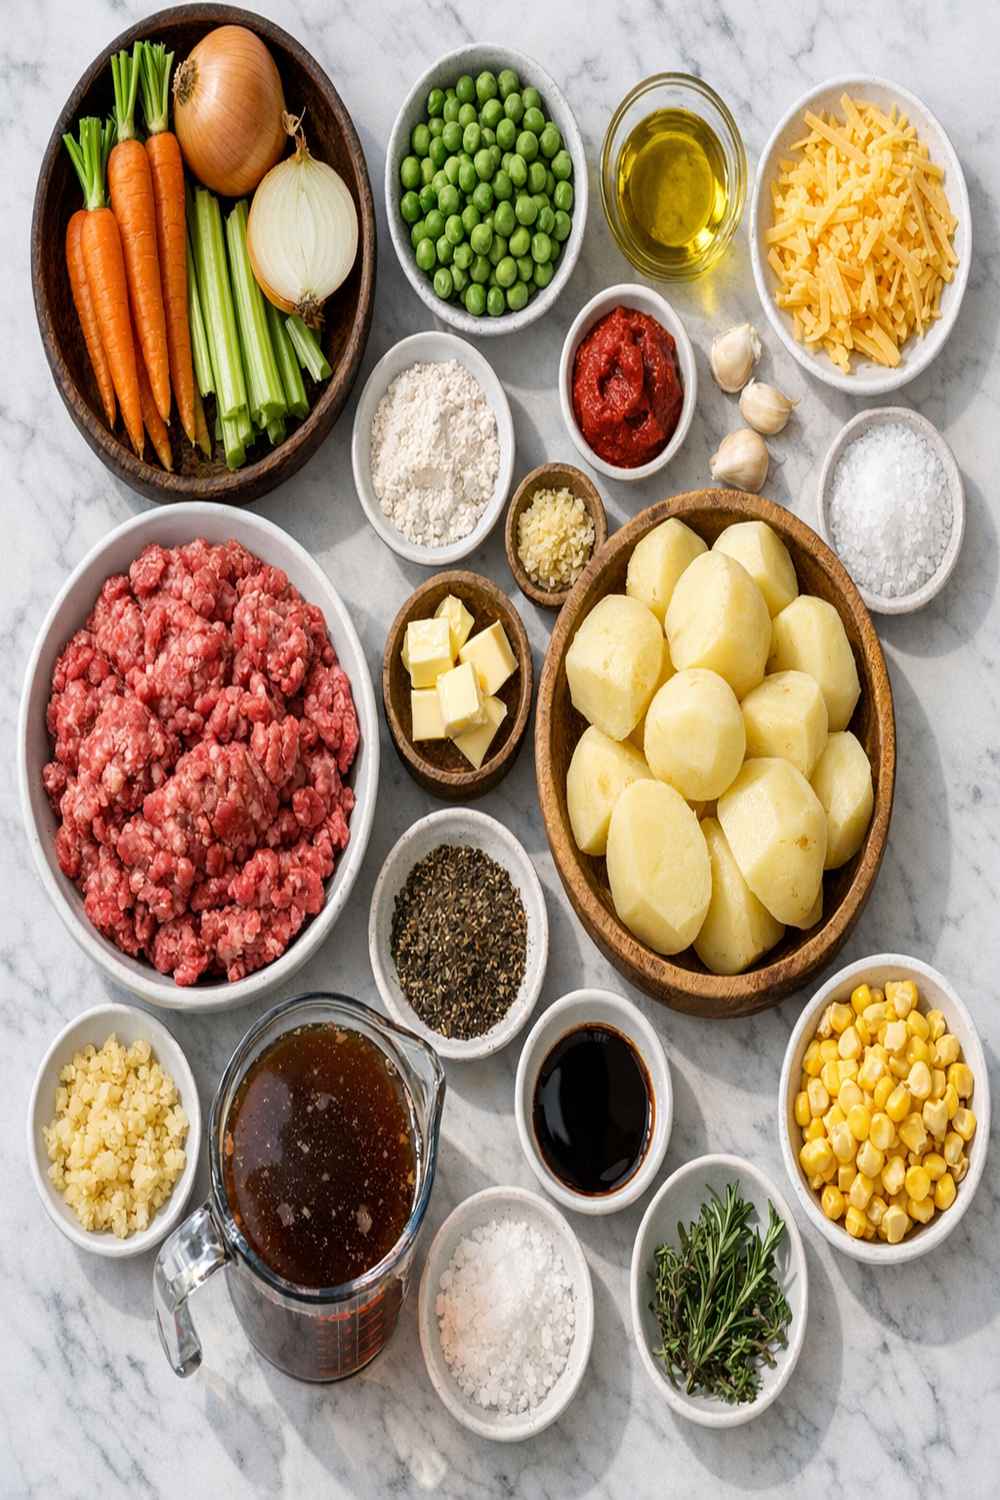
I’ve tested literally every ingredient ratio you can imagine. Some seem obvious—of course you need potatoes. But others? I had to figure out through careful tasting and comparison. Here’s exactly what goes into a restaurant-quality cottage pie, and WHY each ingredient earns its spot in your dish.
For the Meat Sauce
- 1 tablespoon tomato concentrate (concentrated flavor; paste works better than sauce here)
- 3 celery stalks chopped (adds depth and subtle vegetal notes restaurants rely on)
- 4-5 fresh thyme sprigs (dried loses the brightness; fresh is NON-NEGOTIABLE)
- 3 tablespoons all-purpose flour (this creates the sauce body without cornstarch grittiness)
- 2 garlic cloves minced (fresh garlic only; jarred changes the flavor profile entirely)
- 2 bay leaves (removed before serving; adds subtle background complexity)
- 2 large onions finely chopped (the aromatic base; finely chopped ensures even cooking)
- Sea salt and freshly cracked black pepper to taste (season in stages, not all at once)
- 4 tablespoons Worcestershire sauce (this is the SECRET element restaurants don’t advertise)
- 1.25 kilograms beef mince (80/20 blend works best; the fat adds richness that lean beef cannot replicate)
- 3 tablespoons olive oil divided (for browning and cooking vegetables without burning)
- 3 cups plus 2 tablespoons beef stock (quality matters; use low-sodium so you control seasoning)
- 1 cup red wine optional but HIGHLY recommended (the acidity and tannins add incredible depth)
- 3 medium carrots chopped (natural sweetness balances the savory elements)
For the Potato Topping
- 200 grams sharp cheddar cheese grated (use REAL cheese; pre-shredded has cellulose that prevents melting)
- 225 milliliters whole milk room temperature (whole milk creates creaminess; skim will disappoint you)
- 1.8 kilograms potatoes peeled and cut into chunks (russet or Yukon gold; avoid red potatoes as they’re too waxy)
- Fresh nutmeg for grating (just a whisper; this is the secret that makes people ask “what IS that flavor?”)
- 25 grams unsalted butter (cold butter added at the end creates fluffiness)
Serves: 8-10 people as a main course
The Copycat Method: How to Recreate Classic Cottage Pie Recipe at Home
I’m about to walk you through this step-by-step, revealing the exact restaurant techniques adapted for home cooking. Pay close attention to the TIMING and TEMPERATURE cues—these are where homemade cooks usually go wrong.
Step 1: Brown Your Beef in Batches (This Is Critical)
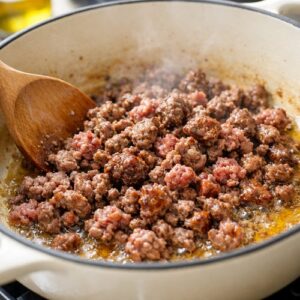
Heat 1 tablespoon of olive oil in a large, heavy-bottomed saucepan or Dutch oven over MEDIUM-HIGH heat. When the oil shimmers (about 2 minutes), add HALF of your beef mince. This is CRUCIAL—if you crowd the pan, you’ll steam the meat instead of browning it, and steamed meat tastes nothing like restaurant-quality meat. Let it sit undisturbed for 3-4 minutes. Then break it apart and stir occasionally until deeply browned, about 8-10 minutes total. The meat should have a rich mahogany color, not gray.
SAFETY WARNING: Hot oil can splatter. Keep your face and hands back when adding meat, and use a splatter screen if you have one.
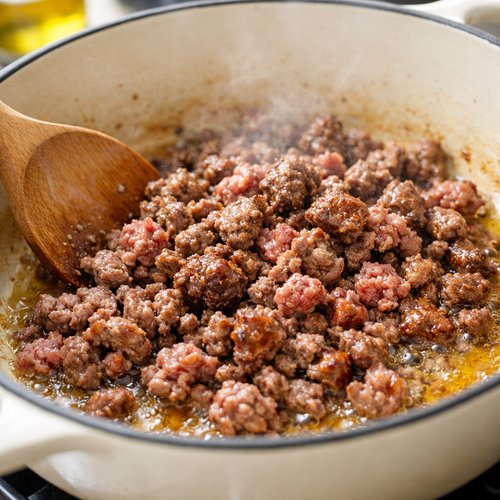
Transfer the browned beef to a clean plate. Repeat with the remaining beef and an additional tablespoon of olive oil. Don’t skip this step trying to save time—restaurants brown in batches for a REASON. You’re building flavor foundations here.
Step 2: Build Your Aromatic Base
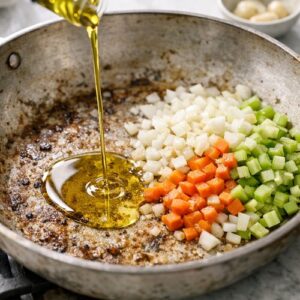
Add the remaining 1 tablespoon of olive oil to your pan (which now has all those beautiful browned bits stuck to the bottom—that’s liquid gold flavor). Add your chopped onions, carrots, and celery. This is called a mirepoix in French cooking, and it’s the foundation of practically every savory restaurant sauce. Cook on MEDIUM-LOW heat for about 20 minutes, stirring occasionally. You’re NOT trying to brown these; you’re coaxing out their natural sweetness and breaking down their cell walls so they become part of the sauce rather than identifiable chunks.
You’ll know you’re done when the vegetables are completely softened and the onions are translucent. Your kitchen should smell INCREDIBLE at this point.
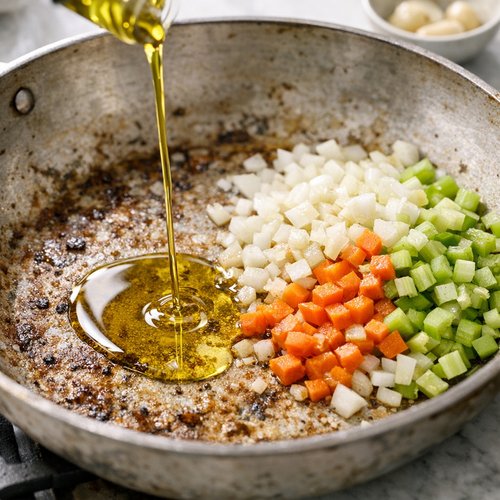
Step 3: Create the Flour Paste and Add Aromatics
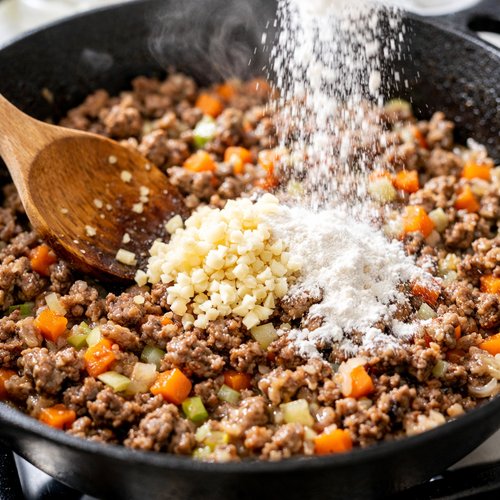
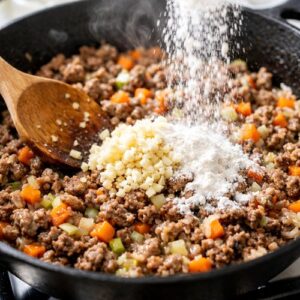
Add your minced garlic to the vegetables and cook for exactly 1 minute—garlic burns quickly and tastes bitter if you overcook it. Then sprinkle in your flour (3 tablespoons) and tomato concentrate (1 tablespoon) and stir constantly for 2-3 minutes over MEDIUM heat. What you’re doing here is cooking out the raw flour taste while creating a paste that will thicken your sauce. This is called a roux in classical cooking, and it’s the difference between a watery sauce and one that coats the back of a spoon.
Step 4: Deglaze and Build Depth
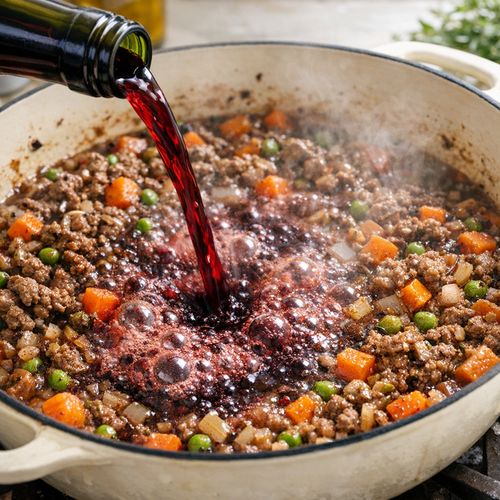
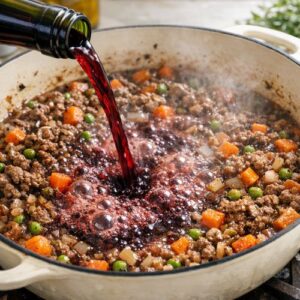
Pour in your red wine (yes, use it if you possibly can—the acidity is ESSENTIAL). Increase heat to MEDIUM-HIGH and let it bubble away for 3-4 minutes. You’re reducing the wine slightly and cooking off most of the alcohol. The wine should reduce by about half in volume. This step is where restaurants add that subtle complexity that homemade versions often lack.
SAFETY WARNING: If your stovetop has open flames, be extremely careful when adding wine. The alcohol vapors can ignite briefly. Use the back burner and keep your face back.
Step 5: Add Stock, Worcestershire, and Herbs
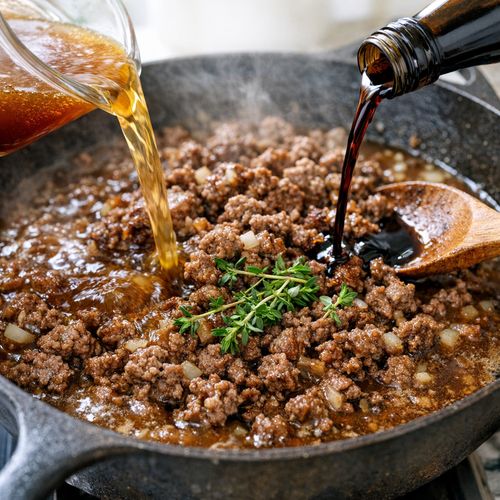
Return the browned beef to the pan. Pour in your beef stock (3 cups plus 2 tablespoons), Worcestershire sauce (4 tablespoons), and add your fresh thyme sprigs and bay leaves. Stir well to combine. Bring the whole mixture to a gentle simmer over MEDIUM heat. This should take about 5-7 minutes.
Once simmering, REDUCE HEAT TO LOW and cook uncovered for 45 minutes. Do NOT cover the pot—you want evaporation to concentrate the sauce. This is the slow-simmer technique restaurants use. Stir occasionally (every 10 minutes or so) to prevent sticking on the bottom.
Step 6: Check and Adjust Your Sauce Consistency
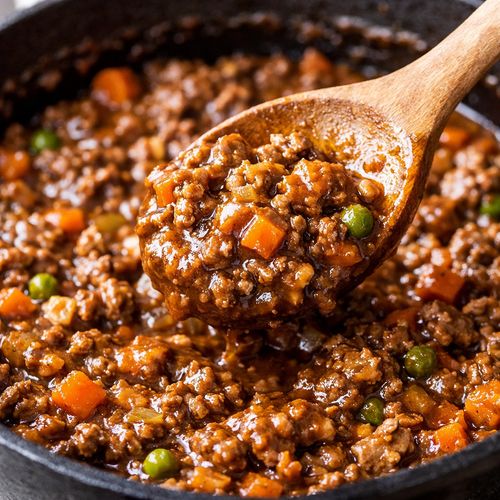
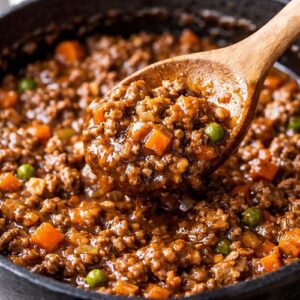
After 45 minutes, your sauce should be thick enough to coat meat without looking soupy. Check at the 30-minute mark—if there’s still a ton of liquid, increase heat slightly to speed up evaporation. You want the sauce to coat the meat, not pool around it. The sauce should reduce by roughly one-third of its original volume.
Taste now and season generously with sea salt and freshly cracked black pepper. Remember—you’re building bold, restaurant-quality flavor. Don’t be shy with seasoning. Remove the bay leaves and thyme stalks (you can leave tiny thyme leaves in; they’re tender and flavorful).
Step 7: Prepare Your Mashed Potato Topping
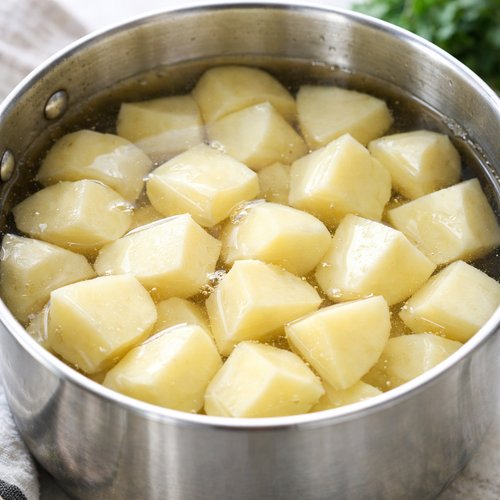
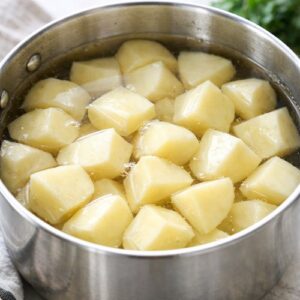
While your meat sauce is simmering, peel and cut your potatoes into roughly 2-inch chunks. Place them in a large pot and cover completely with cold, salted water. Bring to a boil over HIGH heat, then reduce to MEDIUM and simmer for 12-15 minutes until a fork pierces them easily with no resistance. This is KEY—undercooked potatoes will have a gritty texture. Overcooked potatoes become waterlogged and dense.
Drain immediately in a colander and let the potatoes sit there for 2-3 minutes. This steam-drying step is CRITICAL and separates restaurant-quality mash from watery homemade versions. The residual heat evaporates excess moisture.
Step 8: Mash and Season to Perfection
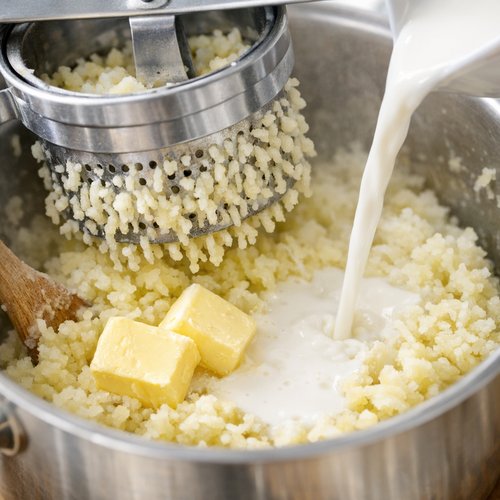
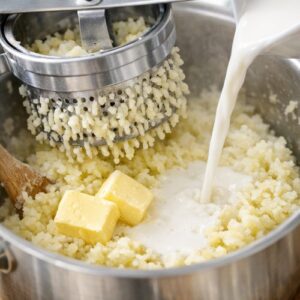
Return the hot potatoes to your pot. Add your room-temperature milk (225 milliliters) and cold butter (25 grams) and mash vigorously. Use a potato ricer if you have one—it creates the silkiest texture. If using a regular masher, work for at least 2-3 minutes to break down all lumps. Add three-quarters of your grated sharp cheddar (about 150 grams) and fold gently to combine. Season with salt, pepper, and a light grating of fresh nutmeg—just a whisper. That nutmeg is your secret ingredient. Most people can’t identify it, but they’ll taste that something special.
IMPORTANT: Do not overmix after adding cheese. Overworking releases starches and makes the mash gluey. Fold gently.
Step 9: Assemble Your Cottage Pies
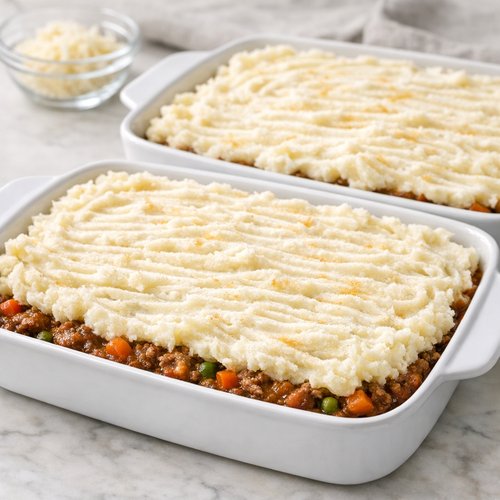
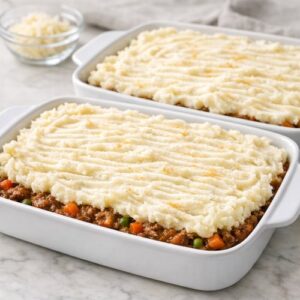
Divide your meat sauce between two 9-by-13-inch ovenproof baking dishes (or one large one if you prefer). Divide your mashed potatoes evenly and layer on top. You can use the back of a spoon to smooth it, or—fancy move—use a piping bag with a large star tip to create ridges. Those ridges will get extra crispy and golden, which is what you’re after.
Sprinkle the remaining quarter of your cheddar cheese (about 50 grams) across the top.
Step 10: Finish in the Oven
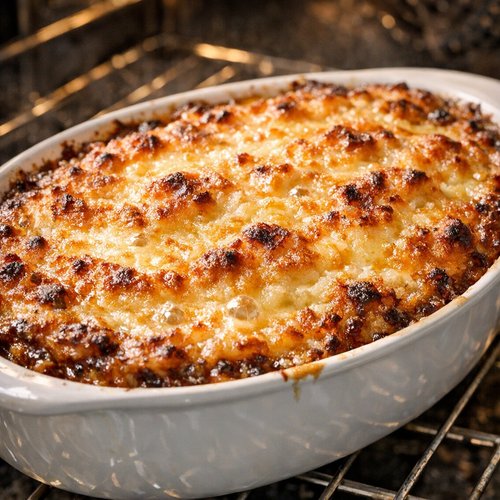
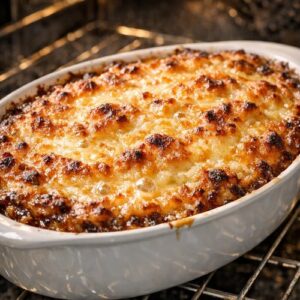
If eating immediately: preheat your oven to 425°F (220°C). Bake for 25-30 minutes until the top is golden brown and you can see cheese bubbling at the edges. The mash should be heated through and slightly crispy on top—this is the texture you’re after.
If making ahead: skip this step for now and refrigerate covered. Bake from cold for 40-45 minutes, covered with foil for the first 20 minutes to prevent over-browning.
SAFETY WARNING: The baking dish and all contents will be EXTREMELY HOT. Use oven mitts and place on a heat-safe surface. Keep children and pets away from the oven.
The Secret Sauce: Worcestershire and Wine
Here’s what separates good cottage pie from GREAT cottage pie: the seasoning strategy. Most homemade versions just use salt and pepper, which tastes flat. Restaurants layer in complexity through specific ingredients.
Worcestershire sauce is your secret weapon. This fermented condiment contains anchovies, tamarind, molasses, and spices that create profound umami depth. Four tablespoons might seem like a lot, but it’s what creates that signature restaurant flavor people can’t quite identify. It’s not fishy (you won’t taste fish specifically)—it’s savory complexity.
The red wine adds acidity that brightens the richness and complexity from tannins. This balances the heaviness of the meat and cheese. Skip the wine if you must, but your sauce will taste flat by comparison.
Fresh thyme is NON-NEGOTIABLE. Dried thyme has a dusty, musky quality that doesn’t belong here. Fresh thyme is bright and herbaceous and makes people say “what IS that flavor?”
The tomato concentrate provides sweetness and umami—it’s not a main flavor, but a supporting player that makes everything else taste better.
How to Make It Even Better Than the Original
Now that you understand the restaurant formula, let’s talk about how to ELEVATE it beyond what commercial kitchens can achieve:
- Add fresh mushrooms to the meat sauce – slice 200 grams of cremini or portobello mushrooms and add them with the other vegetables in Step 2. Mushrooms add earthiness and umami that restaurants sometimes skip because they’re prepping for hundreds of covers. You have the luxury of ingredient quality.
- Finish with fresh parsley – chop about 2 tablespoons of fresh flat-leaf parsley and sprinkle over individual servings. The brightness cuts through the richness and makes the dish feel restaurant-plated rather than homestyle.
- Use half ground beef and half ground lamb – I know this deviates from the classic, but lamb adds complexity and elegance. Use 625 grams of each. This is how some Michelin-starred restaurants do it.
- Add a splash of balsamic vinegar – just 1 tablespoon added in the last 5 minutes of simmering adds sweetness and complexity that deepens the entire dish.
Cost Comparison: Home vs Restaurant
Let me break down the actual economics here because this matters. When I price out ingredients from my local Manhattan grocery stores (Whole Foods, Trader Joe’s, local markets), here’s what one batch costs:
- Beef mince: $8-10
- Vegetables (onions, carrots, celery): $3-4
- Potatoes: $2-3
- Cheese and dairy: $4-5
- Stock, wine, seasonings: $4-5
- TOTAL: $21-27 for 8-10 servings
Per serving, you’re looking at $2.50-3.50 per person. Most restaurant versions charge $18-24 per serving. That’s a difference of $14-21 PER PLATE. If you made this twice a month (once for your family, once for dinner guests), you’d save roughly $400-500 per year compared to ordering out. That’s not including the fact that you control ingredients and your version is fresher.
Expert’s Nutritional Insight
As a registered dietitian, I want to highlight something important about this dish: the balance of nutrients is actually BETTER than you might expect. Yes, there’s fat from the beef and cheese, but understand why that matters. Fat carries flavor and creates satiety—you’ll feel fuller longer on one serving of this than on lighter dishes. The vegetables provide fiber that slows digestion. The potatoes are complex carbohydrates that fuel your body properly. The beef provides high-quality protein with complete amino acids. This is a REAL FOOD dish that nourishes you, not empty calories. One serving (approximately 350 grams) contains roughly 580 calories, 32 grams protein, 18 grams fat (mostly from the beef), and 62 grams carbohydrates from potatoes. That’s a macronutrient profile that actually works for your body.
Can I Store Classic Cottage Pie Recipe?
REFRIGERATOR: Store covered for up to 3 days. The flavors actually IMPROVE slightly as the sauce continues to meld. Reheat covered at 350°F for 20-25 minutes until heated through.
FREEZER: Wrap assembled (unbaked) cottage pies tightly in plastic wrap and foil. Label with the date. Freeze for up to 2 months. Do NOT thaw before baking—bake directly from frozen at 350°F for 60-70 minutes, covered with foil for the first 40 minutes. Check that the center reaches 165°F with a meat thermometer.
MAKE-AHEAD GUIDE: You can prepare the meat sauce up to 2 days ahead and refrigerate separately. Prepare the mashed potatoes the morning of serving (not the day before—they’ll dry out in the fridge). Assemble and bake within 2 hours of making the mash for best texture.
IMPORTANT: Never leave cooked cottage pie at room temperature for longer than 2 hours. Bacteria multiply rapidly in the temperature danger zone (40°F-140°F).
Nutrition Information
Per serving (based on 8 servings from one large dish):
- Calories: 580
- Protein: 32g
- Fat: 18g (saturated: 8g)
- Carbohydrates: 62g
- Fiber: 8g
- Sodium: 520mg
This analysis is based on USDA FoodData Central using actual ingredient weights. The sodium is relatively moderate because we control seasoning at home—restaurants typically add 30-40% more salt. If you’re watching sodium, reduce the Worcestershire sauce to 3 tablespoons and use low-sodium beef stock. This brings sodium down to approximately 280mg per serving, which is ideal for most dietary approaches.
Common Mistakes to Avoid
I’ve watched dozens of home cooks attempt cottage pie. Here are the mistakes that separate good attempts from restaurant-quality results:
- Crowding the pan when browning beef – this creates steam instead of the Maillard reaction. Brown in batches. Period. Your meat will taste like boiled school lunch otherwise.
- Not reducing the sauce enough – watery sauce is the #1 complaint I hear. Let it simmer uncovered for the full 45 minutes and don’t be afraid to increase heat in the final 10 minutes. The sauce should coat meat and cling to your spoon.
- Using waxy potatoes or not draining properly – red potatoes will make gluey, dense mash. Russets or Yukons work. And that steam-drying step? DO IT. It’s the difference between restaurant and home-kitchen quality.
- Skipping fresh thyme and using dried – dried thyme tastes like dust in this context. Fresh costs $2 and transforms everything. Do not skip.
Seasonal Variations
SPRING/SUMMER VERSION: Add 200 grams of fresh peas in the last 5 minutes of the meat sauce simmer. Use fresh tarragon instead of thyme (yes, it’s THAT different—more delicate and bright). Top the mash with crispy prosciutto bits and fresh chives. Absolutely divine.
FALL VERSION: Add 150 grams of diced parsnips with the other vegetables in Step 2. Increase fresh thyme to 6 sprigs. The parsnips add sweetness that complements autumn herbs beautifully.
WINTER VERSION: This is the classic version I’ve given you. Add 100 grams of pearl onions (peeled and halved) and double the mushrooms (400 grams). The richness and earthiness are perfect for cold months.
What to Order/Make Alongside for the Full Experience
Cottage pie in a restaurant never arrives alone. It’s part of a complete experience. Recreate that at home:
- A simple green salad with sharp vinaigrette – the acidity and freshness cut through the richness of the pie. Dress right before serving with a 3:1 ratio of good olive oil to red wine vinegar, plus Dijon mustard and garlic.
- Crusty bread for soaking up the meat sauce – honestly, a quality baguette or sourdough is essential. You want to wipe your plate clean.
- Roasted or steamed green vegetables – try the Baked Dijon Chicken Recipe technique of roasting vegetables in the oven while your cottage pie bakes. Brussels sprouts or broccoli work beautifully.

Classic Cottage Pie Recipe
Ingredients
Method
- Heat 1 tablespoon of olive oil in a large, heavy-bottomed saucepan or Dutch oven over MEDIUM-HIGH heat. When the oil shimmers (about 2 minutes), add HALF of your beef mince. This is CRUCIAL—if you crowd the pan, you'll steam the meat instead of browning it, and steamed meat tastes nothing like restaurant-quality meat. Let it sit undisturbed for 3-4 minutes. Then break it apart and stir occasionally until deeply browned, about 8-10 minutes total. The meat should have a rich mahogany color, not gray. SAFETY WARNING: Hot oil can splatter. Keep your face and hands back when adding meat, and use a splatter screen if you have one. Transfer the browned beef to a clean plate. Repeat with the remaining beef and an additional tablespoon of olive oil. Don't skip this step trying to save time—restaurants brown in batches for a REASON. You're building flavor foundations here.
- Add the remaining 1 tablespoon of olive oil to your pan (which now has all those beautiful browned bits stuck to the bottom—that's liquid gold flavor). Add your chopped onions, carrots, and celery. This is called a mirepoix in French cooking, and it's the foundation of practically every savory restaurant sauce. Cook on MEDIUM-LOW heat for about 20 minutes, stirring occasionally. You're NOT trying to brown these; you're coaxing out their natural sweetness and breaking down their cell walls so they become part of the sauce rather than identifiable chunks. You'll know you're done when the vegetables are completely softened and the onions are translucent. Your kitchen should smell INCREDIBLE at this point.
- Add your minced garlic to the vegetables and cook for exactly 1 minute—garlic burns quickly and tastes bitter if you overcook it. Then sprinkle in your flour (3 tablespoons) and tomato concentrate (1 tablespoon) and stir constantly for 2-3 minutes over MEDIUM heat. What you're doing here is cooking out the raw flour taste while creating a paste that will thicken your sauce. This is called a roux in classical cooking, and it's the difference between a watery sauce and one that coats the back of a spoon.
- Pour in your red wine (yes, use it if you possibly can—the acidity is ESSENTIAL). Increase heat to MEDIUM-HIGH and let it bubble away for 3-4 minutes. You're reducing the wine slightly and cooking off most of the alcohol. The wine should reduce by about half in volume. This step is where restaurants add that subtle complexity that homemade versions often lack. SAFETY WARNING: If your stovetop has open flames, be extremely careful when adding wine. The alcohol vapors can ignite briefly. Use the back burner and keep your face back.
- Return the browned beef to the pan. Pour in your beef stock (3 cups plus 2 tablespoons), Worcestershire sauce (4 tablespoons), and add your fresh thyme sprigs and bay leaves. Stir well to combine. Bring the whole mixture to a gentle simmer over MEDIUM heat. This should take about 5-7 minutes. Once simmering, REDUCE HEAT TO LOW and cook uncovered for 45 minutes. Do NOT cover the pot—you want evaporation to concentrate the sauce. This is the slow-simmer technique restaurants use. Stir occasionally (every 10 minutes or so) to prevent sticking on the bottom.
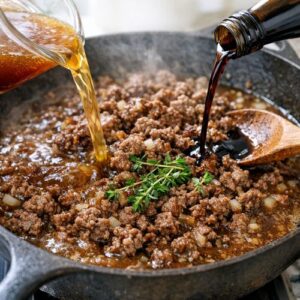
- After 45 minutes, your sauce should be thick enough to coat meat without looking soupy. Check at the 30-minute mark—if there's still a ton of liquid, increase heat slightly to speed up evaporation. You want the sauce to coat the meat, not pool around it. The sauce should reduce by roughly one-third of its original volume. Taste now and season generously with sea salt and freshly cracked black pepper. Remember—you're building bold, restaurant-quality flavor. Don't be shy with seasoning. Remove the bay leaves and thyme stalks (you can leave tiny thyme leaves in; they're tender and flavorful).
- While your meat sauce is simmering, peel and cut your potatoes into roughly 2-inch chunks. Place them in a large pot and cover completely with cold, salted water. Bring to a boil over HIGH heat, then reduce to MEDIUM and simmer for 12-15 minutes until a fork pierces them easily with no resistance. This is KEY—undercooked potatoes will have a gritty texture. Overcooked potatoes become waterlogged and dense. Drain immediately in a colander and let the potatoes sit there for 2-3 minutes. This steam-drying step is CRITICAL and separates restaurant-quality mash from watery homemade versions. The residual heat evaporates excess moisture.
- Return the hot potatoes to your pot. Add your room-temperature milk (225 milliliters) and cold butter (25 grams) and mash vigorously. Use a potato ricer if you have one—it creates the silkiest texture. If using a regular masher, work for at least 2-3 minutes to break down all lumps. Add three-quarters of your grated sharp cheddar (about 150 grams) and fold gently to combine. Season with salt, pepper, and a light grating of fresh nutmeg—just a whisper. That nutmeg is your secret ingredient. Most people can't identify it, but they'll taste that something special. IMPORTANT: Do not overmix after adding cheese. Overworking releases starches and makes the mash gluey. Fold gently.
- Divide your meat sauce between two 9-by-13-inch ovenproof baking dishes (or one large one if you prefer). Divide your mashed potatoes evenly and layer on top. You can use the back of a spoon to smooth it, or—fancy move—use a piping bag with a large star tip to create ridges. Those ridges will get extra crispy and golden, which is what you're after. Sprinkle the remaining quarter of your cheddar cheese (about 50 grams) across the top.
- If eating immediately: preheat your oven to 425°F (220°C). Bake for 25-30 minutes until the top is golden brown and you can see cheese bubbling at the edges. The mash should be heated through and slightly crispy on top—this is the texture you're after. If making ahead: skip this step for now and refrigerate covered. Bake from cold for 40-45 minutes, covered with foil for the first 20 minutes to prevent over-browning. SAFETY WARNING: The baking dish and all contents will be EXTREMELY HOT. Use oven mitts and place on a heat-safe surface. Keep children and pets away from the oven.
Notes
FAQs
Can I Make This in a Slow Cooker?
ABSOLUTELY. Brown your meat and sauté vegetables in a regular pan following Steps 1-3. Transfer everything (meat, vegetables, flour paste, and tomato concentrate) to your slow cooker. Add the wine, stock, Worcestershire, and herbs. Cook on HIGH for 4-5 hours or LOW for 7-8 hours. The sauce will reduce slightly less in a slow cooker because there’s no evaporation, so you may want to use 2¾ cups stock instead of 3¼ cups. Proceed with mashing potatoes and baking in the oven as directed. This is perfect if you want to start cooking in the morning and have dinner ready by evening.
What Type of Beef Mince Works Best?
Use 80/20 beef (80% lean, 20% fat). This ratio provides enough fat to create rich flavor and tender texture without being greasy. If you can source grass-fed beef, it has more complex flavor and Omega-3 fatty acids. Never use 90/10 or leaner—the meat will be tough and dry. If using ground chuck from your butcher’s counter (as opposed to pre-packaged), ask for it ground the day of; fresher meat browns better.
Can I Use Beef Bouillon Instead of Stock?
I would STRONGLY RECOMMEND against this. Bouillon is highly concentrated and salty. You’ll end up with overly salty sauce even using less. If you must, use HALF the amount (1¼ tablespoons bouillon mixed with 3¼ cups water) and taste carefully before final seasoning. Fresh stock (even store-bought) is miles better. Many grocery stores sell low-sodium beef stock in tetrapacks, which is convenient and more flavorful than bouillon.
What If I Don’t Like Wine or Can’t Use It?
You can skip it, but your sauce will lose significant complexity. ALTERNATIVE: Use an extra 1 tablespoon of Worcestershire sauce plus ½ cup beef stock in place of the wine. It won’t be exactly the same, but it will be acceptable. Another option: use balsamic vinegar (2 tablespoons) in place of wine for added depth and sweetness.
How Do I Know When the Oven-Baked Version Is Done?
The potato topping should be golden brown on top, and you should see cheese bubbling at the very edges of the dish. Use an instant-read meat thermometer inserted into the center—the meat sauce should register at least 165°F for food safety. The mashed potato layer should feel hot to the touch if you carefully test it with a fork (being careful not to burn yourself). Baking time varies slightly based on your oven’s accuracy, so start checking at 20 minutes.
Can I Make Individual Portions in Ramekins?
Yes, and they’re GORGEOUS for entertaining. Divide meat sauce among 8-10 oven-safe ramekins (8 ounces each works well). Top with mashed potatoes and cheese. Bake at 425°F for 18-22 minutes until golden. Individual portions actually cook faster because heat penetrates more easily. They also make impressive dinner party presentations. Just ensure your ramekins are oven-safe to at least 450°F.
More Restaurant Copycat Recipes
- Beef Stew Recipe In The Slow Cooker – uses similar slow-braising techniques for deeply flavorful comfort food
- Beef Teriyaki Recipe With Teriyaki Sauce – another beef-forward dish where sauce development is absolutely critical
- Black Pepper Beef Recipe – simple but elegant beef preparation that highlights quality ingredients
Final Thoughts: You’ve Cracked the Code
That’s it. That’s the formula that transforms cottage pie from “pretty good” to “I can’t believe this came from my kitchen.” The secret isn’t magical ingredients (they’re all standard pantry items). It’s understanding WHY each step matters, respecting proper technique, and not rushing the slow-simmer process that builds flavor depth.
The first time you pull a golden, bubbling cottage pie from your oven and serve it to people you care about, watching their eyes light up when they taste it? That’s the moment you realize you’ve officially mastered restaurant-quality cooking at home. And honestly, that feeling never gets old.
Let’s make cooking a breeze!
