
Filipino Noodles Recipe
This post contains affiliate links. As an Amazon Associate I earn from qualifying purchases.
This Filipino noodles recipe doesn’t just taste incredible—it stops people in their tracks. I’ve served this dish at countless dinners across my NYC apartment, and I WATCH what happens: people get quiet, take that first bite, and suddenly everyone’s asking for seconds. The beauty here isn’t just in the golden, perfectly softened noodles or the bright crunch of fresh vegetables—it’s in how FAST this comes together, how the flavors build on each other, and honestly, how it makes you look like you spent WAY more time cooking than you actually did. If you’re looking for more noodle inspiration, my Best Beef Noodle Recipe is another incredible option, but today, we’re doing the Filipino version, and trust me, this one’s going to become your weeknight go-to.
The Most Beautiful Filipino Noodles Recipe You’ll Ever Make (And It’s Easier Than It Looks)
I remember the exact moment I fell in love with this dish. I was testing recipes in my tiny Manhattan kitchen, experimenting with different noodle bases—something I do constantly because NYC’s food culture demands authenticity mixed with simplicity. I had just discovered rice vermicelli noodles, and I wanted to honor the Filipino tradition while making it accessible for busy New Yorkers like myself. The moment those thin, delicate noodles absorbed the savory broth, the carrots glistened with heat, and the cabbage stayed just crispy enough—I knew this was THE recipe. It became my answer to the question I get asked constantly: “How do I make something impressive on a Wednesday night without losing my mind?”
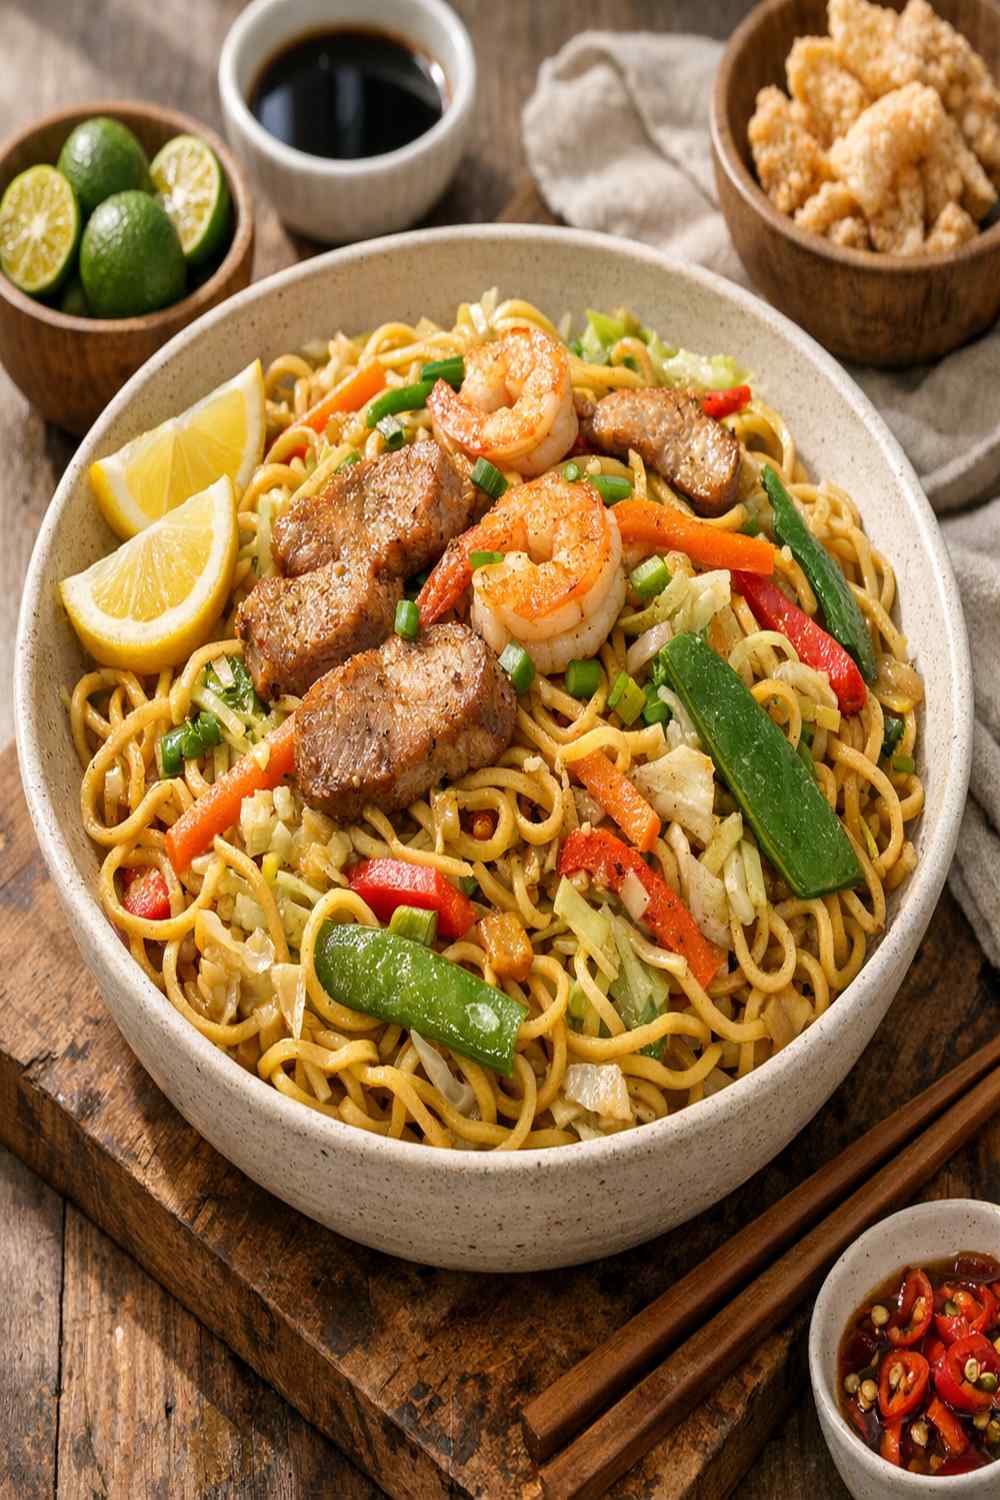
The Visual Elements That Make This Dish Stunning
Here’s what I’ve learned as a dietitian AND a home cook: the most nutritious dishes are often the most visually interesting. Why? Because when you’re eating a variety of BRIGHT, contrasting colors, you’re naturally getting diverse nutrients. This Filipino noodles recipe is a masterclass in that principle. Let me break down what makes this dish absolutely gorgeous on the plate.
- Golden, tender noodles as your base – The rice vermicelli develops a subtle golden tone as it absorbs the broth, creating warmth and depth. These thin strands catch light beautifully and give you that sense of careful, patient cooking.
- The fresh vegetable contrast – Bright orange carrots, pale green celery, and the deep green-white of shredded cabbage create natural color blocking. The KEY is not overcooking them—they should have distinct colors, not muted sameness.
- Tender chicken pieces throughout – These white protein pockets break up the color palette and add height variation, making the dish feel abundant and intentional rather than one-note.
Choosing Ingredients for Maximum Visual Impact
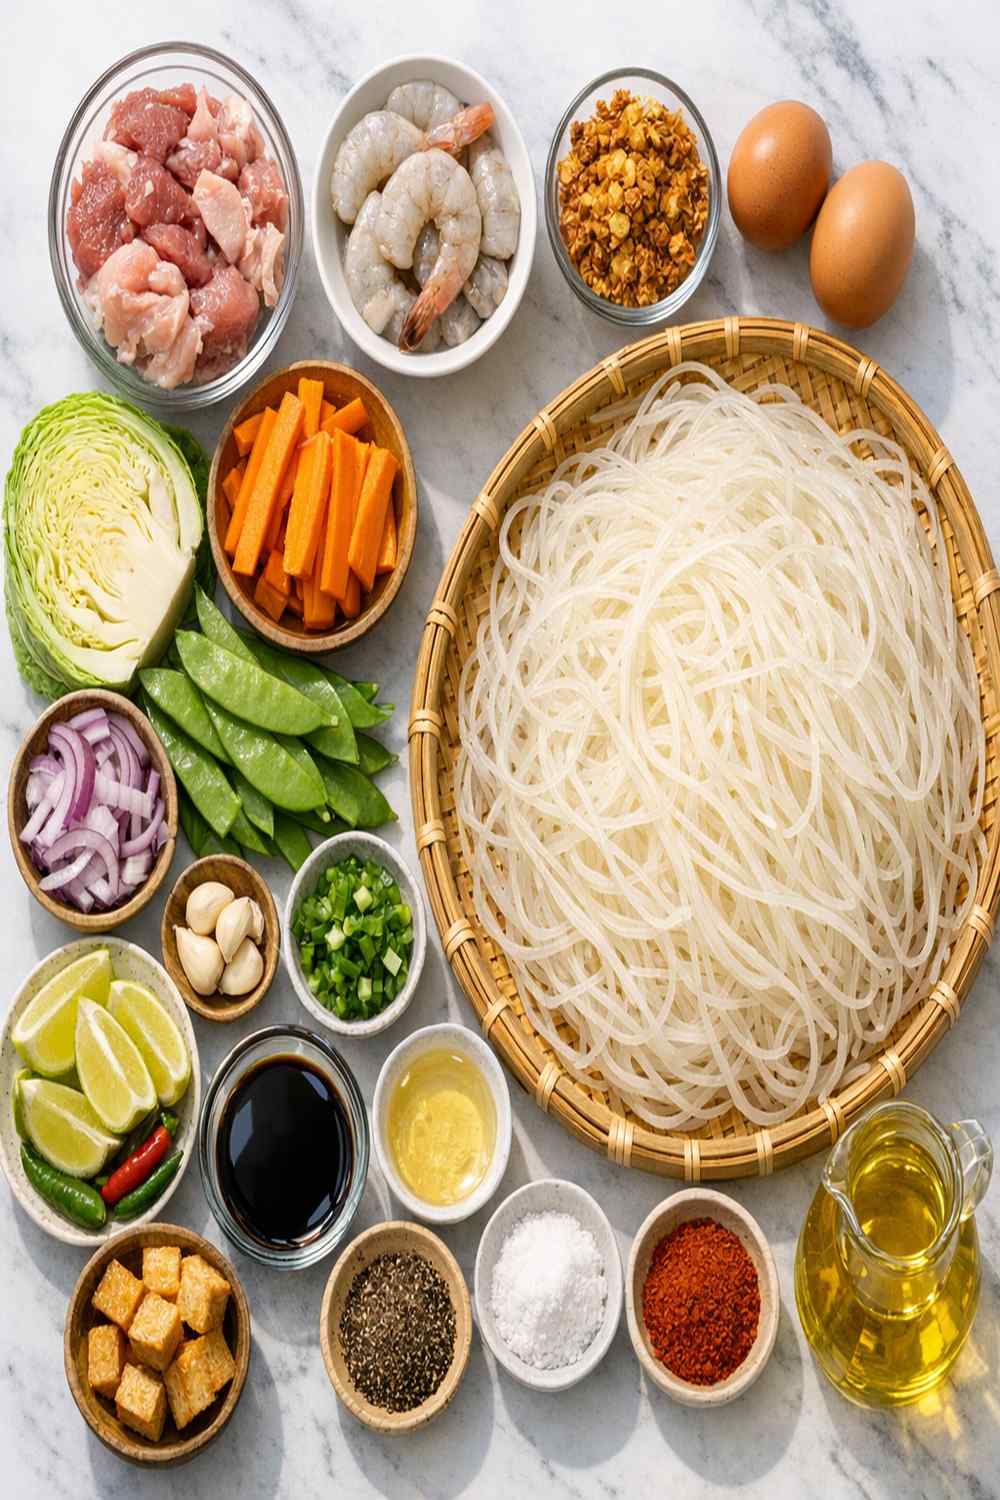
I choose my ingredients like I’m building a visual story. As a registered dietitian, I KNOW that color variety in food signals nutritional diversity—different pigments mean different phytonutrients and antioxidants. But I also know that when food looks this good, people actually WANT to eat more vegetables. It’s a win-win, and honestly, it’s one of my favorite tricks from years of working with clients in NYC who initially resist vegetable-forward meals.
- 2 tablespoons soy sauce (brings umami and that signature Filipino-influenced flavor profile)
- 2 tablespoons Worcestershire sauce (deepens the savory complexity)
- 1 teaspoon minced garlic (freshly minced, not from a jar—creates fragrant aromatic moments)
- 1 medium celery stalk, sliced (adds mild vegetal sweetness and pale green elegance)
- 1 cup carrots, sliced into thin coins or matchsticks (brings vibrant orange sweetness and tender-but-still-firm texture)
- 10 ounces boneless, skinless chicken breast, diced or sliced (use tenders, then chop after cooking; or swap precooked rotisserie chicken to save 10 minutes)
- 3 cups cabbage, shredded (creates raw, fresh crunch and pale-to-deep green color—use pre-shredded slaw mix if time is tight, ZERO judgment)
- ¼ teaspoon white pepper, freshly ground (optional, but adds subtle heat and brightness)
- 2 tablespoons dry soup mix, like onion or herb variety (measured from the packet—adds subtle depth and visual flecks of seasoning)
- 8 ounces rice vermicelli noodles, thin variety (these are distinctly different from wheat noodles—rice ones are delicate, slightly translucent when cooked)
- 3 cups chicken broth, preferably low-sodium (provides the flavor foundation and cooking liquid)
- 2 teaspoons sesame oil or extra virgin olive oil (the cooking fat that brings everything together)
- Fresh lime wedges for serving (adds bright citrus and visual pop at the finish)
Makes 4 servings | Ready in approximately 25 minutes
How to Make Picture-Perfect Filipino Noodles Recipe
Now we’re creating edible art. I’m going to walk you through this step-by-step, and I want you to notice something: you’re using that ONE pan repeatedly, keeping it HOT, which means faster cooking, better texture development, and frankly, fewer dishes at the end. This is the kind of practical technique that makes me love cooking in a busy city.
Step 1: Get Your Pan Screaming Hot and Cook the Chicken
Pour that sesame oil or olive oil into a large wok or skillet with high sides—and I MEAN a large one. You need room to work. Let it heat for about 2 minutes until you hear it sizzle when you flick a water droplet in (careful, that’s HOT!). Once you hear that sizzle, you’re ready. Add your diced chicken and let it sit undisturbed for 3-4 minutes on one side before flipping. This creates those beautiful golden edges that aren’t just pretty—they’re FLAVORFUL. Brown it completely until there’s absolutely no pink inside, then remove it to a clean plate. If you’re using precooked chicken, skip this step entirely.
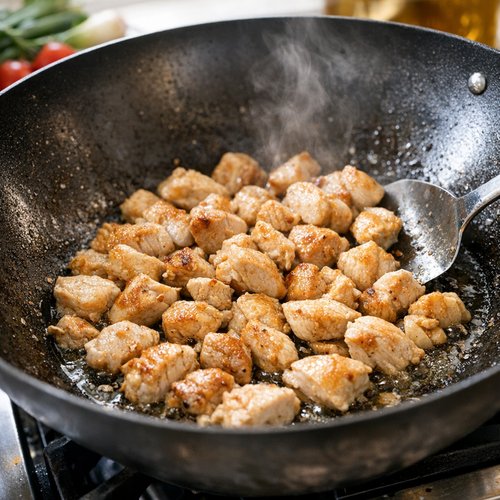
SAFETY WARNING: That pan is EXTREMELY HOT. Keep children and pets away. Never touch the sides without an oven mitt.
Step 2: Develop Flavor with Your Hard Vegetables
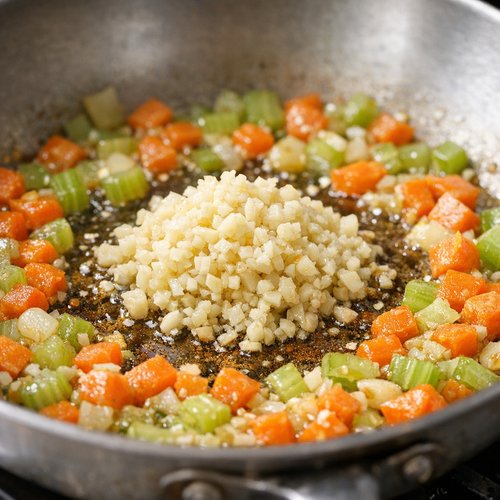
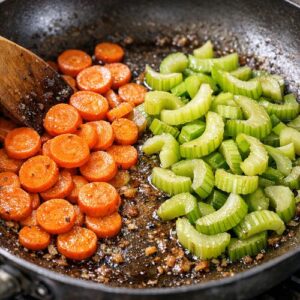
Don’t wash that pan—that flavorful browned residue is GOLD. In that same hot pan, add your sliced carrots and celery. These vegetables need about 6 minutes to soften slightly while staying firm and maintaining that distinct bright color. Stir occasionally so they cook evenly. You want them tender enough to bite easily but firm enough that you can still see individual pieces, not mush.
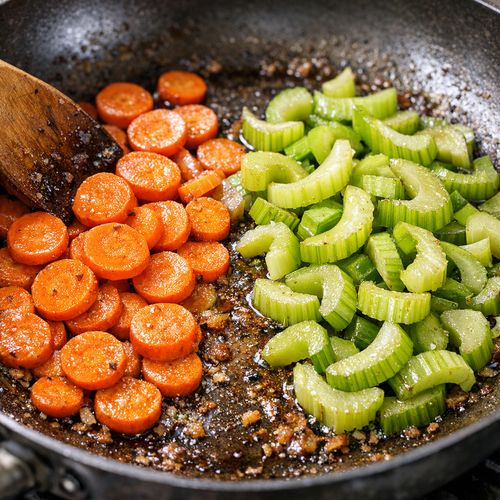
Step 3: Bloom Your Aromatics
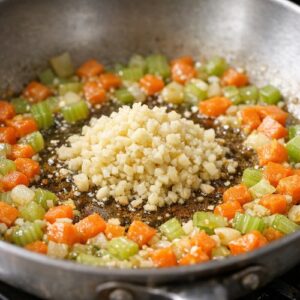
Once the carrots and celery are beginning to soften, add that minced garlic straight into the pan. HERE’S THE TRICK: let it sit for about 30 seconds WITHOUT STIRRING. This “blooms” the garlic, releasing its essential oils and creating that gorgeous fragrant moment. Then stir it in. That 30-second pause transforms raw garlic into something sweet and complex.
Step 4: Add Fresh Vegetables and Maintain Crunch
Now add your shredded cabbage mix, stirring everything together constantly for about 2-3 minutes. DO NOT WALK AWAY. You want the cabbage to heat through and become slightly soft but still maintain that RAW CRUNCH. This is the difference between a mushy dish and one that has textural interest. Remove EVERYTHING—carrots, celery, cabbage, garlic—from the pan to a separate bowl and set aside.
Step 5: Build the Broth Base (This Is Where Magic Happens)
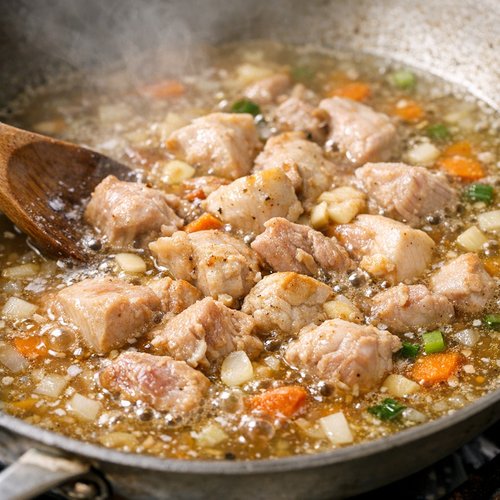
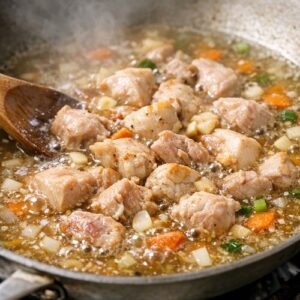
Here’s where I want you to fall in love with this recipe: in that SAME hot pan (seriously, we’re maximizing that pan every single time), add your chicken broth, Worcestershire sauce, soy sauce, and dry soup mix all at once. Stir well so the dry mix dissolves completely. Let this come to a gentle simmer for about 2 minutes. You’ll smell incredible things happening—this is the umami base, the foundation that makes everything taste rich and intentional.
Step 6: Cook the Noodles in the Broth
Break your rice vermicelli noodles slightly so they’re easier to manage (you can do this by gently crushing the brick in its package before opening), then add them directly to the hot broth. THIS IS IMPORTANT: do not stir constantly. Let the noodles sit in the liquid and soften. Stir occasionally—every 60-90 seconds—and watch as the liquid gets absorbed. This is the most meditative part of cooking. It happens faster than you’d expect, usually within 4-6 minutes, but you’ll KNOW it’s happening because the noodles transform from hard strands to tender, delicate ribbons. The liquid won’t disappear completely—there should be just a little pooling at the bottom.
PRO TIP: If your noodles still feel hard after the liquid is absorbed, add ¼ cup more broth and wait another minute. If they’re getting mushy, you’ve got enough liquid.
Step 7: Bring It All Together
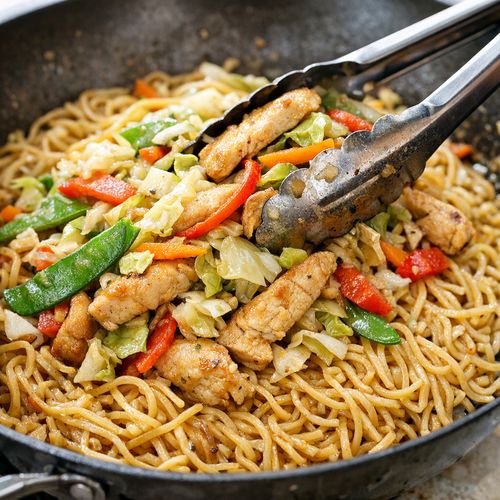
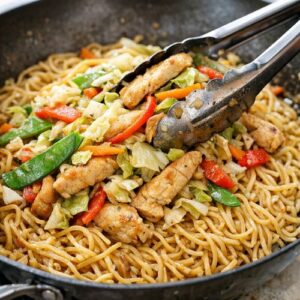
As soon as the noodles are tender and the liquid is almost completely absorbed, add your cooked vegetables and chicken back into the pan. Use tongs to mix everything together gently—tongs are BETTER than a spatula here because they let you lift and turn the noodles without breaking them. Mix until everything is heated through and the colors are distributed throughout, about 2 minutes. The final dish should look abundant, with distinct pockets of color and protein.
The Plating Masterclass
I’ve learned through years of working with clients and cooking in NYC kitchens that HOW you plate a dish changes how people perceive it and enjoy it. This Filipino noodles recipe deserves thoughtful plating. Here’s exactly how I do it in my kitchen, and I’m sharing this because presentation directly impacts how much people enjoy eating (and yes, nutritionists care about that too).
- The nest technique – Using tongs, twirl a small portion of noodles to create a loose nest in the center of your bowl. This gives HEIGHT and makes the dish feel intentional rather than just scooped. Let some noodles fall naturally inside the nest for organic texture.
- Layer your vegetables strategically – Don’t just dump everything on top. Arrange your carrots, celery pieces, and cabbage so you can SEE distinct colors. Let some noodles poke through. Tuck the chicken pieces into visible spots so they look abundant.
- Leave breathing room – In professional plating, negative space (empty areas of the bowl) is actually more important than filling every inch. Leave maybe 1-2 inches of clear bowl showing around the edges. This makes the dish look sophisticated and intentional, not overcrowded.
- Broth pooling – If there’s a small amount of broth remaining, let it pool slightly at the base and around the edges. This keeps the noodles moist and adds visual sheen, but don’t make it soupy.
- Garnish with intention – A squeeze of fresh lime juice over top, maybe a tiny pinch of white pepper, and perhaps some fresh cilantro if you have it. These small touches say “I cared about this dish.”
Photography Tips for This Dish
I know this sounds silly, but I photograph my food constantly—partly because I love sharing, partly because it forces me to plate more carefully. Here’s what makes THIS dish photograph beautifully, and why it matters (besides Instagram, it actually helps you SEE if something’s cooked properly).
- Natural light from the side – Never shoot directly overhead with harsh light. Shoot from the side where a window has natural light coming in. This catches the gloss of the broth, highlights the individual noodle strands, and makes the orange carrots absolutely GLOW. If it’s nighttime, move your plate near a lamp and shoot from the side.
- Timing is everything – Shoot within 2 minutes of plating. The noodles look best when they’re just-cooked tender and still slightly steaming. That steam actually creates a beautiful haze in photos. Wait too long and they start looking matte and tired.
- Show the textural contrast – Angle your camera so viewers can see the difference between the tender noodles, the crisp vegetables, and the protein. A 45-degree angle from the side usually captures this best.
- Props matter less than you think – A simple white or neutral bowl, maybe a small glass of water, simple chopsticks or a fork. This food is BUSY visually, so keep everything else minimal. The dish should be the star.
Seasonal Color Variations
One thing I absolutely LOVE about this recipe is how adaptable it is to different seasons. As a dietitian, I always encourage eating seasonally because that’s when produce is cheapest, most flavorful, and nutritionally peak. Here’s how I switch this dish:
Spring: Replace half the cabbage with shredded zucchini, add thin asparagus pieces, and garnish with fresh spring peas. The palette becomes lighter, more delicate greens.
Summer: Add thin strips of bell pepper (red, yellow, or orange), keep the fresh herbs generous with mint and cilantro, and squeeze lime juice heavily. It becomes brighter, fresher, more vibrant.
Fall: Add diced mushrooms, thin slices of sweet potato, and perhaps a touch of ginger to the broth. The color palette deepens to more golden-brown tones.
Winter: Use dark leafy greens like bok choy, add sliced shiitake mushrooms, increase the ginger slightly. The dish becomes earthier, warmer, deeper in color.
Can I Store Filipino Noodles Recipe?
YES, and this is where this recipe becomes BRILLIANT for meal prep. I make this on Sunday and eat it throughout my week. Here’s what you need to know: the noodles are best eaten fresh, but they keep beautifully with proper storage.
Refrigerator storage: Keep your cooked noodles in an airtight container for up to 4 days. The noodles will firm up slightly as they cool—this is completely normal and honestly kind of nice because they don’t fall apart when you reheat them.
Reheating: I reheat in a large skillet over medium-high heat with a splash of broth or water (about ¼ cup) to add back moisture. Stir constantly for 3-4 minutes until heated through. The noodles will soften again and taste nearly as good as fresh.
Freezer storage: You CAN freeze this, but I don’t recommend it. The vegetable texture changes significantly, becoming softer and less appealing when thawed. The noodles can get slightly mealy. For best results, keep this dish in the fridge and eat within 4 days.
Pro tip: Store the broth and noodles together (they preserve better that way), but if you have extra vegetables, you can store them separately and add fresh ones when reheating. This is my trick for keeping things tasting fresh throughout the week.
Expert’s Nutritional Insight: Why Rice Vermicelli Matters
Here’s something I tell my clients constantly: not all noodles are created equal, and this matters for your nutrition. Rice vermicelli noodles are naturally gluten-free and lower in overall carbohydrate density compared to wheat-based noodles—they’re lighter, which means you can eat a satisfying portion without feeling overly full or sluggish after. They’re also easier to digest for many people, which is why they’re so traditional in Southeast Asian cuisines. The key is that they cook FAST, which means less nutrient loss from prolonged heat exposure. I always choose rice vermicelli when I want noodles to feel fresh and delicate rather than heavy.
Nutrition Information
Using USDA nutritional database standards, here’s what one serving (approximately 1 cup of finished dish) contains:
Per serving (based on 4 servings total): Approximately 285 calories | 8g protein | 34g carbohydrates | 6g dietary fiber | 9g fat | 2.5g saturated fat | 840mg sodium | 285mg potassium | IU vitamin A: 4,200 IU | vitamin C: 15mg
What I LOVE about the nutritional profile here is what you CAN’T see in the numbers: the deep color variety means you’re getting diverse phytonutrients. The orange from carrots brings beta-carotene, the cabbage provides sulforaphane, the garlic offers allicin. Combined with lean protein and complex carbs from the noodles, this is a genuinely balanced, nourishing meal. The sodium is moderate for a dish with soy sauce and Worcestershire—if you’re sodium-sensitive, use low-sodium broth and reduce soy sauce slightly.
Make-Ahead Guide: Your Meal Prep Blueprint
As someone who works with busy New Yorkers constantly, I’ve developed a make-ahead strategy for this dish that actually WORKS:
Two days ahead: Cook your chicken, season it lightly, and store it separately in an airtight container in the fridge. This is the component that takes longest, so getting it done early is clutch.
One day ahead: Chop all vegetables (carrots, celery, and measure out your cabbage). Store each in separate airtight containers. The vegetables stay fresh and ready to go. Keep the garlic minced but separate because it oxidizes over time.
Day of cooking: You’re literally just heating your pan, combining components, and cooking the noodles. Total hands-on time is maybe 15 minutes. This is the EASIEST form of meal prep because you’re not eating reheated, already-combined food—you’re making it fresh every time but with prep work done.
Portion out immediately: If you’re meal prepping for the full week, I recommend cooking the full recipe but portioning it into 4 containers immediately after finishing. Eat within 4 days. This maintains better texture than storing a large batch.
Common Mistakes to Avoid (So Your Dish Turns Out Perfect)
I’ve made literally EVERY mistake with this recipe, and I want to save you the frustration. Here’s what I see go wrong, and how to fix it:
Mistake 1: Overcooking the vegetables into mush – This happens when people leave vegetables in the pan too long or add them to the broth too early. SOLUTION: Add vegetables AFTER the noodles are cooking, not before. Keep them out of the pan until the last moment. Your final vegetables should have distinct texture and color, not blend into the background.
Mistake 2: Not keeping the pan hot enough – Cold pan means slow cooking, soggy textures, and pale colors. SOLUTION: Preheat your pan and oil for a solid 2 minutes. You should hear sizzle when protein or vegetables hit it. If it’s quiet, it’s not hot enough.
Mistake 3: Stirring the noodles constantly as they cook – Constant stirring breaks them into smaller pieces and prevents them from absorbing the broth properly. SOLUTION: Stir only every 60-90 seconds. Let them sit and soften. Patience here creates texture.
Mistake 4: Using warm or room-temperature broth instead of hot – Cold broth will cool down your pan and extend cooking time significantly. SOLUTION: Keep your broth at a gentle simmer before adding it. If you’re using store-bought, heat it in a separate pot while you’re preparing vegetables. Thirty seconds of planning saves you 10 minutes of cooking.
What to Serve Alongside for a Complete Visual Spread
Here’s the thing about serving this dish in NYC: I’m constantly thinking about how meals look TOGETHER on a table, not just individually. The Filipino noodles are the star, but they benefit from supporting players. If you’re feeling adventurous, my Adobo Fried Rice Recipe would be an amazing complement—the darker brown tones would contrast beautifully against your lighter noodles. Or if you want something lighter, consider:
- Simple cucumber salad with rice vinegar – The pale green and clear dressing create visual lightness and provide acidic contrast to the rich broth-based noodles. The crunch also plays beautifully against soft noodles.
- Steamed bok choy with sesame – Deep green stalks drizzled with sesame oil add another layer of umami and visual sophistication without competing with the noodles’ color story.
- Fresh spring rolls (if you want to go fancier) – The translucent rice paper wrapper shows off fresh herbs and vegetables inside. Serve with peanut sauce for dipping. This makes the whole meal feel like a special occasion.
The key is: keep sides SIMPLER than your main. Your noodles are the complexity, so sides should be straightforward and let them shine.

Filipino Noodles Recipe
Ingredients
Method
- Pour that sesame oil or olive oil into a large wok or skillet with high sides—and I MEAN a large one. You need room to work. Let it heat for about 2 minutes until you hear it sizzle when you flick a water droplet in (careful, that's HOT!). Once you hear that sizzle, you're ready. Add your diced chicken and let it sit undisturbed for 3-4 minutes on one side before flipping. This creates those beautiful golden edges that aren't just pretty—they're FLAVORFUL. Brown it completely until there's absolutely no pink inside, then remove it to a clean plate. If you're using precooked chicken, skip this step entirely. SAFETY WARNING: That pan is EXTREMELY HOT. Keep children and pets away. Never touch the sides without an oven mitt.
- Don't wash that pan—that flavorful browned residue is GOLD. In that same hot pan, add your sliced carrots and celery. These vegetables need about 6 minutes to soften slightly while staying firm and maintaining that distinct bright color. Stir occasionally so they cook evenly. You want them tender enough to bite easily but firm enough that you can still see individual pieces, not mush.
- Once the carrots and celery are beginning to soften, add that minced garlic straight into the pan. HERE'S THE TRICK: let it sit for about 30 seconds WITHOUT STIRRING. This "blooms" the garlic, releasing its essential oils and creating that gorgeous fragrant moment. Then stir it in. That 30-second pause transforms raw garlic into something sweet and complex.
- Now add your shredded cabbage mix, stirring everything together constantly for about 2-3 minutes. DO NOT WALK AWAY. You want the cabbage to heat through and become slightly soft but still maintain that RAW CRUNCH. This is the difference between a mushy dish and one that has textural interest. Remove EVERYTHING—carrots, celery, cabbage, garlic—from the pan to a separate bowl and set aside.
- Here's where I want you to fall in love with this recipe: in that SAME hot pan (seriously, we're maximizing that pan every single time), add your chicken broth, Worcestershire sauce, soy sauce, and dry soup mix all at once. Stir well so the dry mix dissolves completely. Let this come to a gentle simmer for about 2 minutes. You'll smell incredible things happening—this is the umami base, the foundation that makes everything taste rich and intentional.
- Break your rice vermicelli noodles slightly so they're easier to manage (you can do this by gently crushing the brick in its package before opening), then add them directly to the hot broth. THIS IS IMPORTANT: do not stir constantly. Let the noodles sit in the liquid and soften. Stir occasionally—every 60-90 seconds—and watch as the liquid gets absorbed. This is the most meditative part of cooking. It happens faster than you'd expect, usually within 4-6 minutes, but you'll KNOW it's happening because the noodles transform from hard strands to tender, delicate ribbons. The liquid won't disappear completely—there should be just a little pooling at the bottom. PRO TIP: If your noodles still feel hard after the liquid is absorbed, add ¼ cup more broth and wait another minute. If they're getting mushy, you've got enough liquid.
- As soon as the noodles are tender and the liquid is almost completely absorbed, add your cooked vegetables and chicken back into the pan. Use tongs to mix everything together gently—tongs are BETTER than a spatula here because they let you lift and turn the noodles without breaking them. Mix until everything is heated through and the colors are distributed throughout, about 2 minutes. The final dish should look abundant, with distinct pockets of color and protein.
Notes
FAQs
Can I use a different type of noodle for this recipe?
Technically yes, but here’s my honest take: traditional wheat noodles will change the entire feel of this dish. They’re heavier, take longer to cook, and don’t have that delicate quality that makes rice vermicelli special. If you need a substitute for dietary reasons (gluten-free, for example), look for other gluten-free RICE noodles specifically, not egg noodles or pasta. The texture and cooking time matter here.
What if I don’t have chicken broth—can I use water or vegetable broth?
Water will taste bland—I won’t lie to you. Vegetable broth works, but the depth won’t be quite the same. If you’re stuck, use water PLUS a tablespoon of soy sauce and a teaspoon of miso paste mixed in, and you’ll have decent depth. But honestly, chicken broth is SO accessible (even low-sodium versions at any NYC grocery store) that I recommend picking some up. It’s a 2-minute store trip for a significantly better dish.
How do I know when the noodles are perfectly cooked, not overdone?
This is actually the most important question. Pick up a single noodle with a fork and bite it. Perfect noodles have NO hard center but still have SOME resistance—they’re tender but not mushy or falling apart. If you bite through and there’s a hard white core, cook longer. If they’re bending like cooked pasta, you’ve gone too far. The texture should be “delicate but with structure.” You’ll know it immediately once you taste it.
Can I make this dish vegetarian or vegan?
YES. Replace the chicken with extra vegetables—I’d suggest adding mushrooms (cremini or shiitake), diced tofu, or even chickpeas. Reduce the chicken broth to 2 cups and add 1 cup vegetable broth, plus an extra tablespoon of soy sauce for umami depth. The cooking method stays exactly the same. The final dish will be equally delicious and feel equally abundant.
Why does my dish taste flat even though I’m following the recipe?
Nine times out of ten, this is a salt issue. Taste it BEFORE serving and adjust. I often add another ½ tablespoon of soy sauce or a tiny pinch of salt at the very end. Also, make sure you’re using freshly minced garlic, not jarred—jarred loses its volatile oils and doesn’t provide the same flavor burst. And finally, make SURE your pan is hot enough when you start. A cold pan creates dull, pale-colored food that tastes dull even if the seasoning is technically correct.
More Visually Stunning Recipes
- Best Beef Noodle Recipe – A richer, deeper noodle dish perfect for when you want something more substantial
- Szechuan Fried Rice Recipe – Complex spice flavors with vibrant textures, completely different from this but equally stunning plated
- Yangzhou Fried Rice Recipe – A classic that builds flavor through technique rather than sauce, beautiful alongside noodle dishes
Cooking this Filipino noodles recipe has genuinely changed how I think about weeknight dinners. Because here’s what I’ve learned through working with hundreds of busy New Yorkers and testing endless recipes in my small kitchen: the best meals aren’t about complexity or hours of cooking. They’re about respect for your ingredients, understanding HOW things work, and plating with intention. They’re about feeding people—their bodies with nourishment, their eyes with beauty, their souls with care. This dish does all three, in about 25 minutes, in one pan. That’s the recipe I’m most proud of, honestly. It’s accessible, it’s nourishing, it’s absolutely delicious, and it proves that impressive cooking doesn’t require stress. Let’s make cooking a breeze!
