
Garlic Parmesan Chicken Tenderloin Recipe
This post contains affiliate links. As an Amazon Associate I earn from qualifying purchases.
Did you know that chicken tenderloin—the small, delicate strip of meat tucked beneath the chicken breast—cooks faster than almost ANY other protein? I discovered this years ago in my NYC kitchen when I was juggling a crazy work schedule and needed weeknight dinners that felt restaurant-quality but took MINIMAL time. This garlic parmesan chicken tenderloin recipe became my secret weapon. It’s the kind of dish that tastes like you spent an hour in the kitchen when you actually spent just 15 minutes of hands-on work. The magic happens when creamy mayo creates an emulsified coating that keeps the chicken impossibly moist while the parmesan crust develops that golden, umami-rich crust. I’ve served this to countless friends who asked for the recipe immediately—and I’m so excited to share it with you today.
The Science Behind Garlic Parmesan Chicken Tenderloin Recipe
As a registered dietitian, I’m obsessed with recipes that work BOTH nutritionally AND scientifically. This dish is a masterclass in efficient cooking. When you combine mayo with cheese and coat the chicken, you’re creating an insulating layer that does three critical things simultaneously: it protects the delicate meat from drying out, it distributes heat evenly, and it creates the Maillard reaction—that brown, savory crust that makes your mouth water just thinking about it.
The tenderloins themselves are nutritional powerhouses. Unlike thicker chicken breasts that require longer cooking times (and often dry out), these smaller cuts reach their perfect 160°F internal temperature in just 15-25 minutes. This shorter cooking window means less time for moisture loss and more nutritional retention. The coating also acts as a moisture barrier, which is why this method is SO much more forgiving than roasting plain chicken.
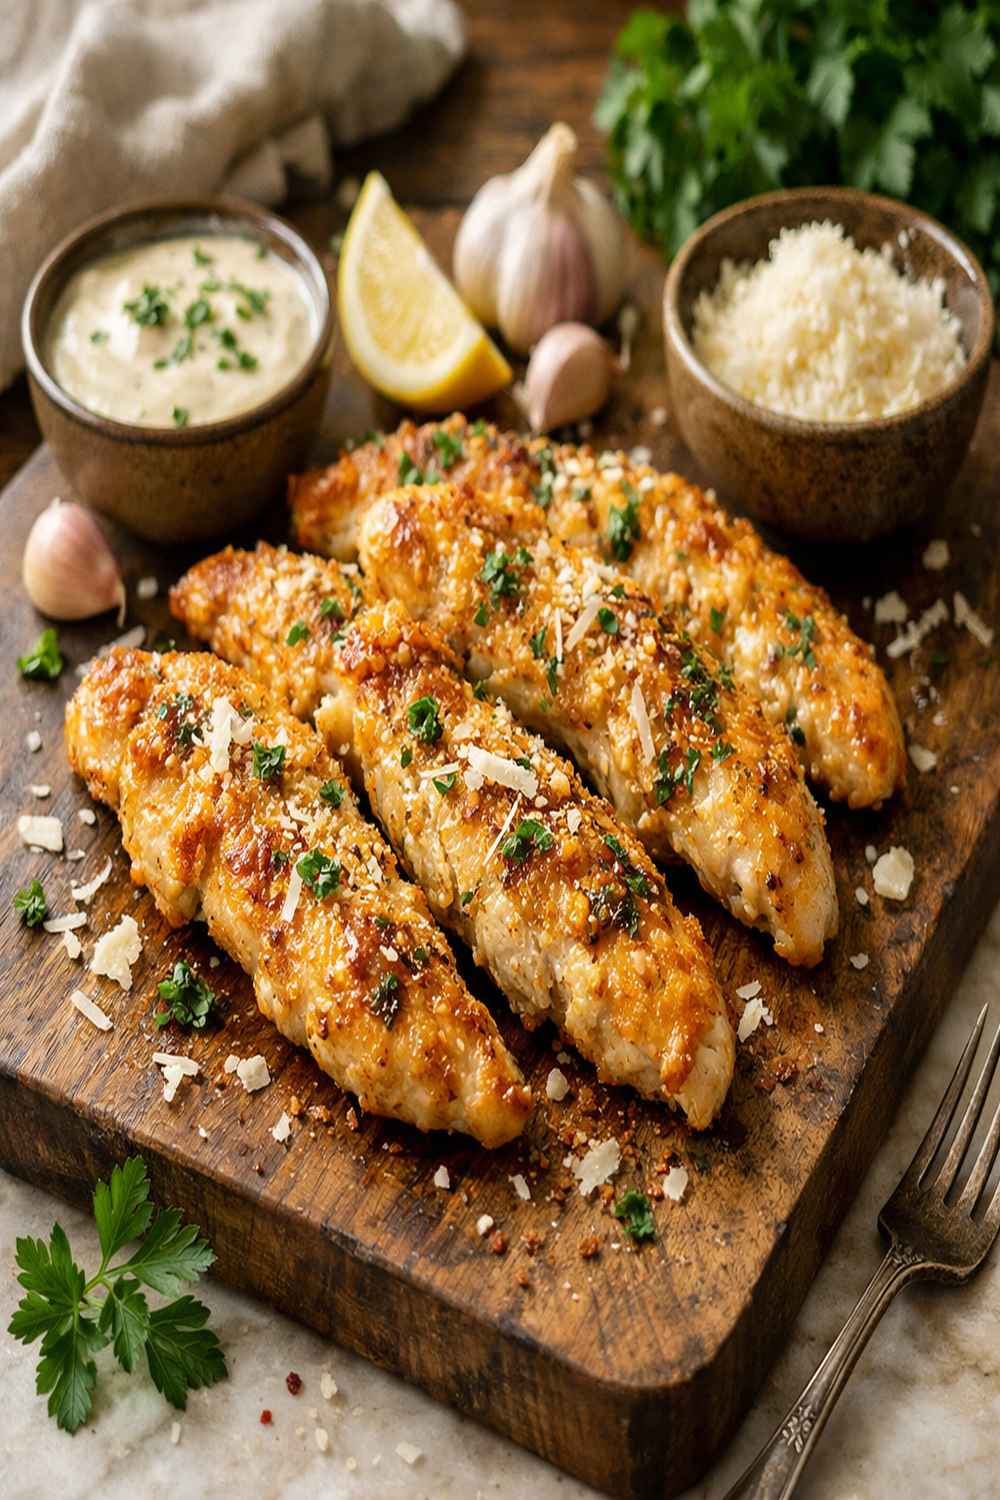
Why This Recipe Is Nutritionally Superior
I get asked constantly about “clean eating” recipes, and here’s my professional perspective: this dish IS clean eating. We’re using whole food ingredients with zero additives, and the nutritional profile is exactly what your body needs for sustained energy and muscle recovery. According to USDA nutritional data, chicken tenderloin provides more selenium and B vitamins than almost any other lean protein, supporting your metabolism and immune function.
- Lean Protein (40+ grams per serving) – supports muscle recovery, keeps you satiated for hours, and has a high thermic effect (your body burns calories just digesting it)
- Selenium (35% of daily value) – a powerful antioxidant that protects cells from damage and supports thyroid function
- Vitamin B12 (critical for energy) – this nutrient is ONLY found in animal proteins, making chicken an essential source for energy production and nervous system health
- Phosphorus and Calcium – the parmesan coating adds bone-supporting minerals without excessive fat
Ingredient Deep Dive
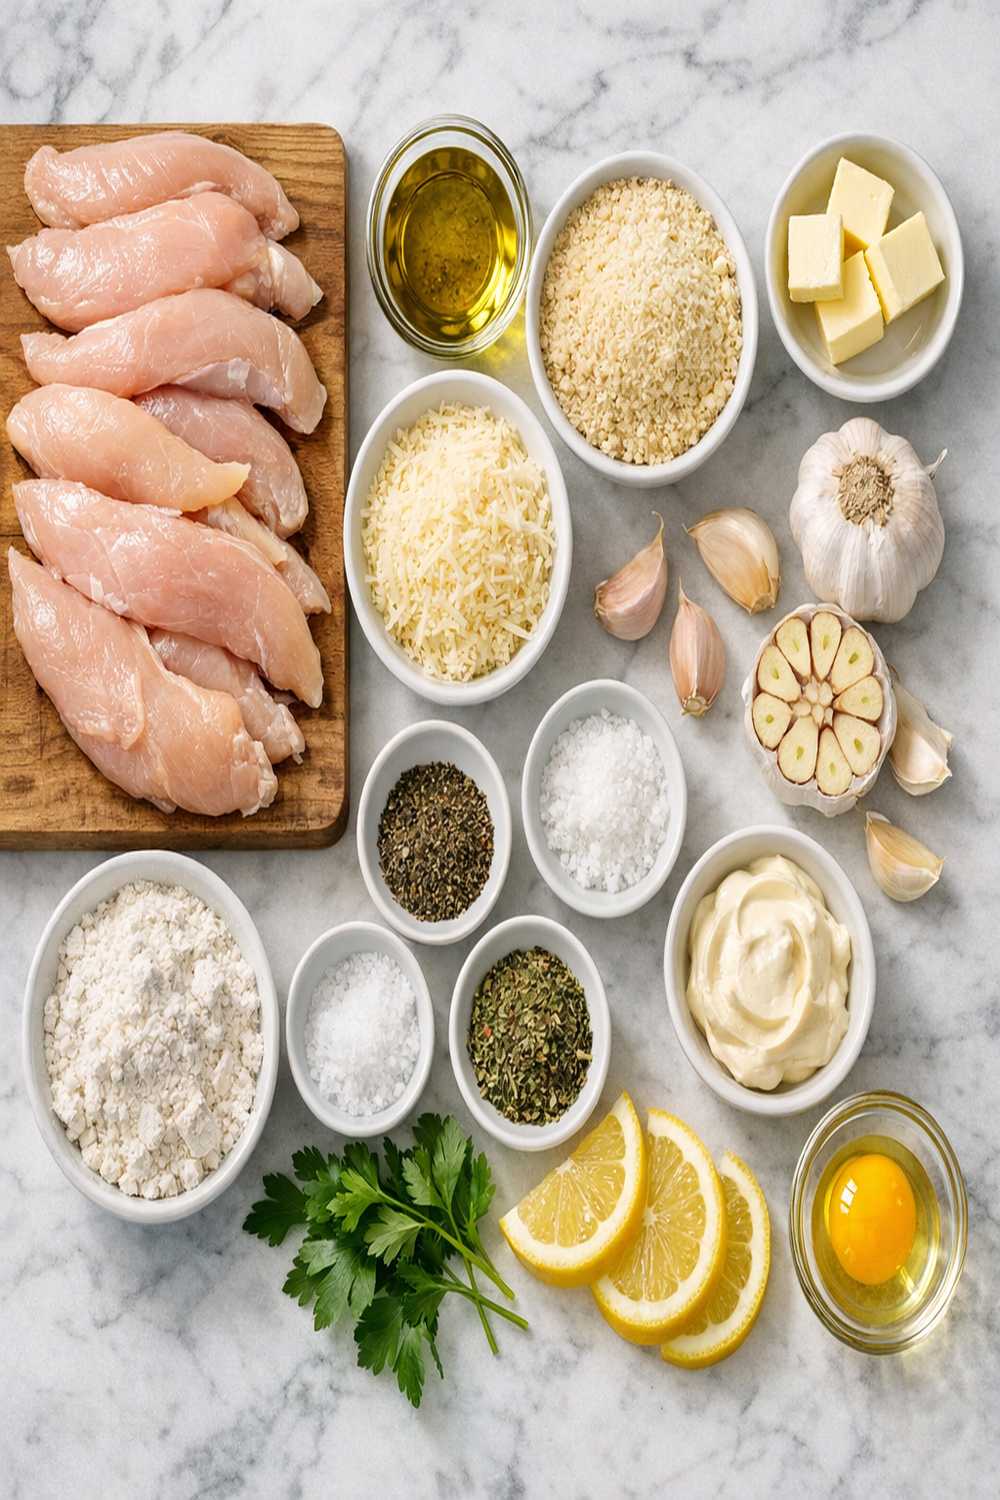
Every ingredient in this recipe serves a specific purpose—nothing is here by accident. Let me walk you through exactly what each component does so you understand the SCIENCE of why this works so beautifully together.
- 1 tablespoon fresh lemon juice (brightens flavors and adds a finishing touch that cuts through richness)
- 1/2 teaspoon salt (seasons the chicken and enhances the perception of umami flavors)
- 3/4 cup mayonnaise (acts as an emulsifier and moisture barrier, preventing the chicken from drying out while distributing heat evenly)
- 3/4 cup shredded parmesan cheese (creates the golden crust through the Maillard reaction while adding umami depth and calcium)
- 2.5 pounds chicken tenderloins (the small, tender strip of meat from the underside of the breast—cooks faster and more evenly than larger cuts)
- 1/4 teaspoon ground black pepper (optional but recommended—adds complexity and aids in flavor perception)
- 1 teaspoon garlic powder (concentrated garlic flavor that distributes evenly throughout the coating without adding moisture)
The Technique: How to Make Garlic Parmesan Chicken Tenderloin Recipe Properly
I’ve made this recipe hundreds of times, and I promise you—the technique is where the magic lives. There’s no complicated equipment needed, no special skills required. What MATTERS is understanding the WHY behind each step so you can troubleshoot if something goes slightly off. Let’s break this down together.
Step 1: Prepare Your Workspace and Preheat the Oven
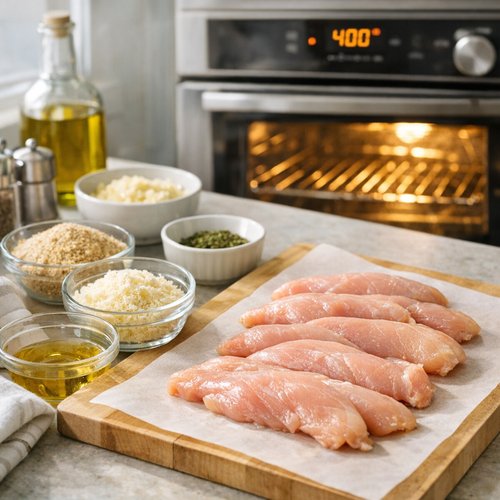
Start by preheating your oven to 400°F. This temperature is CRITICAL—it’s hot enough to develop that golden crust through the Maillard reaction (around 300°F+) but not so scorching that the exterior burns before the interior cooks through. While your oven is heating, line a large baking sheet with parchment paper or spray it with nonstick cooking spray. This step is NON-NEGOTIABLE because the mayo coating can stick to bare metal, making cleanup a nightmare and potentially damaging your tenderloins when you try to remove them.
Step 2: Create Your Flavor Coating
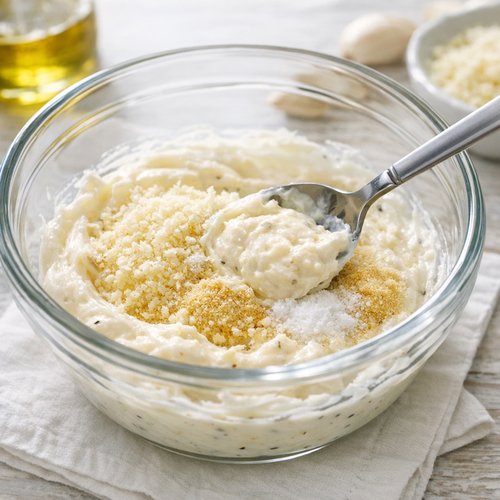
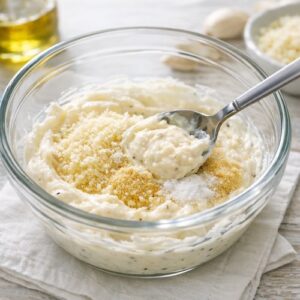
In a medium mixing bowl, combine 3/4 cup mayonnaise, 1/4 cup (half) of your parmesan cheese, 1 teaspoon garlic powder, and 1/2 teaspoon salt. Stir until COMPLETELY uniform—this ensures every piece of chicken gets equal seasoning. The mayo acts as your emulsifier here, meaning it bonds the solid ingredients together while staying creamy. This coating will cling to the chicken and create a protective seal. If your mixture seems too thick, it won’t coat evenly; if it’s too thin, the cheese will slide off. You want something that clings—almost like thick peanut butter consistency.
Step 3: Coat the Chicken Evenly
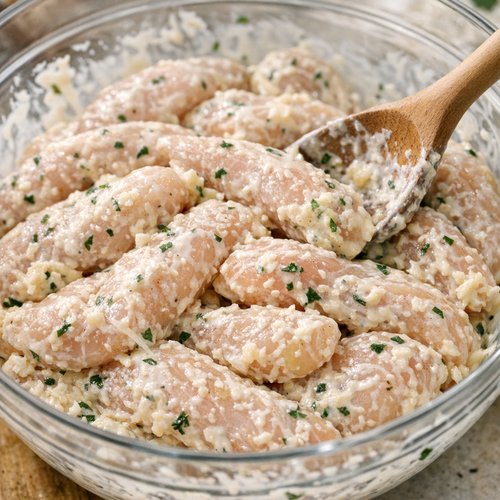
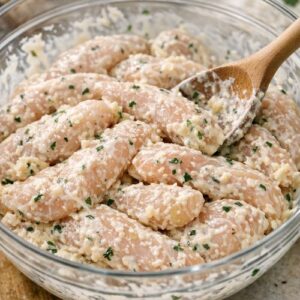
Add your 2.5 pounds of chicken tenderloins to the bowl and stir gently but thoroughly until EVERY piece is coated with the mayo mixture. This step requires patience—don’t just dump and hope. Make sure each tenderloin gets complete coverage on all sides. This coating is your insurance policy against dry chicken. The mayo will emulsify during baking, creating a creamy, flavorful exterior while keeping the interior moist.
Step 4: Arrange on the Baking Sheet
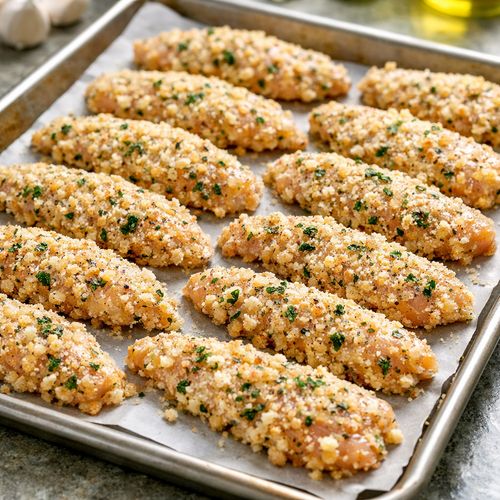
Spread your coated chicken pieces in a SINGLE LAYER on your prepared baking sheet. This is absolutely crucial for even cooking. If you overcrowd the pan, the pieces won’t develop that golden crust—they’ll steam instead. There should be at least 1 inch of space between each piece. The hot air needs to circulate completely around each tenderloin for even browning.
Step 5: Add the Final Cheese Layer
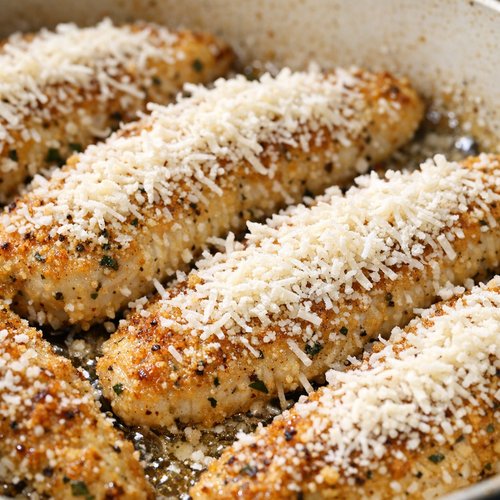
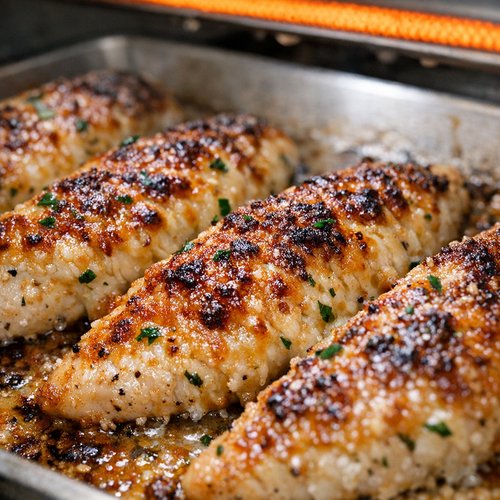
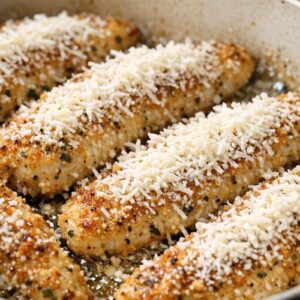
Sprinkle the remaining 1/2 cup of parmesan cheese evenly over the coated chicken. This is your visible golden crust—this layer is what makes people’s eyes light up when they see the finished dish. The cheese will melt slightly and brown, creating textural contrast and concentrated umami flavor. Don’t skip this step; it’s the difference between “good” and “restaurant quality.”
Step 6: Bake to Perfect Doneness
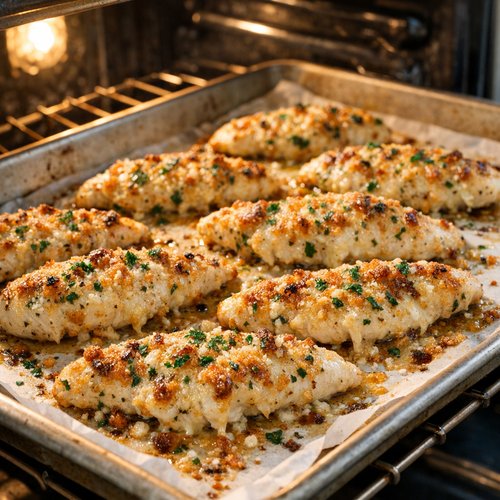
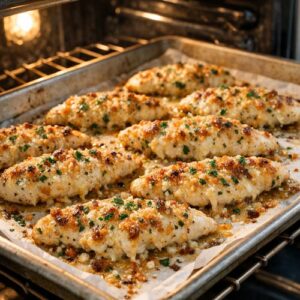
Place your baking sheet in the preheated 400°F oven for 15-25 minutes. The timing depends on the thickness of your tenderloins and your oven’s accuracy. Here’s my professional trick: START checking at 15 minutes using an instant-read meat thermometer. Insert the thermometer into the thickest part of the largest tenderloin without touching bone or the pan. When it reads 160°F, the chicken is safely cooked through. HOWEVER, I recommend removing the pan at 158°F and letting it rest for 3-5 minutes on the counter. This allows carryover cooking to bring it to exactly 160°F while the proteins relax—resulting in MORE MOISTURE retained inside.
Step 7: Optional Broil for Extra Crust (Advanced Technique)
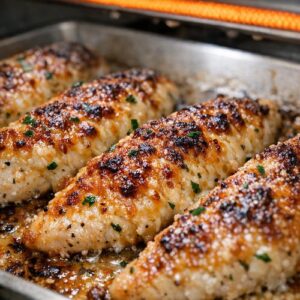
If you want a darker, crispier cheese crust, switch your oven to BROIL for the final 2-3 minutes. WATCH THIS LIKE A HAWK—I mean literally keep your eyes on it. Broiler intensity varies wildly between ovens, and the parmesan can go from golden to burnt in 90 seconds. If you’re new to this recipe, skip this step on your first attempt. Once you master the base recipe, THEN experiment with broiling.
Expert’s Nutritional Tip From My NYC Kitchen
Here’s something I’ve learned from working with hundreds of busy New Yorkers: the BIGGEST barrier to healthy eating isn’t knowing WHAT to eat—it’s making something so delicious that you actually WANT to cook it. This recipe removes that barrier completely. The combination of creamy mayo and umami-rich parmesan creates such a satisfying dish that you won’t crave takeout. From a metabolic standpoint, chicken tenderloin has the highest protein-to-calorie ratio of any chicken cut, and the parmesan adds calcium and selenium. This is a dish that makes your body feel NOURISHED, not deprived.
Make-Ahead Guide: Meal Prep Like a Pro
I get asked constantly about meal prepping this recipe, and yes—it’s ABSOLUTELY doable. Here’s my professional meal prep strategy:
Prepare the coating up to 2 days ahead: Mix your mayo, 1/4 cup cheese, garlic powder, and salt in a container. Store it in the refrigerator. This saves you prep time on cooking day and actually allows the flavors to meld more deeply.
Coat the chicken up to 8 hours ahead: If you’re prepping in the morning for dinner, you can coat the chicken and refrigerate it in a covered dish. The coating will adhere even better after sitting. Remove from the fridge 15 minutes before baking so the chicken reaches closer to room temperature for more even cooking.
Bake fresh the same day you serve: Don’t pre-bake this recipe—the texture won’t be as good. But the prep work being done means you’re literally 25 minutes away from dinner whenever you are.
Professional Tips From the Kitchen
- Pat your chicken completely dry before coating – any surface moisture will prevent the mayo coating from adhering properly and creates steam instead of browning. Use paper towels and press gently.
- Use room temperature mayo – cold mayo straight from the fridge is too thick to coat evenly. Let it sit on the counter for 10 minutes before mixing. Room temperature mayo spreads smoothly and clings to the chicken better.
- Invest in an instant-read meat thermometer – this is THE most important tool for foolproof chicken every single time. I recommend one with a thin probe so you get accurate readings without creating large holes in the meat. Temperature is never a guess—it’s measurable and reliable.
- Don’t crowd your baking sheet – I know it’s tempting to fit everything on one pan, but overcrowding prevents air circulation and creates steaming instead of roasting. Use two pans if needed.
- Let cooked chicken rest for 3-5 minutes before serving – this is when the carryover cooking happens and the proteins relax, keeping juices locked inside. Cutting immediately releases all that moisture onto the plate instead of into your chicken.
Common Mistakes to Avoid
Mistake #1: Using cold, wet chicken – I’ve seen people pull chicken straight from the package, shake off surface water, and immediately coat it. This moisture prevents proper adhesion of the mayo coating. ALWAYS pat your chicken completely dry with paper towels before coating. Dry chicken browns better, cooks more evenly, and tastes superior.
Mistake #2: Oven temperature too low – if your oven runs cool (and many do!), 375°F instead of 400°F means the exterior won’t develop that golden crust before the interior overcooks. Buy an inexpensive oven thermometer and check your actual temperature. This single tool has revolutionized countless home kitchens I’ve worked with.
Mistake #3: Skipping the rest period – this is so important I’m saying it twice. When you cut into chicken immediately after cooking, all the hot juice escapes. Waiting 3-5 minutes allows the proteins to relax and reabsorb moisture. The difference between juicy and dry chicken is often just THESE MINUTES.
Mistake #4: Not using a meat thermometer – “eyeballing” doneness by color is unreliable. Some ovens run hot, some cool. Tenderloins vary in thickness. Temperature is the ONLY objective measure. Period. Get a thermometer. Use it every time. Never guess again.
Ingredient Substitutions and Their Impact
- Mayonnaise -> Greek yogurt or sour cream: This creates a slightly tangier flavor and less rich texture. The coating will be thinner and less creamy, so add a tiny bit more to compensate. The chicken will still stay moist, but you’ll lose some of that silky exterior. Nutrition-wise, Greek yogurt adds protein and probiotics.
- Parmesan cheese -> Pecorino Romano: This swap makes the dish significantly saltier and more peppery. Use only 1/2 cup instead of 3/4 cup to avoid over-salting. The crust will be crispier and more assertive in flavor.
- Garlic powder -> Fresh minced garlic: Use 3 cloves minced fresh garlic. Fresh garlic adds moisture and stronger flavor, so you might need to add 2 tablespoons more parmesan to compensate for the extra liquid. The flavor will be fresher and more aromatic.
- Salt -> Soy sauce: Use 1 tablespoon soy sauce instead of 1/2 teaspoon salt. This adds umami depth and a slight Asian flair. The liquid will make your coating thinner, so reduce mayo slightly to 1/2 cup.
Seasonal Variations
Spring/Summer Version: Add 2 tablespoons fresh basil, 1 tablespoon fresh lemon zest, and 1/4 teaspoon red pepper flakes to your mayo coating. Serve with a bright salad. The herbs lighten the dish without compromising that creamy coating.
Fall/Winter Version: Add 1/4 teaspoon smoked paprika, 1/4 teaspoon cayenne, and 1 tablespoon grated Pecorino Romano to your coating. The smokiness becomes especially comforting when it’s cold outside.
Year-Round Italian Version: Mix 2 tablespoons fresh Italian parsley into your mayo coating and sprinkle fresh herb blend (parsley, oregano, basil) over the top instead of just cheese. This adds freshness and visual appeal.
Dietary Adaptations
Gluten-Free: This recipe is NATURALLY gluten-free—all ingredients are inherently free of wheat or gluten-containing products. The only thing to verify is your specific mayo and parmesan brands, as some may contain additives. Check labels to be certain.
Dairy-Free Adaptation: Replace the parmesan with nutritional yeast (same amount) for that umami, savory element. Use dairy-free mayo or coconut mayo. The texture will be slightly different—less crispy, more creamy—but still delicious. This adaptation works surprisingly well.
Lower-Calorie Version: Replace mayo with equal parts Greek yogurt mixed with a small amount of mayo (1/2 cup yogurt plus 1/4 cup mayo). This cuts calories significantly while maintaining moisture. The protein content actually INCREASES from the yogurt. Use reduced-fat parmesan if available.
Paleo/Whole30 Compliant Version: This is trickier because traditional mayo contains refined seed oils. Use avocado oil-based mayo or make your own mayo with avocado oil. Replace parmesan with nutritional yeast or simply coat with avocado oil, salt, and garlic powder, then top with crushed nuts instead of cheese for texture. It’s a different dish but still delicious.
Can I Store Garlic Parmesan Chicken Tenderloin Recipe?
Yes! Here’s the science of proper storage: the parmesan crust is your protection. As long as you store cooked chicken in an airtight container, the exterior crust helps seal in moisture and prevents bacterial growth.
Refrigerator Storage (3-4 days): Place cooled chicken in an airtight container. The parmesan crust will soften slightly but remains delicious. Reheat gently in a 300°F oven for 8-10 minutes to restore some crispiness without drying out the meat.
Freezer Storage (up to 3 months): Cool completely, then place in a freezer-safe container with parchment paper between layers. Freeze for up to 3 months. The quality is best within the first month. Thaw in the refrigerator overnight, then reheat as above.
DO NOT store uncooked coated chicken for more than 8 hours – the mayo coating will break down and separate, creating a greasy mess rather than a creamy coating.
Nutrition Information
Based on USDA nutritional data per serving (approximately 1 tenderloin or 5 ounces of cooked chicken plus coating):
Calories: 285 | Protein: 42g | Fat: 12g | Carbohydrates: 1g | Fiber: 0g | Sodium: 420mg | Selenium: 35% of daily value | Vitamin B12: 30% of daily value | Calcium: 280mg | Phosphorus: 380mg
This macronutrient breakdown is IDEAL for someone following a high-protein, lower-carb eating pattern. The 42 grams of protein per serving means your muscles have the amino acids they need for repair and growth. The relatively low fat (12g) is primarily unsaturated fat from the mayo, making this a truly balanced dish. The selenium content supports thyroid function and acts as an antioxidant. One serving meets your daily selenium needs and provides critical B vitamins for energy production.
What Can I Serve With Garlic Parmesan Chicken Tenderloin Recipe?
The beauty of this dish is its versatility. The creamy, umami-rich coating pairs beautifully with bright, acidic, or starchy sides. Here’s my professional approach to flavor balancing:
- Roasted asparagus with balsamic reduction – the acidic balsamic cuts through the richness of the parmesan while asparagus’s slight bitterness creates flavor complexity. These vegetables contain compounds that aid fat digestion.
- Lemon herb rice or orzo – the starch provides satiety while lemon brightness prevents the meal from feeling heavy. This pairing is a classic because the flavors actually enhance each other through contrast.
- Arugula salad with shallot vinaigrette – the peppery arugula and acidic vinaigrette balance the umami-rich chicken, creating a complete flavor profile. Raw vegetables add digestive enzymes and phytonutrients.
- Roasted cherry tomatoes and zucchini – summer vegetables add freshness and nutrients while their natural sweetness complements the savory chicken.
- Creamy cauliflower rice or mashed potatoes – if you want to stay in the creamy family, these provide comfort while keeping the meal nutritionally balanced. The best chicken gravy recipe would also pair beautifully if you want to get fancy.
- Sautéed spinach with garlic – the iron from spinach complements the chicken’s nutrients while garlic echoes your chicken’s seasoning for flavor cohesion.
For a complete meal, pair this chicken with a starch (rice, potatoes, bread) and a vegetable or salad. The ratio I recommend is: 1/3 protein (your chicken), 1/3 starch, 1/3 vegetables. This creates balanced nutrition and satisfying portions.

Garlic Parmesan Chicken Tenderloin Recipe
Ingredients
Method
- Start by preheating your oven to 400°F. This temperature is CRITICAL—it's hot enough to develop that golden crust through the Maillard reaction (around 300°F+) but not so scorching that the exterior burns before the interior cooks through. While your oven is heating, line a large baking sheet with parchment paper or spray it with nonstick cooking spray. This step is NON-NEGOTIABLE because the mayo coating can stick to bare metal, making cleanup a nightmare and potentially damaging your tenderloins when you try to remove them.
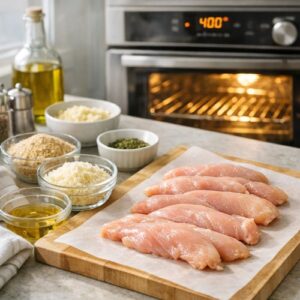
- In a medium mixing bowl, combine 3/4 cup mayonnaise, 1/4 cup (half) of your parmesan cheese, 1 teaspoon garlic powder, and 1/2 teaspoon salt. Stir until COMPLETELY uniform—this ensures every piece of chicken gets equal seasoning. The mayo acts as your emulsifier here, meaning it bonds the solid ingredients together while staying creamy. This coating will cling to the chicken and create a protective seal. If your mixture seems too thick, it won't coat evenly; if it's too thin, the cheese will slide off. You want something that clings—almost like thick peanut butter consistency.
- Add your 2.5 pounds of chicken tenderloins to the bowl and stir gently but thoroughly until EVERY piece is coated with the mayo mixture. This step requires patience—don't just dump and hope. Make sure each tenderloin gets complete coverage on all sides. This coating is your insurance policy against dry chicken. The mayo will emulsify during baking, creating a creamy, flavorful exterior while keeping the interior moist.
- Spread your coated chicken pieces in a SINGLE LAYER on your prepared baking sheet. This is absolutely crucial for even cooking. If you overcrowd the pan, the pieces won't develop that golden crust—they'll steam instead. There should be at least 1 inch of space between each piece. The hot air needs to circulate completely around each tenderloin for even browning.
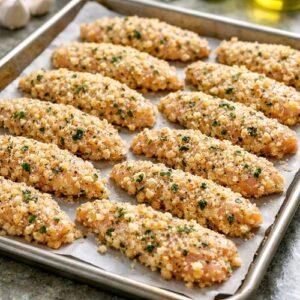
- Sprinkle the remaining 1/2 cup of parmesan cheese evenly over the coated chicken. This is your visible golden crust—this layer is what makes people's eyes light up when they see the finished dish. The cheese will melt slightly and brown, creating textural contrast and concentrated umami flavor. Don't skip this step; it's the difference between "good" and "restaurant quality."
- Place your baking sheet in the preheated 400°F oven for 15-25 minutes. The timing depends on the thickness of your tenderloins and your oven's accuracy. Here's my professional trick: START checking at 15 minutes using an instant-read meat thermometer. Insert the thermometer into the thickest part of the largest tenderloin without touching bone or the pan. When it reads 160°F, the chicken is safely cooked through. HOWEVER, I recommend removing the pan at 158°F and letting it rest for 3-5 minutes on the counter. This allows carryover cooking to bring it to exactly 160°F while the proteins relax—resulting in MORE MOISTURE retained inside.
- If you want a darker, crispier cheese crust, switch your oven to BROIL for the final 2-3 minutes. WATCH THIS LIKE A HAWK—I mean literally keep your eyes on it. Broiler intensity varies wildly between ovens, and the parmesan can go from golden to burnt in 90 seconds. If you're new to this recipe, skip this step on your first attempt. Once you master the base recipe, THEN experiment with broiling.
Notes
FAQs
Why is my chicken coming out dry even though I’m following the recipe?
This almost always comes down to overcooking—either your oven is running hotter than 400°F, or you’re leaving the chicken in too long. GET A MEAT THERMOMETER. Seriously, this is the fix. Cook to 158°F internal temperature and remove immediately. Let it rest 5 minutes while carryover cooking brings it to 160°F. The rest period is CRUCIAL. Also, make sure you’re patting your chicken completely dry before coating—moisture prevents proper heat transfer.
Can I use chicken breasts instead of tenderloins?
Technically yes, but they’ll take longer (25-35 minutes) and are harder to cook evenly because they’re thicker. You’ll need to pound them to even thickness first. Tenderloins are genuinely faster and more forgiving. That said, if breasts are what you have, pound them to 3/4-inch thickness and increase baking time to 25-30 minutes.
What if I don’t have an instant-read thermometer?
Please buy one. They cost $15-30 and will literally change your cooking life. BUT if you don’t have one right now: the chicken is done when there’s no pink inside and the juices run clear. However, this is unreliable for home cooks. I’m not trying to be dramatic—I genuinely recommend getting a thermometer before making this recipe again. It takes the guesswork out of food safety.
Why is my parmesan crust not browning?
Your oven might be running cool. Use an oven thermometer to verify that it’s actually reaching 400°F. If it’s running cool, increase the temperature 25°F. Also, make sure you’re spreading the parmesan cheese in an even layer—thick patches brown faster than thin ones. And don’t overcrowd the pan; spacing allows air circulation needed for browning.
Can I make this recipe in advance and reheat it?
Yes! Store in an airtight container in the refrigerator for up to 4 days. Reheat gently in a 300°F oven for 8-10 minutes. The parmesan crust will soften but the chicken will stay moist. I don’t recommend microwaving because it can make the coating rubbery, but a gentle oven reheat restores the original texture beautifully. You can also eat it cold—it’s actually delicious straight from the fridge for lunch.
More Recipes You’ll Love
- Baked Dijon Chicken Recipe with Creamy Mustard Sauce – another one-pan chicken dish using a similar emulsified coating technique for tender, flavorful results
- Best Beef Noodle Recipe – if you want to explore umami-rich, restaurant-quality proteins beyond chicken
- Beef Teriyaki Recipe With Teriyaki Sauce – another quick-cooking protein perfect for busy weeknights
- Italian Easter Pie – a savory dish featuring parmesan and eggs for when you want to expand your weeknight repertoire
Final Thoughts: Making This Recipe Your Own
This garlic parmesan chicken tenderloin recipe has become my secret weapon for those nights when I want something that feels indulgent but IS actually nourishing. Years of working with busy New Yorkers taught me that the best recipe isn’t the fanciest one—it’s the one that actually gets MADE. This recipe wins because it’s simple enough for a Tuesday night but impressive enough for a Friday dinner with friends.
I want you to know that cooking mastery isn’t about expensive equipment or complicated techniques. It’s about understanding WHY each step matters, following temperature guidelines instead of guessing, and giving yourself permission to rest that chicken because THOSE MINUTES matter. When you understand the science behind your cooking, you stop being afraid. You start experimenting confidently. You become the person who actually cooks.
Let’s make cooking a breeze!
