Ingredients
Method
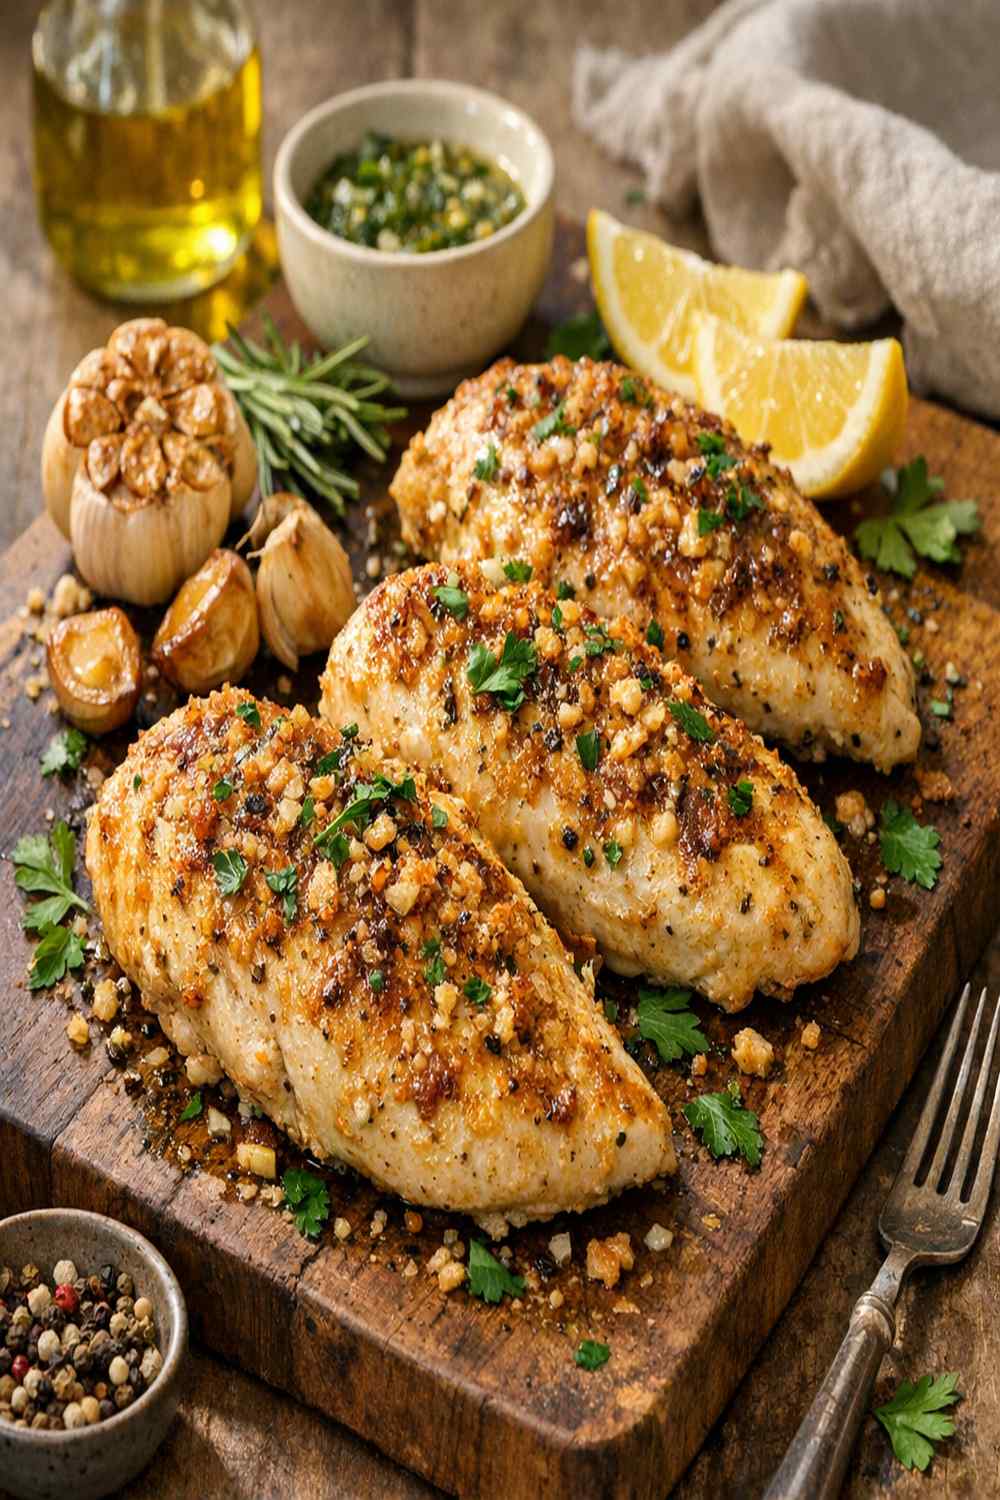
Step 1: Prep Your Chicken and Season the Base Layer
- Remove your chicken breasts from the refrigerator 10-15 minutes before cooking. This is CRITICAL—room temperature chicken cooks more evenly than cold chicken straight from the fridge. While they're warming up, take paper towels and pat each breast completely dry on both sides. Moisture will literally prevent browning, so don't skip this. Pat them like you mean it. On a clean cutting board or plate, season both sides of each chicken breast generously with kosher salt, freshly ground black pepper, and ½ teaspoon of paprika divided among the three breasts. Don't be shy with the salt—it seasons the chicken from the inside out and helps retain moisture during cooking. Set the seasoned chicken aside.

Step 2: Make Your Garlic Butter Mixture
- In a small bowl, combine your 4 tablespoons of melted butter with the minced garlic, Italian seasoning, remaining ¼ teaspoon paprika, and chopped fresh parsley. Stir it well and set it aside—this is your flavor bomb, and you'll use it to baste the chicken during the final baking stage. The heat from the melted butter will gently infuse the garlic flavor throughout, creating that restaurant-quality sauce. If you melt the butter in the microwave, let it cool for just 30 seconds before mixing with the fresh herbs so they don't wilt completely.

Step 3: Preheat Your Oven to 400°F
- This is your signal to turn on the oven NOW, even before you start searing. Your oven needs 10-15 minutes to reach full temperature. A properly preheated oven is NON-NEGOTIABLE for even cooking. If you skip this, your chicken will bake at a lower temperature initially, which means the cooking time becomes unpredictable and your results become inconsistent.
Step 4: Heat Your Skillet and Sear the Chicken
- Place your cast iron skillet (or heavy oven-safe skillet—this is important because it needs to go directly into the oven) on the stovetop over medium heat. Add 1 tablespoon of extra virgin olive oil and let it heat for about 1 minute. You'll know it's ready when you place your hand a few inches above the pan and feel significant heat—you're not looking for smoking oil, just shimmering oil with real heat behind it. Carefully place each seasoned chicken breast into the hot skillet. DON'T MOVE THEM. Let them sear undisturbed for 1-2 minutes on the first side. You're building that Maillard reaction crust that I mentioned earlier—interrupting it by flipping constantly ruins the whole point. After 1-2 minutes, flip each breast carefully and sear the other side for 1-2 minutes. You're not trying to cook them all the way through—just create that golden exterior. The chicken will still be pale in the very center, and that's EXACTLY what you want.

Step 5: Pour in the Garlic Butter and Transfer to the Oven
- Once both sides of each chicken breast have that beautiful golden color, carefully pour your garlic butter mixture over the top of the chicken. The butter will sizzle—that's the sound of flavor happening. If you want extra insurance against dryness, add ¼ cup of low-sodium chicken broth to the pan at this point. Now comes the magic moment: transfer the entire skillet to your preheated 400°F oven. Use an oven mitt because the handle WILL be hot. Bake for 18-22 minutes, depending on the thickness of your chicken breasts. We'll talk about exactly how to know when it's done in the next section.

Step 6: Baste and Rest
- Halfway through baking (around the 10-minute mark), carefully remove the skillet from the oven and use a spoon to baste the chicken—basically, spoon some of that gorgeous garlic butter that's accumulated in the pan back over the top of each breast. This keeps everything moist and distributes the flavor. Return it to the oven and finish cooking. When the chicken reaches the safe internal temperature (we'll discuss this in detail next), remove it from the oven and let it rest in the skillet for 3-5 minutes. This allows the juices to redistribute throughout the meat, which means when you cut into it, those juices stay INSIDE the chicken instead of running all over your plate. This resting period is why restaurant chicken tastes so much juicier than home-cooked chicken.

Notes
- Skipping the searing step or using low heat—this is the number one reason people end up with pale, flavorless chicken. If your oil isn't shimmering and your heat isn't medium or higher, your chicken won't brown. LOW and SLOW is great for pulled pork, but NOT for this technique. You need real heat for 2-3 minutes to develop that crust. If your heat is too low, you'll steam the chicken instead of searing it.
- Cooking chicken straight from the refrigerator—cold chicken has uneven internal temperature, which means the edges overcook before the center reaches safe temperature. Always bring chicken to room temperature for 10-15 minutes before cooking. This is especially important with this recipe because we're using a relatively high oven temperature. Room temperature chicken gives you a buffer zone for perfect doneness.
- Not patting the chicken completely dry before searing—I cannot stress this enough. Water and browning do not coexist. You will NEVER get a proper crust if there's moisture on the surface. Use paper towels aggressively. This step takes 30 seconds and changes EVERYTHING.
- Opening the oven door repeatedly to check on the chicken—every time you open the door, you drop the internal oven temperature by 25-50 degrees. This extends cooking time unpredictably. Set a timer and check only once, at the 18-minute mark. Trust the process.