
Garlic Chicken Rice Recipe
This post contains affiliate links. As an Amazon Associate I earn from qualifying purchases.
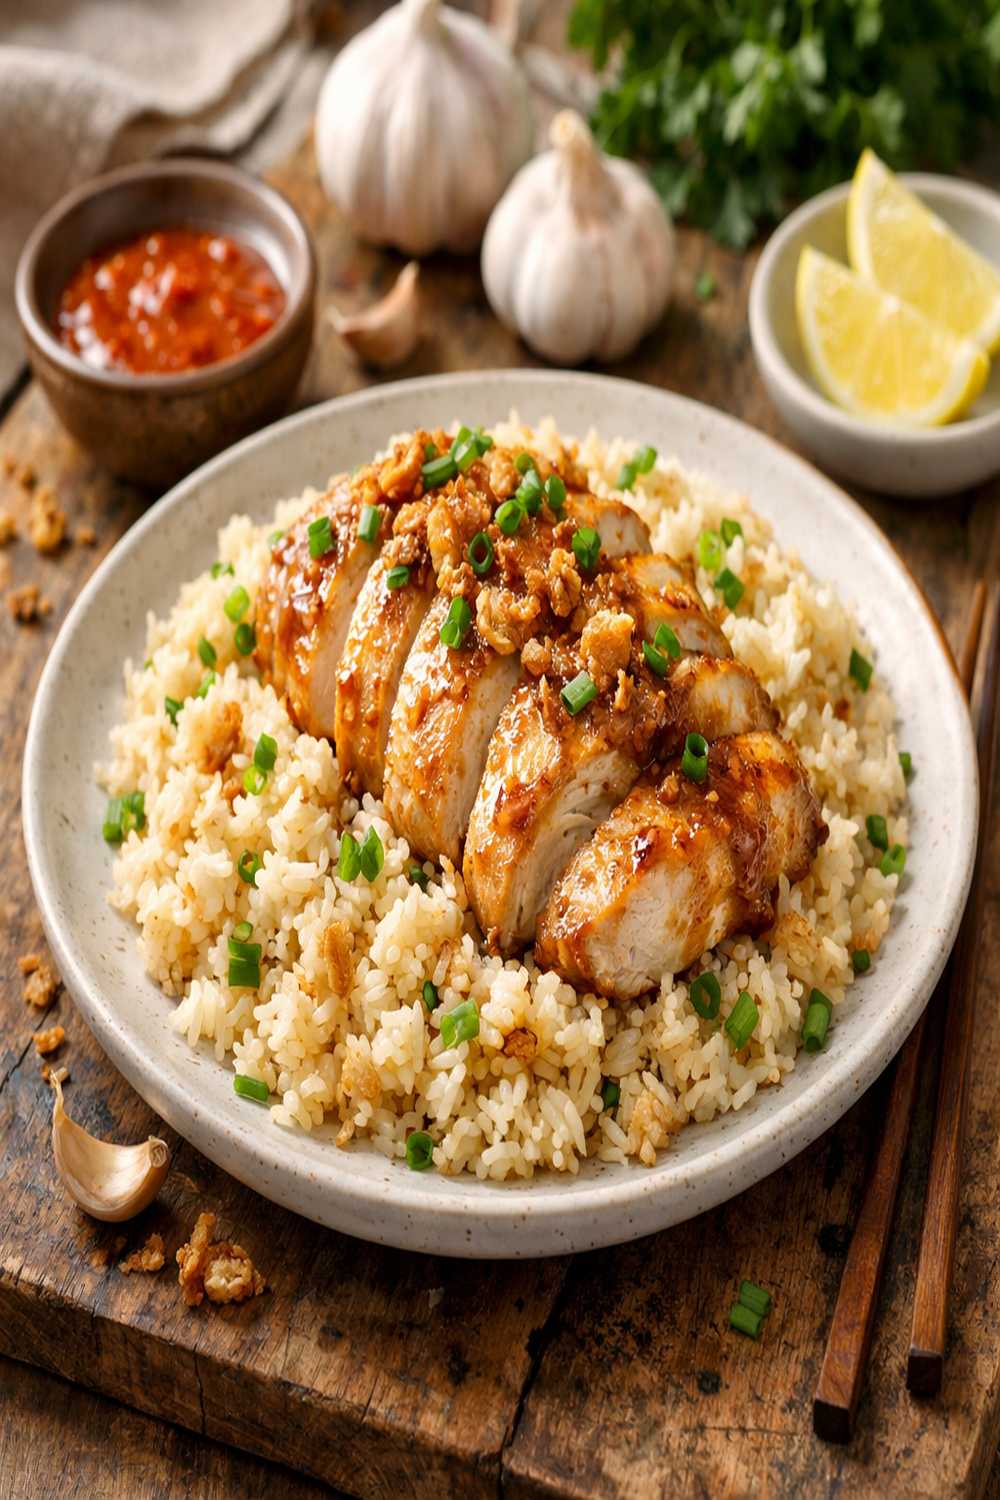
I remember standing in my tiny East Village kitchen at 7 PM on a Tuesday, staring at a sad container of rotisserie chicken and wondering how I could turn it into something that didn’t feel like leftovers. That night, I threw together garlic, rice, and cream, and something MAGICAL happened—one of my go-to weeknight dinners was born. If you’ve ever made chicken and rice at home only to end up with mushy, flavorless rice or dry chicken that nobody wanted to eat, I’m speaking your language. This recipe fixes ALL of that.
Why Your Garlic Chicken Rice Never Turns Out Right (And How to Fix It)
Here’s what I see happen most often: home cooks either end up with rice that’s either crunchy and undercooked OR mushy and waterlogged. The chicken gets overcooked and rubbery. The whole dish tastes flat because the garlic gets lost in the shuffle. As a registered dietitian who works with busy New Yorkers, I’ve cracked the code on this one. The secret isn’t complicated—it’s about TIMING, TECHNIQUE, and understanding why each step matters. Let me walk you through it.
What Makes This Garlic Chicken Rice Recipe Different?
This recipe uses a one-pan technique that cooks everything together in the SAME liquid, which means the rice absorbs all the garlic-infused chicken broth while the chicken stays juicy. Most recipes cook these components separately, which wastes time and flavor. Here’s the game-changer: we sear the chicken first to lock in juices, add fresh minced garlic right after (so it blooms in the hot oil), then build the rice directly into that same pan with low-sodium broth. The cream gets stirred in at the END, just long enough to warm through, which means it won’t break or separate. Fresh spinach wilts right in, and Parmesan finishes it with a nutty, savory punch. Everything cooks together in roughly 30 minutes from start to table.
Before You Start: What You Need to Know
There are TWO critical things most recipes skip that will make or break this dish for you. Pay attention here, because these details separate “I made this and it was fine” from “I made this and everyone asked for seconds.”
- Use low-sodium broth, always. When you’re reducing liquid in a pan, regular broth concentrates its salt content and can quickly become inedible. Low-sodium broth gives you control over seasoning and prevents oversalting.
- Cut your chicken into roughly equal-sized cubes. Uneven pieces cook unevenly—some will be dry while others are still pink inside. Uniformity ensures everything finishes at the same time.
The Ingredients
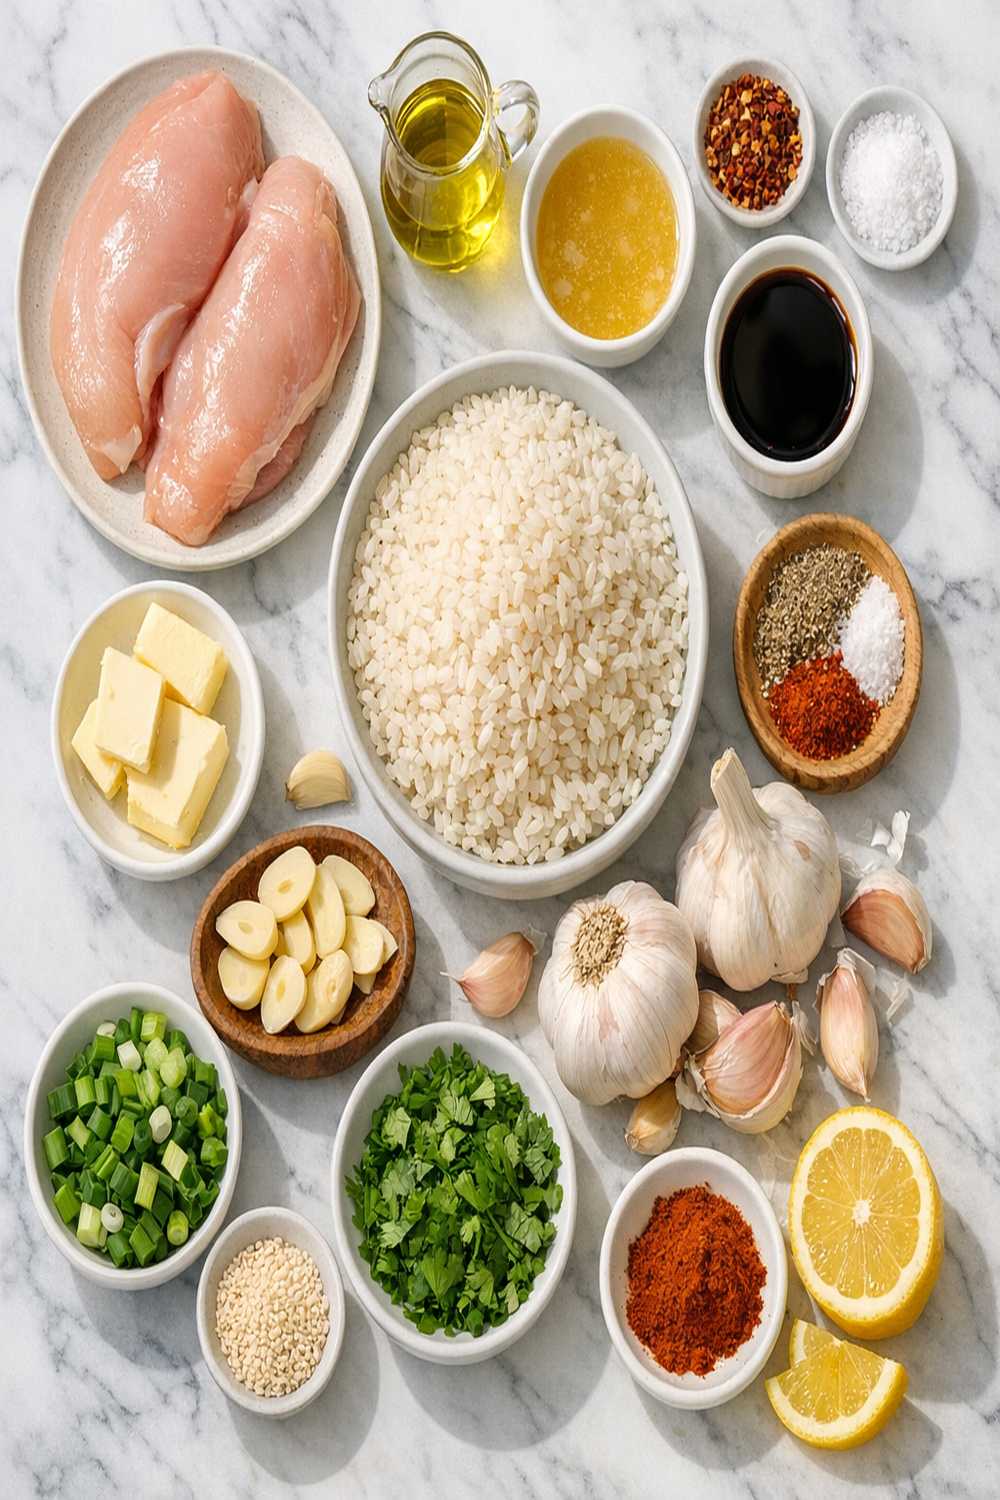
I’ve chosen each ingredient here for a specific reason—not just flavor, but nutrition, texture, and how everything works TOGETHER in one pan. This recipe serves 4 people generously, with potential for lunch leftovers.
- ¼ cup freshly grated Parmesan cheese (freshly grated melts smoothly; pre-shredded contains anti-caking agents)
- 3 cups low-sodium chicken broth (room temperature or cold, never hot from the carton)
- 1 cup dry white rice (medium or long-grain works best; avoid minute rice which turns mushy)
- 1 pound boneless, skinless chicken breasts (cut into 1-inch cubes for even cooking)
- 2 cups fresh spinach (loosely packed, baby spinach wilts faster than chopped mature spinach)
- 1 tablespoon olive oil or cooking spray (for searing without sticking)
- ½ cup heavy cream (full-fat, not half-and-half, which can curdle more easily)
- ¼ teaspoon ground black pepper (freshly ground tastes significantly better than pre-ground)
- ¾ teaspoon garlic salt (provides both salt and garlic flavor simultaneously)
- 4 cloves fresh garlic (minced very finely so it blooms quickly in hot oil)
Step-by-Step: How to Make Garlic Chicken Rice Recipe Without Fail
I’m going to walk you through this in a way that builds confidence with every step. You’ve got this. By the time you finish, you’ll understand not just WHAT to do, but WHY each action matters. That’s how you become someone who can cook this recipe in your sleep.
Step 1: Season Your Chicken Properly
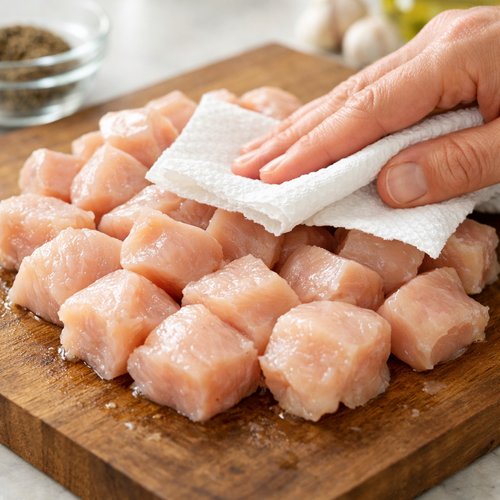
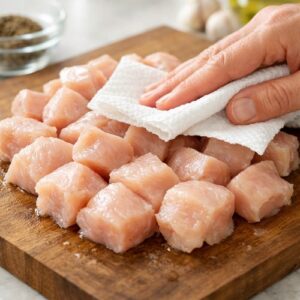
Pat your cubed chicken dry with paper towels—this is non-negotiable. Moisture on the surface prevents browning and steams the chicken instead of searing it. Once dry, sprinkle the garlic salt and black pepper evenly over all pieces. Don’t underseasoning here; the seasoning happens NOW, not at the end. This ensures flavor penetrates the meat as it cooks.
Step 2: Sear the Chicken Until Golden
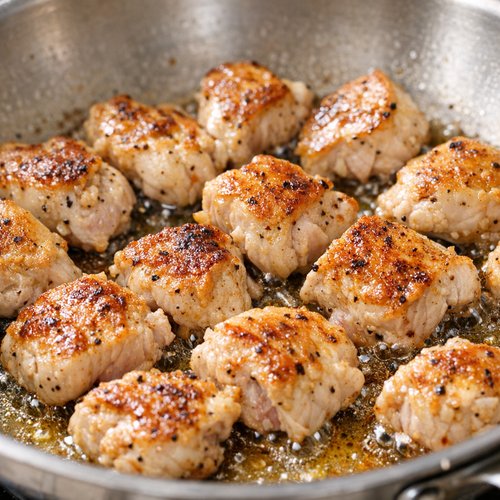
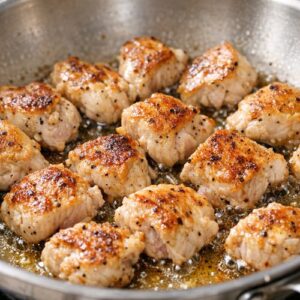
Heat a large skillet (12 inches is ideal) over medium-high heat. Add your olive oil or cooking spray and let it get HOT—you should see a slight shimmer across the pan. This takes about 1 minute. Working in batches if needed, place seasoned chicken cubes in the pan in a single layer. DO NOT move them around for the first 2-3 minutes. Let them SIT. This develops a golden-brown crust that locks in juices. After 2-3 minutes, flip each piece and cook another 2-3 minutes. The chicken doesn’t need to be fully cooked through at this stage—you’re looking for golden-brown exteriors and an internal temperature around 140-145°F (it will finish cooking when the rice cooks). Remove chicken to a clean plate.
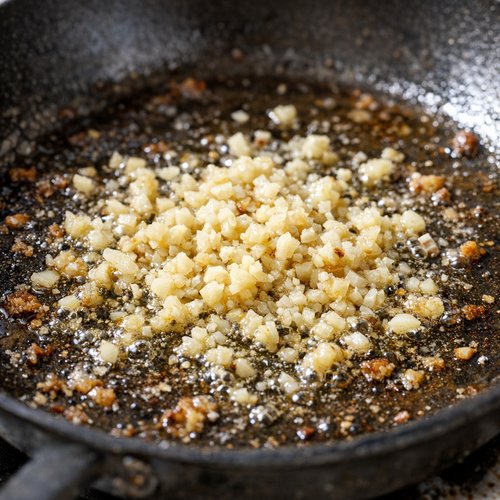
Step 3: Bloom the Garlic
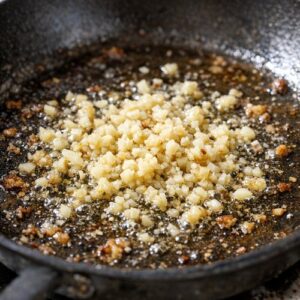
Return the same skillet to medium heat (reduce from medium-high). Add your minced fresh garlic directly to the remaining oil and butter bits. This step is called “blooming,” and it’s where garlic transforms from raw and harsh to mellow and sweet. Stir constantly for exactly 1 minute—no more, no less. You want fragrant, light golden garlic, NOT browned or burnt garlic (which tastes bitter). Your kitchen should smell INCREDIBLE right now.
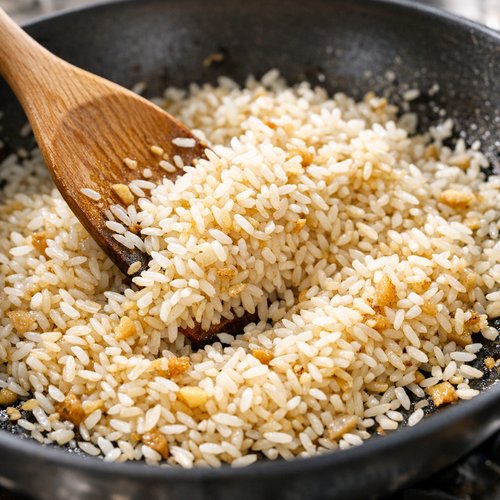
Step 4: Add Rice and Toast It Briefly
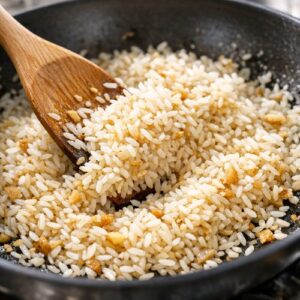
Pour your dry rice directly into the pan with the bloomed garlic. Stir constantly for 1-2 minutes. You’re lightly toasting the rice grains, which adds a subtle nutty flavor and helps each grain stay separate during cooking instead of clumping together. The rice will look slightly translucent around the edges when it’s ready.
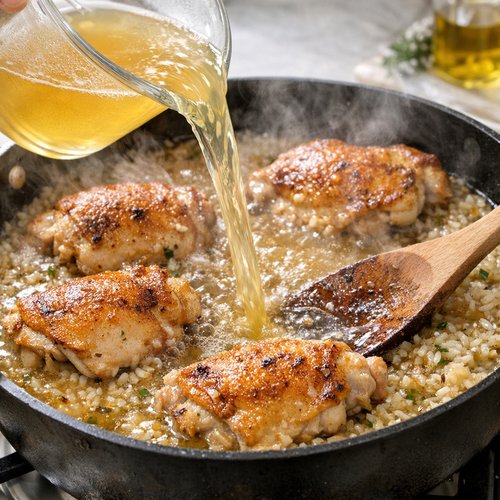
Step 5: Add Broth and Return Chicken
Pour in your 3 cups of low-sodium chicken broth. Be careful—it will steam and bubble. Scrape the bottom of the pan with a wooden spoon to loosen any browned bits (called fond), which add huge flavor. Return your seared chicken pieces to the pan, nestling them into the rice. The liquid should come up to about ½ inch above the rice surface. Stir everything together once.
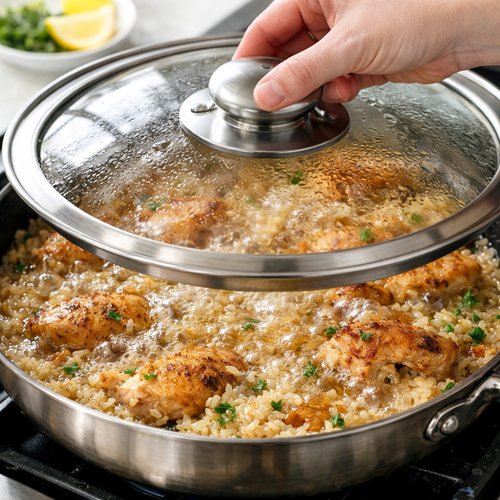
Step 6: Bring to a Boil, Then Cover and Simmer
Increase heat to high until you see a full rolling boil. Once boiling, immediately reduce heat to low, cover the pan with a lid (or foil if you don’t have a lid), and set a timer for 12-15 minutes. Do NOT peek or stir. This is crucial—you’re creating a gentle steam environment where rice cooks evenly. Peeking releases steam and disrupts cooking.
Step 7: Check for Doneness and Add Cream and Spinach
After 12 minutes, carefully lift the lid (watch for steam!) and check if most of the liquid has been absorbed. The rice should look tender and the chicken should reach an internal temperature of 165°F with a meat thermometer. If there’s still excess liquid, cover and cook another 2-3 minutes. Once the rice is nearly tender and liquid is mostly gone, remove from heat. Pour in your heavy cream and add the fresh spinach. Stir gently until spinach wilts (about 1-2 minutes of gentle stirring). The residual heat will wilt the spinach without overcooking it.
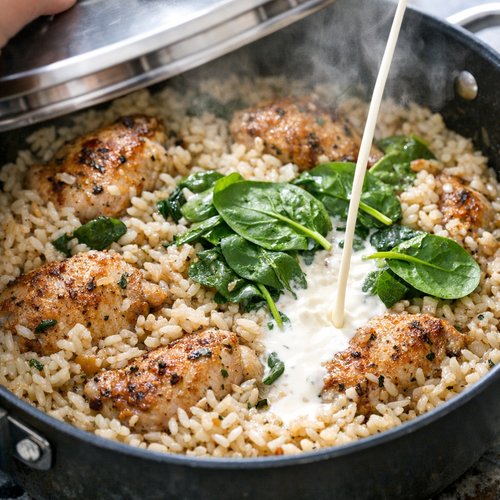
Step 8: Finish With Parmesan and Serve
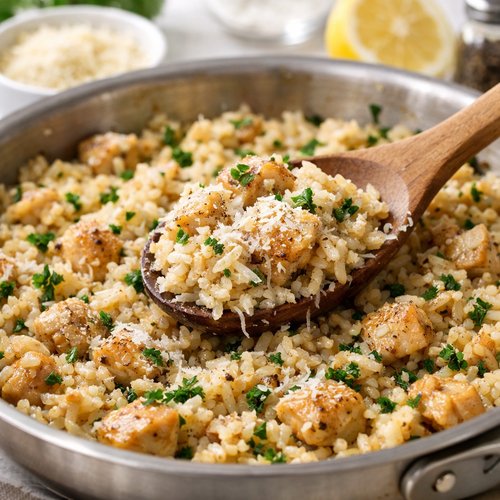
Stir in your freshly grated Parmesan cheese until fully combined. Taste and adjust seasoning with a pinch of salt and pepper if needed (remember, we used garlic salt earlier, so go easy). Serve immediately while hot. If you’re eating right away, transfer to serving bowls. If you’re meal prepping, let it cool slightly before portioning into containers.
The Most Common Mistakes (And How to Avoid Them)
- Using hot broth straight from simmering on the stove. Hot broth can shock the rice and cause uneven cooking. Use room-temperature or cold broth from the carton or let it cool first.
- Peeking under the lid constantly. Every time you lift the lid, you release steam and extend cooking time by 1-2 minutes. Trust the process and set a timer.
- Crowding the pan when searing chicken. If your pan is too small or too full, chicken steams instead of sears. Work in two batches if needed—it takes 2 extra minutes and makes a HUGE difference in texture.
- Adding cream while the pan is still boiling. If your liquid is still at a rolling boil when you add cold cream, it can break or curdle. Always remove from heat first or wait until it’s at a gentle simmer.
How Do I Know When It’s Done?
There are THREE specific things you’re looking for, not just a timer. Timing is a guide, not gospel. The rice should be tender when you bite it, with no hard, chalky center. The chicken should reach 165°F internally (use a meat thermometer in the thickest piece). The liquid should be almost completely absorbed, with maybe a tiny bit of moisture visible at the very bottom of the pan—not swimming in broth, but not completely dry either. If any of these aren’t true, give it another 2-3 minutes.
Troubleshooting: When Things Go Wrong
- Rice is mushy and fell apart. You likely cooked it too long or used too much liquid. For next time, use exactly 3 cups broth for 1 cup rice (that’s the standard 1:3 ratio). Also make sure your heat is truly LOW after bringing to a boil—if it’s still medium-low, it’ll cook too fast and get mushy.
- Rice is still crunchy and hard in the center. Not enough liquid or not enough cooking time. Immediately add ¼ cup more broth, cover, and cook another 3-5 minutes. This usually fixes it.
- Cream looks curdled or separated. This happened because the pan was too hot when cream went in. Don’t panic—it’s still safe to eat, though the texture isn’t ideal. For next time, remove the pan from heat completely before stirring in cream.
- Chicken is dry and tough. You overcooked it. Chicken breast reaches perfect doneness at 165°F internal temperature—even 5 degrees higher and it dries out. Use a meat thermometer, especially when you’re learning.
Can I Store Garlic Chicken Rice Recipe?
YES, and it stores beautifully. This is one of those recipes that actually tastes BETTER on day two because flavors have time to meld. Refrigerate in an airtight container for up to 4 days. The cream and rice stay creamy and don’t dry out. To reheat, transfer to a skillet over medium-low heat with a splash of broth (about ¼ cup), stirring occasionally until warmed through, about 5-7 minutes. Alternatively, microwave in a covered bowl with a tablespoon of water for 2-3 minutes, stirring halfway through. You can also freeze it for up to 3 months in freezer-safe containers, though the texture of the cream sauce may be slightly grainier when thawed. Thaw overnight in the fridge before reheating.
Expert’s Nutritional Tip
As a registered dietitian, here’s what excites me about this dish: you’ve got complete protein from the chicken, complex carbs from the rice, and greens from the spinach—all in one balanced meal. The spinach adds iron (especially important for plant-based eaters or people at risk for deficiency), and the Parmesan provides calcium. The key is the PORTION of cream—½ cup distributed across 4 servings means about 2 tablespoons per person, which adds richness without going overboard on saturated fat. This is satisfying, balanced nutrition that doesn’t feel like “diet food.”
Nutrition Information
Based on USDA nutritional data, per serving (approximately 1.5 cups, serves 4): approximately 485 calories, 28g protein, 52g carbohydrates, 14g fat (6g saturated), 3g fiber, and 680mg sodium. The high protein content supports muscle maintenance and satiety, while the fiber from spinach aids digestion. If you’re watching sodium, use no-salt-added broth, which reduces sodium to around 380mg per serving—still flavorful because of the garlic salt and fresh garlic.
Make-Ahead Guide
I make this recipe on Sunday nights for my clients who want zero-stress weekday dinners. You can prep components the morning of: cube and season your chicken, mince your garlic (store in a small container), measure out rice, and wash spinach. Keep everything in the fridge. When dinner time hits, the actual cooking is 25 minutes start to finish. You can also make the entire dish up to 4 days ahead—just store it in airtight containers and reheat gently. If you’re doing meal prep for the entire week, divide into 4 portions immediately after cooking (while still warm) so it cools faster and more evenly, which prevents bacterial growth.
What Can I Serve With Garlic Chicken Rice Recipe?
This is a complete one-dish meal, but it pairs beautifully with simple sides that don’t compete with the creamy garlic flavors. A crisp green salad with a bright vinaigrette cuts through the richness perfectly. Roasted Brussels sprouts or broccoli add texture and additional vegetables. If you want something warm, try steamed green beans with a squeeze of lemon. For a different protein option or if you’re looking to switch things up another night, check out this Baked Dijon Chicken Recipe which offers another creamy chicken approach. Or if you’re feeling adventurous, this Best Beef Noodle Recipe uses a similar one-pan technique with beef instead.
- Garden salad with lemon vinaigrette – the bright acid balances the creamy richness beautifully
- Roasted vegetables like Brussels sprouts or broccoli – adds color, texture, and additional nutrients without overwhelming the dish
- Steamed green beans with garlic – echoes the garlic flavors while adding freshness
- Crusty bread for soaking up sauce – simple and absolutely delicious for wiping the pan clean
Seasonal Variations
Spring version: Replace spinach with fresh peas (frozen is fine) and asparagus, and add fresh tarragon or dill for brightness. Tarragon pairs beautifully with cream and chicken.
Summer version: Add sun-dried tomatoes and fresh basil at the very end, or stir in fresh zucchini that’s been cut into small cubes. Lemon zest finishes it beautifully.
Fall version: Use cremini or porcini mushrooms sautéed with the garlic, and add a splash of dry white wine (¼ cup) when you pour in the broth. Sage works wonderfully here too.
Winter version: Add diced carrots and celery to the pan with the garlic, and use thyme instead of fresh herbs. This becomes almost a creamy chicken soup in rice form.

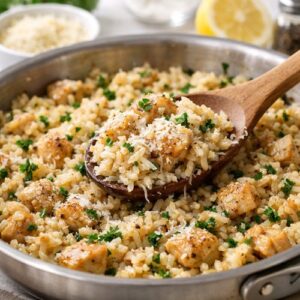
Garlic Chicken Rice Recipe
Ingredients
Method
- Pat your cubed chicken dry with paper towels—this is non-negotiable. Moisture on the surface prevents browning and steams the chicken instead of searing it. Once dry, sprinkle the garlic salt and black pepper evenly over all pieces. Don't underseasoning here; the seasoning happens NOW, not at the end. This ensures flavor penetrates the meat as it cooks.
- Heat a large skillet (12 inches is ideal) over medium-high heat. Add your olive oil or cooking spray and let it get HOT—you should see a slight shimmer across the pan. This takes about 1 minute. Working in batches if needed, place seasoned chicken cubes in the pan in a single layer. DO NOT move them around for the first 2-3 minutes. Let them SIT. This develops a golden-brown crust that locks in juices. After 2-3 minutes, flip each piece and cook another 2-3 minutes. The chicken doesn't need to be fully cooked through at this stage—you're looking for golden-brown exteriors and an internal temperature around 140-145°F (it will finish cooking when the rice cooks). Remove chicken to a clean plate.
- Return the same skillet to medium heat (reduce from medium-high). Add your minced fresh garlic directly to the remaining oil and butter bits. This step is called "blooming," and it's where garlic transforms from raw and harsh to mellow and sweet. Stir constantly for exactly 1 minute—no more, no less. You want fragrant, light golden garlic, NOT browned or burnt garlic (which tastes bitter). Your kitchen should smell INCREDIBLE right now.
- Pour your dry rice directly into the pan with the bloomed garlic. Stir constantly for 1-2 minutes. You're lightly toasting the rice grains, which adds a subtle nutty flavor and helps each grain stay separate during cooking instead of clumping together. The rice will look slightly translucent around the edges when it's ready.
- Pour in your 3 cups of low-sodium chicken broth. Be careful—it will steam and bubble. Scrape the bottom of the pan with a wooden spoon to loosen any browned bits (called fond), which add huge flavor. Return your seared chicken pieces to the pan, nestling them into the rice. The liquid should come up to about ½ inch above the rice surface. Stir everything together once.

- Increase heat to high until you see a full rolling boil. Once boiling, immediately reduce heat to low, cover the pan with a lid (or foil if you don't have a lid), and set a timer for 12-15 minutes. Do NOT peek or stir. This is crucial—you're creating a gentle steam environment where rice cooks evenly. Peeking releases steam and disrupts cooking.
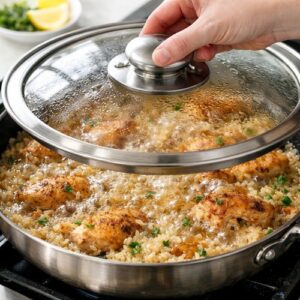
- After 12 minutes, carefully lift the lid (watch for steam!) and check if most of the liquid has been absorbed. The rice should look tender and the chicken should reach an internal temperature of 165°F with a meat thermometer. If there's still excess liquid, cover and cook another 2-3 minutes. Once the rice is nearly tender and liquid is mostly gone, remove from heat. Pour in your heavy cream and add the fresh spinach. Stir gently until spinach wilts (about 1-2 minutes of gentle stirring). The residual heat will wilt the spinach without overcooking it.
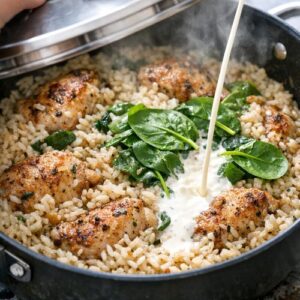
- Stir in your freshly grated Parmesan cheese until fully combined. Taste and adjust seasoning with a pinch of salt and pepper if needed (remember, we used garlic salt earlier, so go easy). Serve immediately while hot. If you're eating right away, transfer to serving bowls. If you're meal prepping, let it cool slightly before portioning into containers.
Notes
FAQs
Can I use chicken thighs instead of chicken breasts?
Absolutely! Thighs are actually MORE forgiving because they stay juicy even if slightly overcooked. You’ll need about 1.5 pounds of thighs (they have more bone and skin). Cube them the same way, season identically, and everything cooks the same. Thighs take about the same time—they just taste richer and more flavorful. This is my go-to when I’m not watching calories as carefully.
What if I don’t have heavy cream?
You have three options: (1) Use half-and-half, though it’s more prone to breaking—remove from heat before adding and stir gently; (2) Use Greek yogurt (¼ cup plain Greek yogurt stirred in at the end adds creaminess and tanginess, plus extra protein); (3) Use cream cheese (2 ounces cubed and stirred in while warm creates creaminess, though it tastes slightly richer). I wouldn’t skip the cream component entirely—it’s what makes this taste restaurant-quality.
Can I make this in a slow cooker or instant pot?
Instant Pot (pressure cooker mode): This works beautifully! Sauté chicken and garlic using the Sauté function, add rice and broth, then pressure cook on high for 8 minutes with natural release. Then add cream and spinach using the Sauté function again. Slow cooker: This is trickier because rice tends to get mushy. If you want to try it, use 2.5 cups broth instead of 3, cook on LOW for 3-4 hours, and add cream and spinach in the last 15 minutes. I don’t recommend slow cooker for this recipe specifically because the cream components work better with higher, faster heat.
Is this recipe freezer-friendly?
It freezes, but with a caveat. The cream sauce may separate slightly when thawed and reheated, though it’s still delicious and the flavor is unchanged. Freeze in flat containers or freezer bags for up to 3 months. Thaw overnight in the fridge and reheat gently with a splash of broth. Alternatively, freeze just the chicken and rice without the cream, then add fresh cream when reheating—this prevents any texture issues. Personally, I recommend eating fresh within 4 days instead of freezing, but it’s possible if meal prepping far ahead.
Why does my rice always taste bland compared to restaurant versions?
You’re likely skipping two flavor-building steps: (1) toasting the dry rice in oil before adding liquid, and (2) using full-flavored broth or blooming garlic directly in the pan. Most home cooks just dump everything in cold. This recipe toasts the rice and blooms fresh garlic, which builds depth. Also, low-sodium broth means we’re not diluting flavor—the chicken, garlic, and Parmesan shine through. If you want even MORE restaurant flavor, add a splash (¼ cup) of dry white wine when you pour in the broth.
My family says this tastes creamy but they’re worried about saturated fat—should I use light cream?
Not necessary. Half a cup of heavy cream divided across 4 servings is about 2 tablespoons per person—roughly 6 grams of saturated fat per serving, which fits well within standard dietary guidelines (10% or less of daily calories). Light cream or half-and-half would reduce this slightly but risks the sauce breaking. A better option: use full-fat Greek yogurt (¼ cup) instead of cream—you get the creaminess with more protein and less saturated fat. Or make it with 2 ounces of cream cheese for richness with fewer calories. These tweaks don’t sacrifice quality.
More Recipes You’ll Love
- Baked Dijon Chicken Recipe – another creamy chicken option with mustard instead of garlic for when you want something different
- Best Chicken Gravy Recipe – perfect for serving alongside or if you want to master sauce-building techniques
- Beef Teriyaki Recipe With Teriyaki Sauce – similar one-pan technique with beef for variety
- Beef Stew Recipe In The Slow Cooker – another comfort food that uses broth and cream for depth
You now have EVERYTHING you need to make creamy garlic chicken rice that tastes like you went to culinary school. You understand the science behind each step, you know exactly what to look for to tell when it’s done, and you have troubleshooting strategies for when things don’t go perfectly. This is the kind of recipe that becomes a weeknight staple, the kind your family requests again and again. I’ve walked through this with hundreds of New Yorkers in my practice, and every single person has succeeded because they understood the WHY behind each action. You’ve got this. Let’s make cooking a breeze!
