
Ham And Cheese Sliders Recipe
This post contains affiliate links. As an Amazon Associate I earn from qualifying purchases.
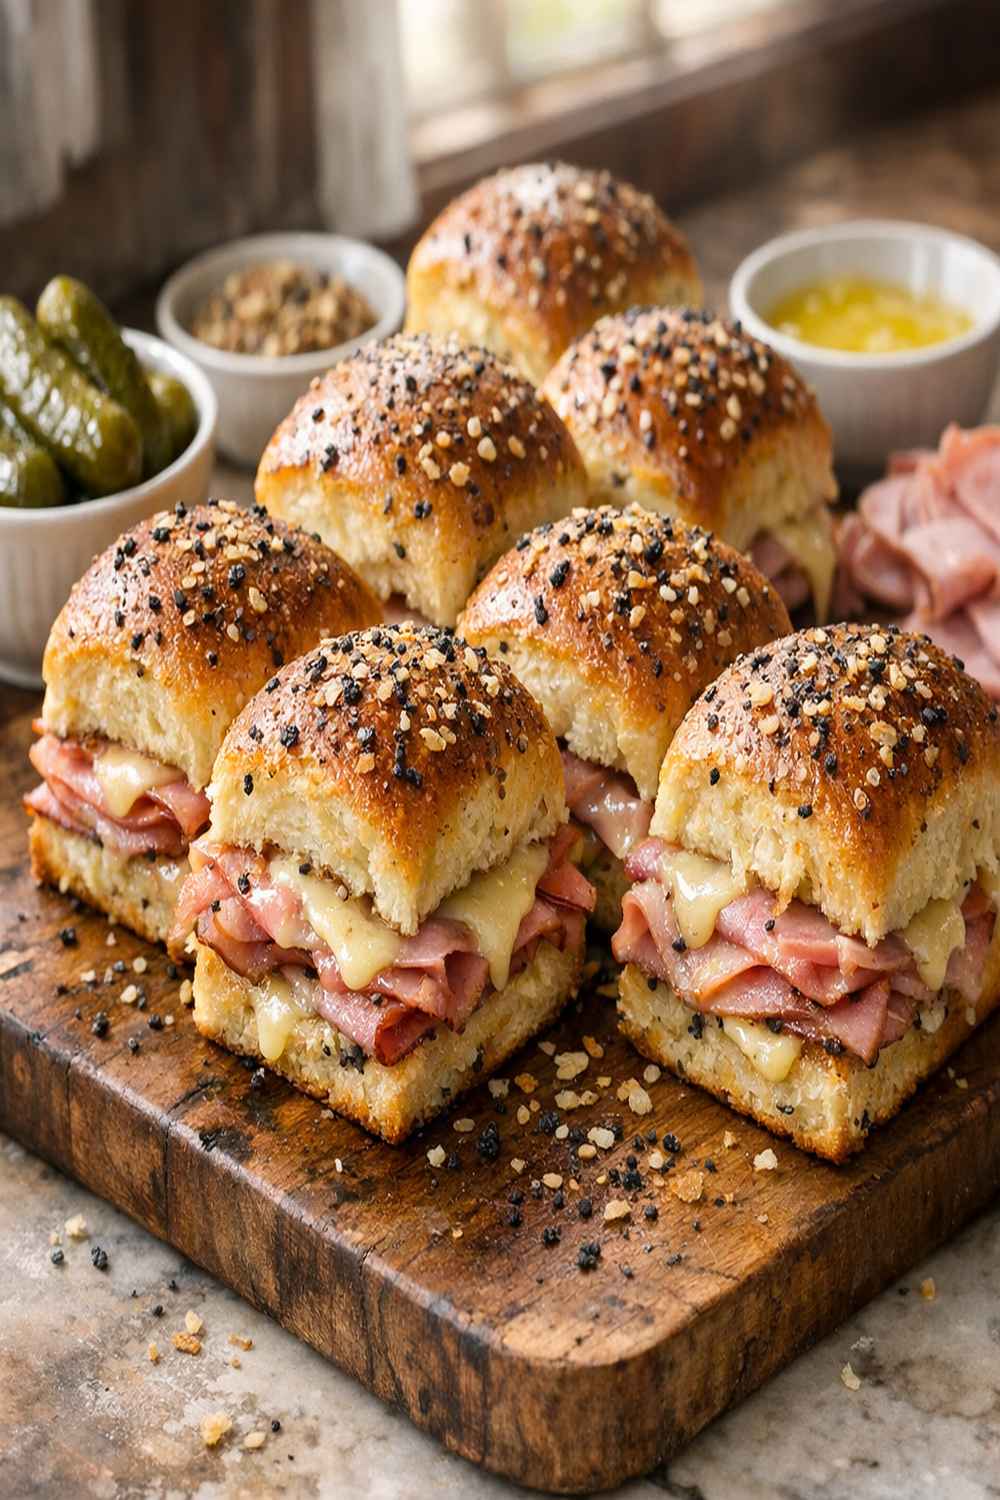
Picture this: You’re hosting your first dinner party in your Manhattan apartment, and you want to impress without spending all day in the kitchen. The aroma of melted Swiss cheese and savory ham fills the air as golden rolls emerge from the oven—and suddenly, your guests are reaching for seconds before you’ve even finished plating. That’s the magic of these ham and cheese sliders. I’ve watched them disappear faster than my sous vide salmon at holiday gatherings, and I’m thrilled to share why they’ve become my go-to recipe for feeding a crowd without the stress. Whether you’re preparing for a brunch, game day gathering, or family holiday, this recipe delivers restaurant-quality results in under 45 minutes. If you’re looking to build a complete menu, I also love pairing these with my Beef Ragu Crock Pot Recipe for a more substantial feast.
Ham And Cheese Sliders Recipe That Will Steal the Show at Your Next Dinner Party
I’ll never forget the Christmas Eve when my sister asked me to bring sliders to our family gathering in Brooklyn. I was nervous—everyone expected something elaborate from “the dietitian”—but I wanted to prove that impressive food doesn’t require complicated techniques. I layered those rolls with deli ham and Swiss cheese, brushed on that buttery Dijon mixture, and watched my uncle (the picky eater in our family) demolish three sliders before dinner even started. That’s when I realized: simplicity IS elegance. These sliders aren’t about fancy knife skills or exotic ingredients. They’re about understanding that the best celebrations happen when food brings people together without drama or stress.
When to Make Ham And Cheese Sliders Recipe
This recipe is INCREDIBLY versatile, and I’ve made it for every occasion you can imagine. Let me paint you some specific scenarios where these sliders absolutely shine:
- Holiday Entertaining (Thanksgiving, Christmas, Easter) – These are perfect for feeding extended family without monopolizing your oven. You prep them in 15 minutes, bake while you handle other sides, and they stay warm in a low oven.
- Game Day Gatherings – Watching football with friends? Make these 30 minutes before kickoff so they’re fresh and hot when everyone arrives. They’re easy to grab with one hand.
- Spring Brunch Celebrations – Pair them with a simple salad and champagne for Mother’s Day or baby showers. The savory-sweet flavor profile complements lighter spring menus perfectly.
- Quick Weeknight Dinners for 4-6 People – Don’t save these for special occasions! Scale them down and enjoy a gourmet dinner on Tuesday without takeout stress.
- Potluck Contributions – These transport beautifully, stay delicious at room temperature, and always get compliments. You’ll be THAT person who brought the sliders everyone’s still talking about.
What Makes This Ham And Cheese Sliders Recipe Special
Here’s what I’ve learned working with diverse food cultures across NYC: the best recipes aren’t complicated—they’re intentional. This slider recipe elevates itself through THREE key elements that make all the difference.
First, the butter-based sauce is where the magic happens. It’s not just melted butter—it’s a balanced combination of molasses sweetness from brown sugar, pungent Dijon mustard, and umami-rich Worcestershire sauce. This creates complexity that makes people say, “Wow, what IS that amazing flavor?” Without this sauce, you’d have fine sliders. WITH it, you have something memorable.
Second, the poppy seeds and dried onion might seem like minor additions, but they provide textural contrast and flavor depth that distinguish homemade sliders from basic assembled sandwiches. The poppy seeds toast slightly as they bake, releasing nutty notes.
Third, the assembly method matters. By building them in a baking dish (rather than assembling individually), the rolls steam together slightly, creating a cohesive unit that’s easier to serve and share. This technique is borrowed from classic Southern cooking and works beautifully for feeding crowds.
Scaling for Your Crowd
One of my FAVORITE aspects of this recipe is how easily it scales. Whether you’re cooking for two or twenty, the technique remains identical—you’re just adjusting quantities. Here’s my professional scaling guide:
- For 2-4 People (Intimate Dinner) – Use half all ingredients (¼ cup butter, ½ lb ham, ½ lb cheese, 12 small rolls or 6 large). Use an 8×8-inch baking dish instead. Bake for 12 minutes covered, 8 minutes uncovered. These come together in about 20 minutes total.
- For 6-8 People (Standard Dinner Party) – This is the EXACT recipe as written below. One 9×13-inch dish serves everyone perfectly with 2-3 sliders per person.
- For 12-20 People (Holiday Gathering or Buffet) – Double the recipe completely and use TWO 9×13-inch baking dishes. Bake them simultaneously on separate racks (stagger positioning for even heat). Timing stays the same. You can also prep both dishes several hours ahead and bake them sequentially.
- For 30+ People (Large Party or Event) – Triple or quadruple the recipe using multiple dishes on multiple racks. Bake in batches if needed. I also recommend setting up a “slider station” where you arrange extras on a warming tray so guests can serve themselves throughout the event.
The Ingredients
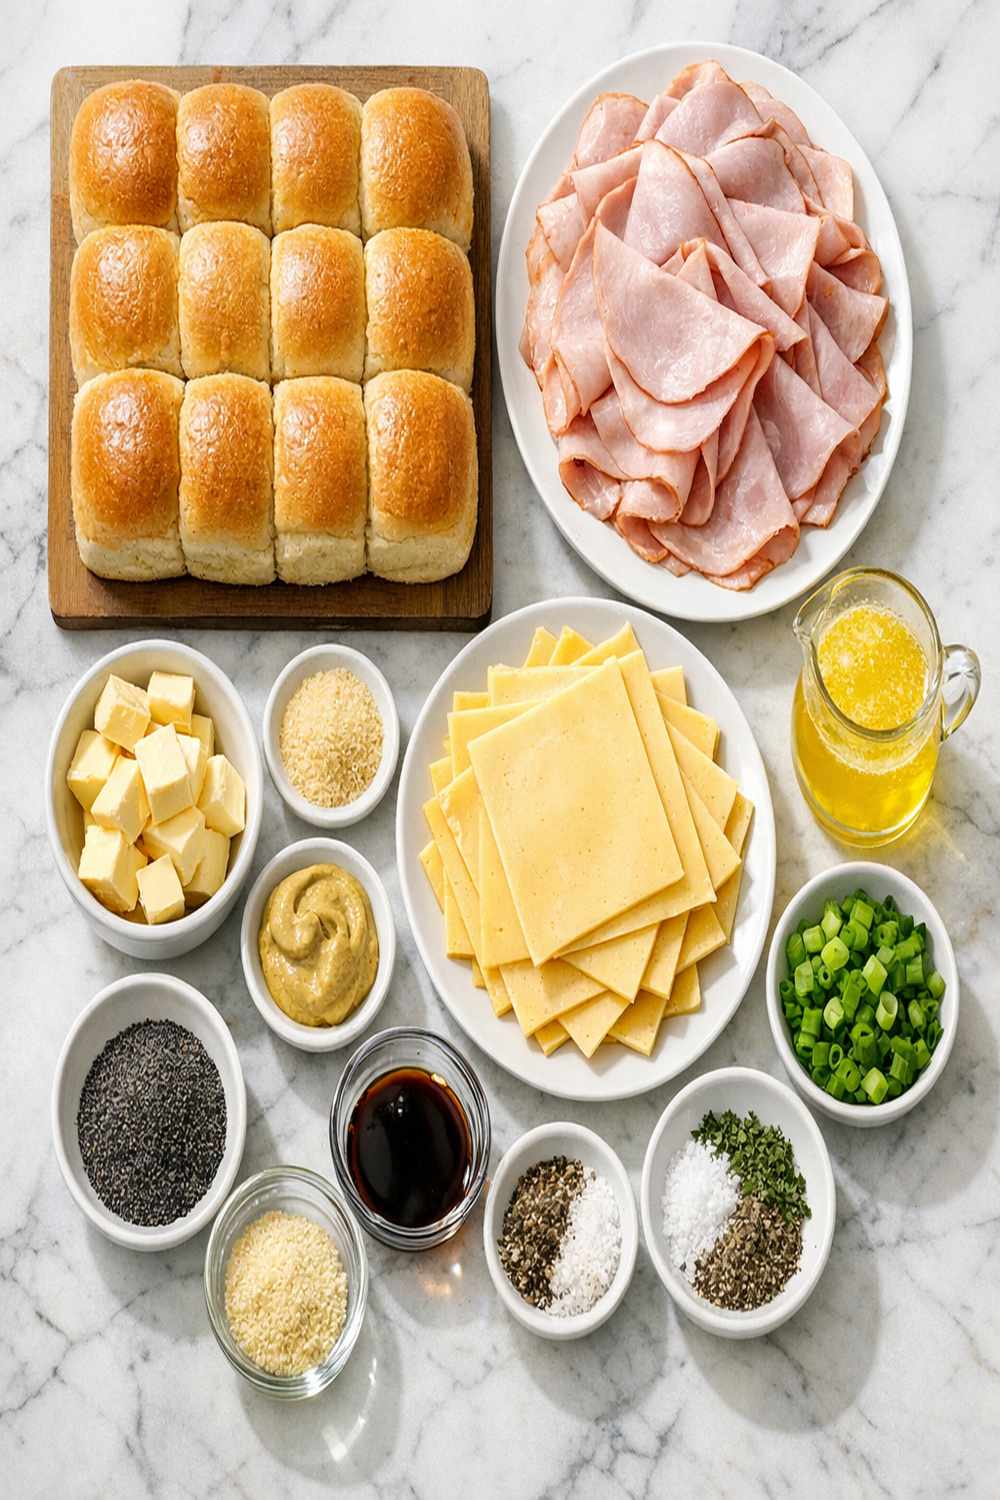
Here’s everything you need for an impressive spread that looks simple but tastes sophisticated. I’ve organized this by component so you can see the structure clearly. This recipe makes approximately 24 sliders (serves 8-12 people, depending on appetite).
For the Buttery Sauce
- 1½ teaspoons Worcestershire sauce (this is the secret umami booster)
- 1 tablespoon Dijon mustard (not yellow mustard—the sharpness is essential)
- 1 tablespoon poppy seeds (they toast during baking for nutty flavor)
- 2 tablespoons brown sugar (packed, adds subtle molasses sweetness)
- ½ cup unsalted butter (melted, this coats every crevice evenly)
For the Sliders
- 1 tablespoon dried minced onion (or 1½ teaspoons onion powder if you prefer finer texture)
- 1 pound deli ham (thinly sliced—ask the deli counter to slice it fresh)
- 1 teaspoon fresh thyme (optional, adds herbaceous brightness)
- ¼ teaspoon freshly cracked black pepper (optional garnish for visual appeal)
- 24 small Hawaiian rolls (or 12 large dinner rolls if you prefer bigger portions)
- 1 pound Swiss cheese (sliced from the block, not pre-packaged—it melts more smoothly)
How to Make Ham And Cheese Sliders Recipe for Your Occasion
This is the part I LOVE—these sliders are genuinely foolproof once you understand the technique. I’ve broken this into clear steps with professional tips so you can execute this with confidence, whether it’s your first time or your fiftieth.
Step 1: Prepare Your Baking Dish and Preheat the Oven
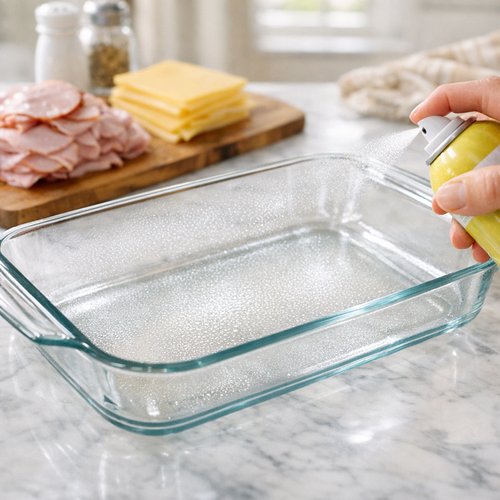
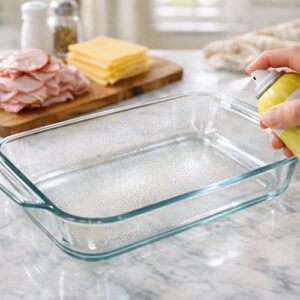
Preheat your oven to 350°F and lightly spray a 9×13-inch baking dish with cooking spray. This prevents sticking and makes cleanup easier. If you’re using glass, it’ll heat slightly slower than metal, which is actually helpful here because it prevents over-browning the bottom. Set your prepared dish aside on the counter while you work on the sauce.
Safety note: Keep your oven rack in the middle position so heat circulates evenly. This matters more than you’d think—a rack too low risks burning the bottom, while a rack too high can brown the tops unevenly.
Step 2: Create the Signature Butter Sauce
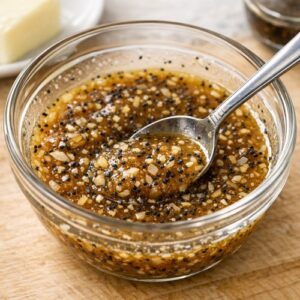
In a small bowl, combine your melted butter with brown sugar, Dijon mustard, Worcestershire sauce, poppy seeds, and dried minced onion. Stir thoroughly for about 1 minute until the brown sugar dissolves completely and everything is evenly distributed. This sauce is everything—it’s the difference between “okay sliders” and “holy cow, what IS this?”
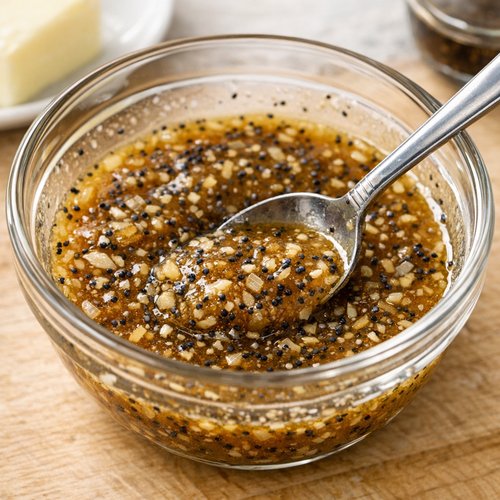
Pro tip from my kitchen: If you’re making this 30 minutes ahead, the sauce will thicken slightly as it cools, which is fine. Just give it a gentle stir before applying. If it’s too thick, microwave for 10 seconds to return it to pourable consistency.
Step 3: Slice and Arrange the Rolls
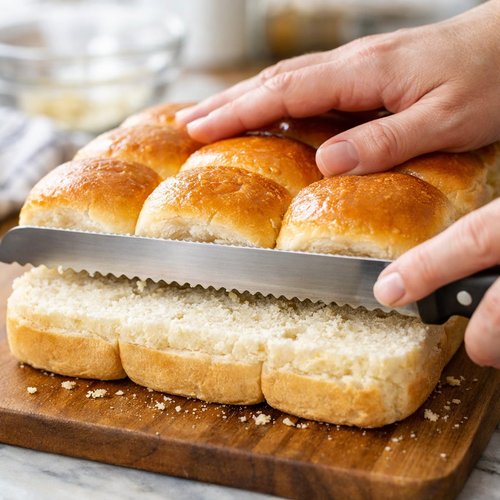
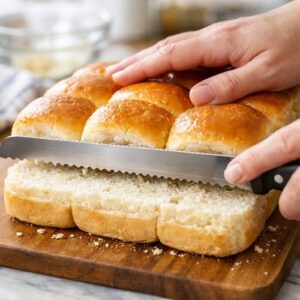
Take your Hawaiian rolls (or dinner rolls) and carefully slice them horizontally using a serrated knife. I recommend a gentle sawing motion rather than pressing down—this keeps the rolls from compressing. Arrange the bottom halves in your prepared baking dish in a single layer. They should fit snugly but not be forced. Don’t stress about perfection here; they’ll settle as they bake.
Step 4: Layer with Ham
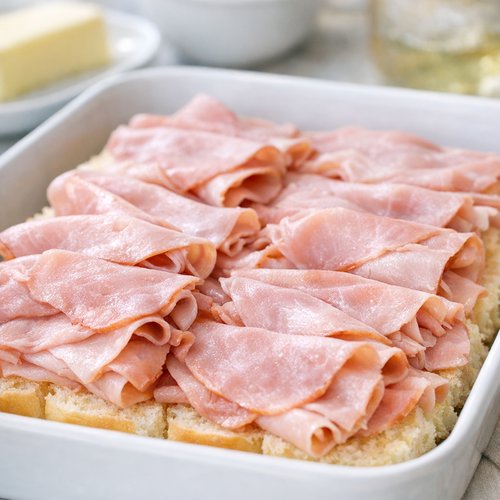
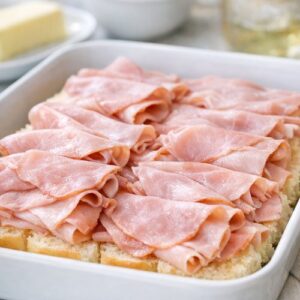
Now comes the assembly. Layer half of your sliced deli ham directly over the roll bottoms. You’re not trying to create individual sandwiches here—think of this more like you’re building one cohesive appetizer that you’ll cut into portions. Arrange the ham so it covers the rolls relatively evenly, but don’t obsess over perfect coverage.
Tip: If your deli ham is especially thin, you might need slightly more than half the pound for this layer. If it’s thicker slices, you’ll use less. Judge by visual coverage rather than weight.
Step 5: Add the Swiss Cheese Layer
Layer all of your Swiss cheese next. Arrange slices in slightly overlapping rows—this ensures every bite has cheese. This is your protein and calcium boost, so don’t skimp. Fresh-sliced Swiss melts beautifully and creates those gorgeous golden spots as it bakes.
Expert nutritional insight: Swiss cheese contains B12 and calcium, which many New Yorkers don’t get enough of. The ham adds protein (about 8g per slider), making this a nutritionally complete appetizer, not just an indulgence.
Step 6: Top with Remaining Ham and Roll Tops
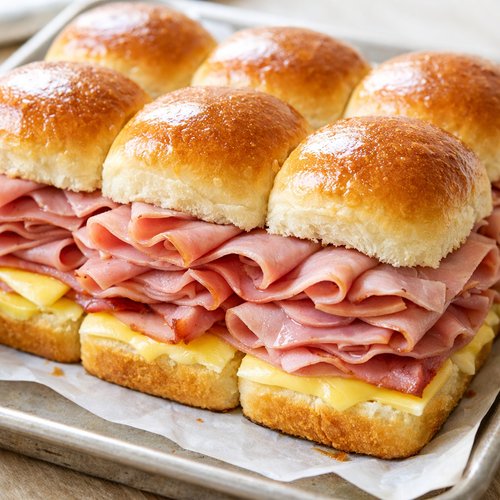
Layer the remaining ham over the cheese, then top with the roll tops. This creates a beautiful ham-cheese-ham sandwich structure. Press gently so everything sits flush.
Step 7: Apply the Sauce and First Bake
Pour the entire butter mixture evenly over the assembled sliders. Use a spoon or pastry brush to distribute it thoroughly—pay special attention to the edges where things can dry out. Some sauce will seep down into the seams, and that’s exactly what you want. Cover the entire baking dish tightly with aluminum foil.
CRITICAL SAFETY WARNING: Make sure the foil doesn’t touch your oven coils if you’re using an electric oven with exposed elements. This is a fire hazard.
Bake covered for 15 minutes. During this time, steam builds up under the foil, which gently heats the sliders through and softens the rolls. Your kitchen will smell absolutely divine.
Step 8: Remove Foil and Final Bake
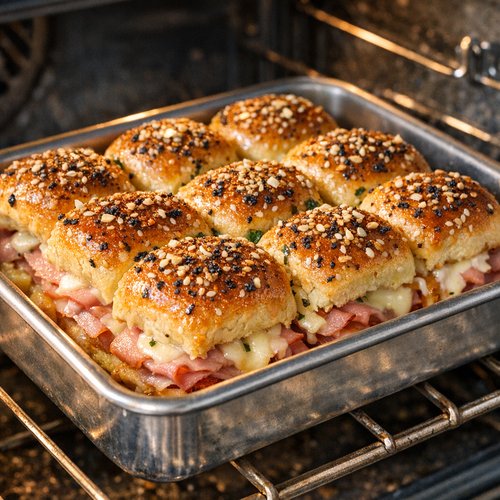
Carefully remove the foil (watch for steam—it’s hot!), and return the sliders to the oven uncovered for an additional 10 minutes. This final baking period allows the tops to brown slightly, the butter to caramelize, and any excess moisture to evaporate. You’re looking for a light golden-brown color on the roll tops.
Troubleshooting: If the tops look pale after 10 minutes, give them another 2-3 minutes. Every oven varies. Conversely, if they’re browning too quickly, it means your oven runs hot—note this for next time.
Step 9: Rest and Serve Immediately
Remove from the oven and let rest for 2-3 minutes. Using a sharp serrated knife, cut the entire block of sliders into individual portions. This is easier than you’d expect—just follow your natural roll divisions.
Serve immediately on a warm platter. The sliders stay perfect for about 15-20 minutes, so time your baking to align with when guests arrive or when you’ll be eating.
Make-Ahead Timeline
As a working dietitian in NYC, I’ve learned that the secret to stress-free entertaining is strategic advance preparation. Here’s exactly what you can do when:
- 3 Days Before – Purchase your deli ham and Swiss cheese from the deli counter. Ask them to slice fresh that day. Store in the coldest part of your refrigerator. The freshness makes a noticeable difference.
- 2 Days Before – Buy your Hawaiian rolls. Store them in their original packaging at room temperature (NOT the refrigerator—this dries them out). Make your Worcestershire-mustard mixture and store in a sealed container. It lasts 48 hours.
- Day Before – Assemble your entire slider baking dish: rolls, ham, cheese, ham again, roll tops—everything except the butter sauce. Cover tightly with plastic wrap and refrigerate. The next day, make your butter sauce fresh, apply it, and bake directly from cold (add 5 minutes to the covered baking time).
- Day Of (2 Hours Before) – Remove your prepared slider dish from the refrigerator about 20 minutes before baking to take the chill off. Make your butter sauce fresh. Proceed with baking instructions as written.
- Day Of (30 Minutes Before Serving) – Preheat oven, apply sauce, and begin baking. Set a phone timer for 15 minutes.
How to Present and Plate Ham And Cheese Sliders Recipe
Presentation matters because we eat with our eyes first. Here’s how I make these sliders look as impressive as they taste:
- Cut Cleanly with a Sharp Serrated Knife – Use a serrated blade and a gentle sawing motion. Rough cuts make them look homemade in a less-polished way. Clean cuts showcase the layers beautifully.
- Serve on a Warm Platter Within 5 Minutes of Baking – The residual heat keeps them at perfect eating temperature. Room-temperature sliders lose their appeal quickly.
- Garnish Subtly – A light sprinkle of fresh cracked black pepper or a few microgreens on top adds visual sophistication without overwhelming the dish.
- Arrange in Neat Rows on the Serving Platter – Standing them slightly upright (propped against each other) creates height and visual interest. It also makes them easier for guests to grab.
- Serve with Small Napkins and Optional Condiments – Whole grain mustard, extra Dijon, or a small bowl of cornichons (pickles) on the side offer flexibility without changing the sliders themselves.
Seasonal Variations
While this recipe is perfect year-round, I love tweaking it seasonally to keep entertaining fresh:
- Spring/Summer Version – Replace half the Swiss with aged white cheddar. Add thin slices of fresh apple between the ham and cheese (Honeycrisp or Granny Smith). Reduce brown sugar to 1 tablespoon and add ½ teaspoon Dijon. This creates a slightly lighter flavor profile perfect for spring brunches and summer gatherings. The apple adds natural sweetness and a crisp textural contrast.
- Fall/Winter Version – Use smoked ham instead of regular deli ham. Add a layer of thin apple-wood smoked turkey for extra richness. Increase brown sugar to 2½ tablespoons and add ½ teaspoon of chipotle powder to the butter sauce for smokiness. This version pairs beautifully with cold weather entertaining and holiday gatherings. The deeper flavors complement heavier winter menus perfectly.
What to Serve Alongside Ham And Cheese Sliders Recipe
These sliders are substantial, but they’re best enjoyed as part of a thoughtful menu. Here’s how I build a complete spread around them:
For a Lunch or Lighter Dinner: Pair with a crisp green salad dressed with lemon vinaigrette (the acidity cuts through the richness of the cheese), roasted vegetables, or a light vegetable soup. This balances the heavier sliders perfectly.
For Holiday or Formal Entertaining: Include a more substantial protein like my Beef Hamburger Patty Recipe as an alternative protein, fresh bread, and multiple vegetable sides. The sliders become one option in a broader spread rather than the sole focus.
For Game Day or Casual Gathering: Serve alongside chips, coleslaw, roasted sweet potato fries, and pickles. This creates a casual buffet where guests graze freely.
- Green Salad with Vinaigrette – The acidity of the dressing balances the cheese and ham beautifully. Toss just before serving so lettuce doesn’t wilt.
- Roasted Vegetables (Broccoli, Carrots, Brussels Sprouts) – Roasting brings out natural sweetness. Toss with olive oil and sea salt about 25 minutes before serving your sliders.
- Creamy Coleslaw – Traditional or Asian-inspired slaw provides cool, crunchy contrast to warm, melted sliders. Make this a few hours ahead.
- Roasted Sweet Potato or Regular Fries – Simple, satisfying, and complements the sliders without competing. Fries stay warm in a low oven.
- Pickled Vegetables (Cornichons, Pickled Onions, Pickled Carrots) – Their sharp acidity cleanses the palate between bites of rich sliders. Prepare these days ahead.
Can I Store Ham And Cheese Sliders Recipe?
Yes, but with specific guidelines. Fresh is always better, but I understand that entertaining isn’t always perfectly timed:
Serving the Same Day: Bake these no more than 2 hours before serving for best quality. If you must hold them longer, keep them covered loosely in a low oven (200°F) for up to 1 hour. Beyond that, they start drying out.
Leftovers (If You Have Them—Lucky You!): Store cooled sliders in an airtight container in the refrigerator for up to 3 days. To reheat, wrap loosely in foil and warm in a 325°F oven for 8-10 minutes until heated through. The foil prevents excessive drying.
Making Ahead Without Baking: Assemble the entire dish (everything except the butter sauce) up to 24 hours ahead. Cover and refrigerate. When ready to serve, make your butter sauce fresh, apply it, and bake. Add 5 minutes to the covered baking time since you’re starting from cold.
Freezing: I don’t recommend freezing fully assembled sliders—the rolls become dense and the texture suffers. HOWEVER, you can freeze the unbaked assembled dish (including sauce) for up to 1 month. Thaw overnight in the refrigerator and bake as directed, adding 5 minutes to the covered time.
DO NOT freeze after baking—the texture deteriorates significantly.
Common Mistakes to Avoid
After making these hundreds of times, I’ve seen what trips people up. Let me save you from these pitfalls:
- Using Pre-Packaged Sliced Cheese Instead of Fresh-Sliced From the Deli Counter – Pre-packaged cheese has additives that prevent melting as smoothly. Fresh-sliced Swiss creates that gorgeous, even melt that makes people swoon. It costs slightly more but makes a REAL difference.
- Skipping the Butter Sauce or Making It Incorrectly – Some people think they can just assemble the sliders and they’ll be fine. Without the sauce, they’re dry and bland. Make sure the brown sugar dissolves completely so you don’t get crunchy bits.
- Overcrowding the Baking Dish or Using Rolls That Are Too Large – If your rolls don’t fit snugly, they won’t steam together properly and you’ll have 12 separate sandwiches instead of one cohesive appetizer. Use the exact size recommended or adjust your baking dish accordingly.
- Not Covering with Foil During the First Bake – This is how the rolls steam and soften. Without foil, they bake dry. Watch for steam when you remove the foil—it’s hot!
- Baking Too Long or Too Hot – At 350°F, these take exactly 15 minutes covered and 10 minutes uncovered. Longer baking dries out the rolls. If your oven runs hot (common in older NYC buildings!), start checking at 12 and 8 minutes respectively.
Nutrition Information
I believe in transparency about what we’re eating. Based on USDA nutritional data, each slider (assuming 24 sliders per recipe) contains approximately 280 calories, 15g fat (7g saturated), 18g protein, and 22g carbohydrates. The sodium content is approximately 620mg per slider (primarily from the deli ham, which is cured).
Protein comes from three sources: the ham (about 7g per slider), the Swiss cheese (about 8g per slider), and the roll itself (about 3g per slider). This makes these sliders surprisingly nutritionally complete—they’re not just empty carbs.
The Swiss cheese provides calcium (about 200mg per slider), which is significant for bone health. The B vitamins from the ham support energy metabolism, particularly important for busy New Yorkers on the go.
Pro tip for lighter entertaining: If you’re concerned about sodium or saturated fat, use lower-sodium deli ham (readily available at most NYC delis) and reduce the butter by 2 tablespoons. The sliders will still be delicious—slightly less rich, but still impressive.

Ham And Cheese Sliders Recipe
Ingredients
Method
- Preheat your oven to 350°F and lightly spray a 9x13-inch baking dish with cooking spray. This prevents sticking and makes cleanup easier. If you're using glass, it'll heat slightly slower than metal, which is actually helpful here because it prevents over-browning the bottom. Set your prepared dish aside on the counter while you work on the sauce. Safety note: Keep your oven rack in the middle position so heat circulates evenly. This matters more than you'd think—a rack too low risks burning the bottom, while a rack too high can brown the tops unevenly.
- In a small bowl, combine your melted butter with brown sugar, Dijon mustard, Worcestershire sauce, poppy seeds, and dried minced onion. Stir thoroughly for about 1 minute until the brown sugar dissolves completely and everything is evenly distributed. This sauce is everything—it's the difference between "okay sliders" and "holy cow, what IS this?" Pro tip from my kitchen: If you're making this 30 minutes ahead, the sauce will thicken slightly as it cools, which is fine. Just give it a gentle stir before applying. If it's too thick, microwave for 10 seconds to return it to pourable consistency.
- Take your Hawaiian rolls (or dinner rolls) and carefully slice them horizontally using a serrated knife. I recommend a gentle sawing motion rather than pressing down—this keeps the rolls from compressing. Arrange the bottom halves in your prepared baking dish in a single layer. They should fit snugly but not be forced. Don't stress about perfection here; they'll settle as they bake.
- Now comes the assembly. Layer half of your sliced deli ham directly over the roll bottoms. You're not trying to create individual sandwiches here—think of this more like you're building one cohesive appetizer that you'll cut into portions. Arrange the ham so it covers the rolls relatively evenly, but don't obsess over perfect coverage. Tip: If your deli ham is especially thin, you might need slightly more than half the pound for this layer. If it's thicker slices, you'll use less. Judge by visual coverage rather than weight.
- Layer all of your Swiss cheese next. Arrange slices in slightly overlapping rows—this ensures every bite has cheese. This is your protein and calcium boost, so don't skimp. Fresh-sliced Swiss melts beautifully and creates those gorgeous golden spots as it bakes. Expert nutritional insight: Swiss cheese contains B12 and calcium, which many New Yorkers don't get enough of. The ham adds protein (about 8g per slider), making this a nutritionally complete appetizer, not just an indulgence.
- Layer the remaining ham over the cheese, then top with the roll tops. This creates a beautiful ham-cheese-ham sandwich structure. Press gently so everything sits flush.
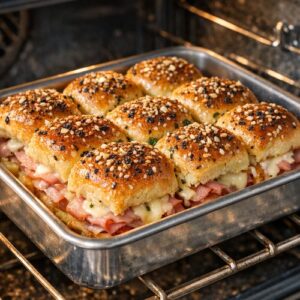
- Pour the entire butter mixture evenly over the assembled sliders. Use a spoon or pastry brush to distribute it thoroughly—pay special attention to the edges where things can dry out. Some sauce will seep down into the seams, and that's exactly what you want. Cover the entire baking dish tightly with aluminum foil. CRITICAL SAFETY WARNING: Make sure the foil doesn't touch your oven coils if you're using an electric oven with exposed elements. This is a fire hazard. Bake covered for 15 minutes. During this time, steam builds up under the foil, which gently heats the sliders through and softens the rolls. Your kitchen will smell absolutely divine.
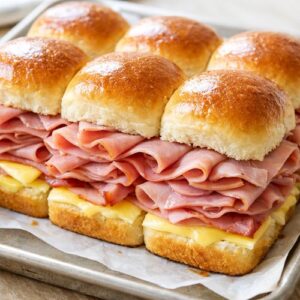
- Carefully remove the foil (watch for steam—it's hot!), and return the sliders to the oven uncovered for an additional 10 minutes. This final baking period allows the tops to brown slightly, the butter to caramelize, and any excess moisture to evaporate. You're looking for a light golden-brown color on the roll tops. Troubleshooting: If the tops look pale after 10 minutes, give them another 2-3 minutes. Every oven varies. Conversely, if they're browning too quickly, it means your oven runs hot—note this for next time.
- Remove from the oven and let rest for 2-3 minutes. Using a sharp serrated knife, cut the entire block of sliders into individual portions. This is easier than you'd expect—just follow your natural roll divisions. Serve immediately on a warm platter. The sliders stay perfect for about 15-20 minutes, so time your baking to align with when guests arrive or when you'll be eating.
Notes
FAQs
Can I Make These Sliders Vegetarian?
Absolutely! Replace the ham with thin layers of roasted red peppers, caramelized onions, and sautéed mushrooms (cremini or shiitake work beautifully). Use the same cheese and butter sauce. The savory umami from the mushrooms and Worcestershire in the sauce creates that satisfying depth you’d get from meat. Bake for the same time—the moisture content is similar.
What if I Don’t Have Worcestershire Sauce?
Worcestershire is traditional but not irreplaceable. Substitute with soy sauce (use slightly less—about ¾ teaspoon—as it’s saltier) or balsamic vinegar (1 teaspoon adds sweetness and acidity). The sliders will taste slightly different but still delicious. Don’t skip this ingredient entirely—it provides umami depth that’s important to the overall flavor profile.
Can I Make Individual Sliders on Regular Bread Instead of Hawaiian Rolls?
You can, but I don’t recommend it for this recipe. The magic is in the assembled-together baking that creates steam and cohesion. Hawaiian rolls are specifically designed with their soft, slightly sweet texture to create this effect. If you use regular bread (like slider buns or ciabatta), they won’t meld together the same way and you’ll have 24 separate sandwiches to assemble, which defeats the purpose of easy entertaining.
How Far in Advance Can I Assemble These Before Baking?
You can assemble completely (everything except the sauce) up to 24 hours ahead. The bread stays soft because it’s protected by the ham and cheese layers and the plastic wrap traps moisture. The moment you apply the butter sauce, you should bake within 30 minutes—longer than that and the rolls absorb too much liquid and become mushy rather than tender.
What’s the Best Way to Transport These to a Party?
Bake them just before leaving your house. Transport in the baking dish covered loosely with foil (so they don’t steam and get soggy). Place the dish on a level surface in your car to prevent shifting. Upon arrival, reheat uncovered in a 325°F oven for 5-7 minutes to restore crispness to the tops. Alternatively, you can assemble them completely at home, transport uncooked, and bake at the party location if they have oven access.
More Recipes for Your Table
- Baked Dijon Chicken Recipe – Features the same tangy Dijon profile these sliders have, making it perfect for a complete menu around Dijon-forward entertaining
- Beef Patty Recipe – A hearty protein option to serve alongside sliders for more substantial gatherings
- Best Chicken Gravy Recipe – The perfect sauce to complement slider-based menus with comfort food elements
Final Thoughts: Make These Sliders Your New Entertaining Secret
Looking back at that Christmas Eve when I first made these sliders for my family, I realize what I’ve learned goes far beyond a recipe. It’s about understanding that the most impressive entertaining comes from choosing technique over complexity, quality ingredients over quantity, and thoughtful timing over last-minute stress.
These ham and cheese sliders have become my answer to “What should I bring?” or “How can I feed 20 people without losing my mind?” They work for game day, holidays, casual weeknight dinners, and fancy brunches. They scale beautifully, store reasonably well, and—most importantly—they consistently impress without requiring you to spend all day cooking.
I encourage you to make this recipe soon, perhaps this weekend. Notice how the butter sauce transforms simple ingredients into something memorable. Feel the confidence of serving something restaurant-quality from your own kitchen. And watch as your guests ask for the recipe (or at least compliment you enthusiastically).
Entertaining should feel like a joy, not a burden. This recipe proves that simplicity and excellence aren’t mutually exclusive. Let’s make cooking a breeze!
