
Indian Chicken Rice Recipe
This post contains affiliate links. As an Amazon Associate I earn from qualifying purchases.
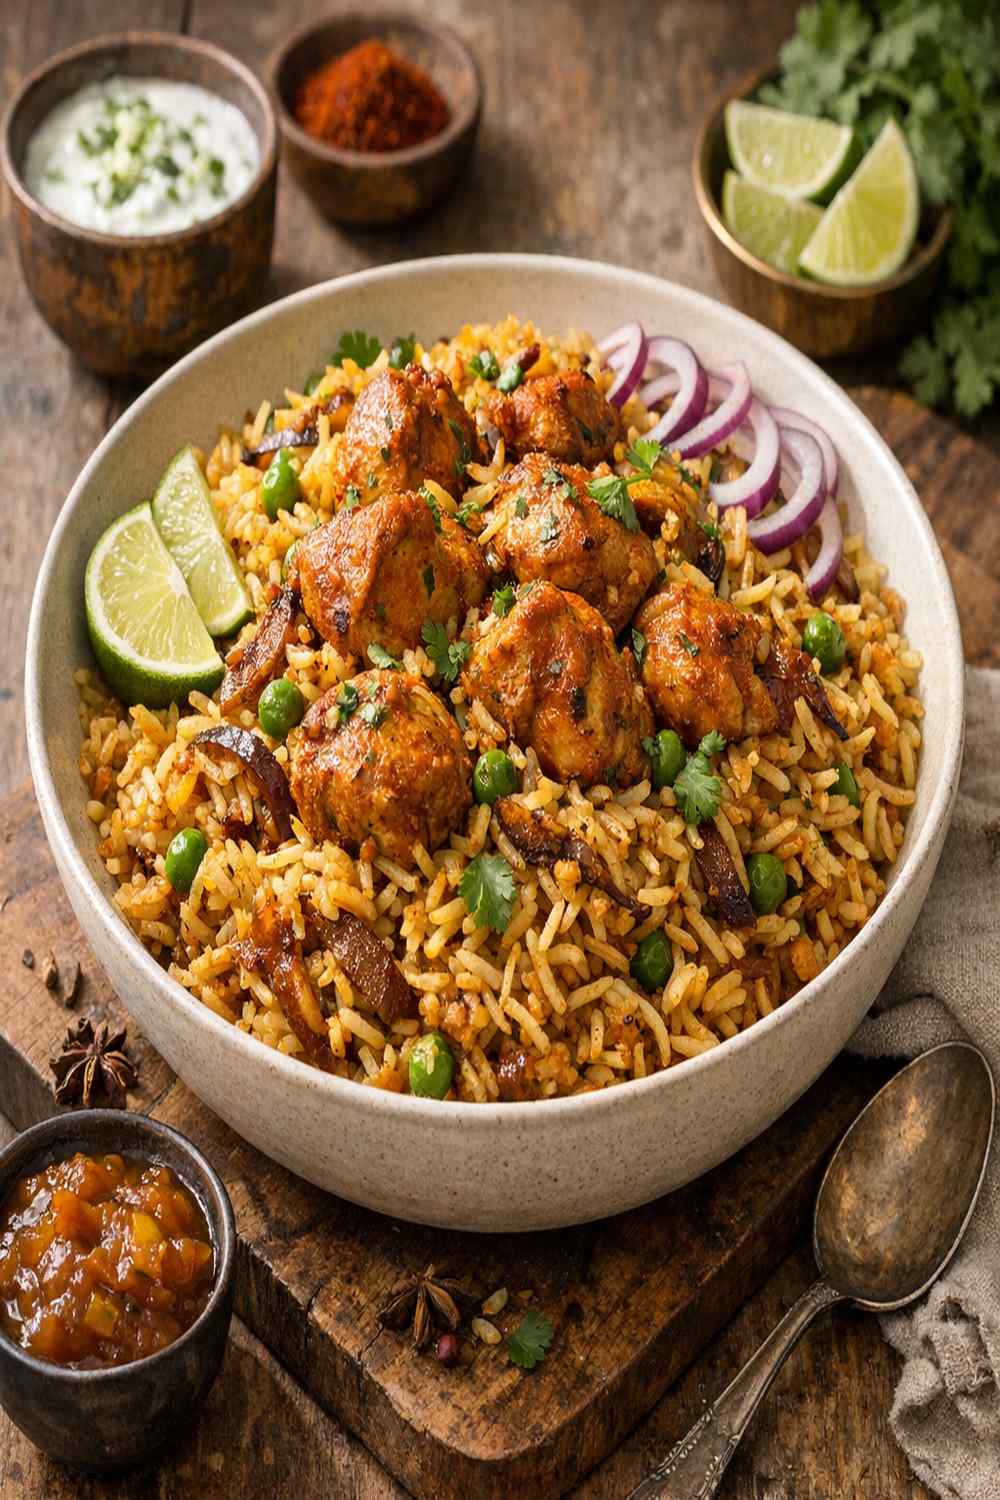
This dish looks and tastes like it costs $40 at a fine-dining spot in Manhattan. The reality? You’re spending under $10 total, and it comes together in ONE pan. I’ve built my entire career in NYC’s diverse food landscape learning that incredible flavor doesn’t require a restaurant budget—it requires INTENTION. This Indian-inspired chicken and rice is my proof. Every spice earns its place, every ingredient multiplies in value, and you’ll have leftovers that taste even better tomorrow. If you’re exploring budget-friendly international cuisines, check out my Beef Coconut Curry Recipe for another way to eat like royalty on a dietitian’s salary.
Restaurant-Quality Indian Chicken Rice for Under $10 (No Shortcuts on Flavor)
I remember standing in my tiny Astoria kitchen five years ago, watching my mom’s old copper pot gleam under the window light. She’d just taught me how to layer spices—not dump them in—and how to let rice absorb every ounce of golden, fragrant broth instead of boiling it aggressively. That afternoon changed everything about how I cook.
As a registered dietitian, I’m obsessed with the math of feeding yourself well. Food cost per serving matters deeply to my clients—especially in a city where rent swallows half your income. But I refuse to accept that budget eating means sad, flavorless meals. This chicken and rice recipe is my answer to that false choice.
You’ll brown chicken thighs (the BEST budget cut—dark meat stays juicy and costs half the price of breasts), layer them with fragrant basmati rice, and let everything cook together until the broth completely disappears and the rice grains are individually glossy and perfumed. THAT’S the restaurant move that costs nothing.
The Real Cost Breakdown
Let me show you the exact math. I shop at multiple NYC bodegas and Trader Joe’s depending on what’s being promoted, and I’ve calculated the cost per ingredient based on realistic prices in my neighborhood (and yours—these are nationally available items).
- Chicken thighs (600g) – $3.50 to $4.50 depending on sale; buy bone-in, skin-on for $1.99/lb at discount grocers like Lidl or discount ethnic markets
- Basmati rice (2 cups uncooked) – $1.20 to $1.80; buy the 10-lb bag at Indian grocery stores or Costco for per-serving costs under $0.15
- Chicken stock (4 cups) – $1.50 to $2.00; homemade costs $0.25, store brands cost $0.50 per carton
- Garlic and ginger paste (2 tsp combined) – $0.30 to $0.50; fresh is cheaper if you buy bulk and freeze
- Garam masala (2 tsp) – $0.15 to $0.25; ethnic markets sell bulk spices for 1/3 the price of grocery store containers
- Turmeric powder (½ tsp) – $0.05; practically free if you buy bulk
- Red chili powder (½ tsp) – $0.05; same as above
- Ghee or oil (2 tbsp) – $0.40 to $0.60; ghee at Indian stores costs less than coconut oil at Whole Foods
- Fresh lemon juice (2 tbsp + garnish) – $0.50 to $0.75; buy lemons on sale (often $0.25–$0.50 each)
- Fresh cilantro (¼ cup) – $0.40 to $0.60; buy at farmers markets in summer for $0.50/bunch
- Fresh mint (¼ cup) – $0.30 to $0.50; grows like a weed—plant it once and harvest for free
- Soy sauce (1 tsp) – $0.05; one bottle lasts months
- Salt and pepper – $0.10 total; negligible cost
TOTAL COST: $8.95–$10.50 for 4 servings = $2.24–$2.63 per serving
A comparable dish at a mid-range NYC Indian restaurant costs $16–$22 per plate. You’re saving $13–$19 per person. If you eat this twice a week for a month, you’ve saved $104–$152. THAT’S real money.
Smart Shopping Tips for This Recipe
- Buy chicken thighs at discount grocers on Sundays (their meat sale day) – Lidl, Aldi, and discount ethnic markets rotate sales weekly. Sign up for their apps and you’ll see 40% discounts regularly. Thighs freeze beautifully for up to 3 months, so buy double when they’re on sale.
- Visit Indian grocery stores for bulk spices and basmati rice – A 10-lb bag of basmati rice costs $8–$12 at Indian markets versus $4–$6 per pound at regular grocers. Bulk garam masala, turmeric, and chili powder cost $1–$2 per pound versus $4–$8 in grocery store jars. One trip saves you $15–$20.
- Make your own garlic and ginger paste in batches and freeze it – Fresh garlic and ginger (costs $0.15 each at bulk stores) minced and frozen in ice cube trays gives you paste for $0.05 per serving. Store-bought paste costs $1–$2 per jar and loses potency.
- Buy cilantro and mint at farmers markets or grow them – Farmers market bunches in summer cost $0.50–$0.75 and are TRIPLE the size of grocery store packages. Mint grows from a single cutting—literally zero maintenance—and yields fresh leaves for months.
- Choose stock strategically: homemade > store brands > organic brands – If you roast chicken regularly, save your bones and make stock ($0.25 cost for 4 cups). If not, store brands at discount grocers cost $0.50 per carton. Skip organic here—the spices cover everything.
The Ingredients
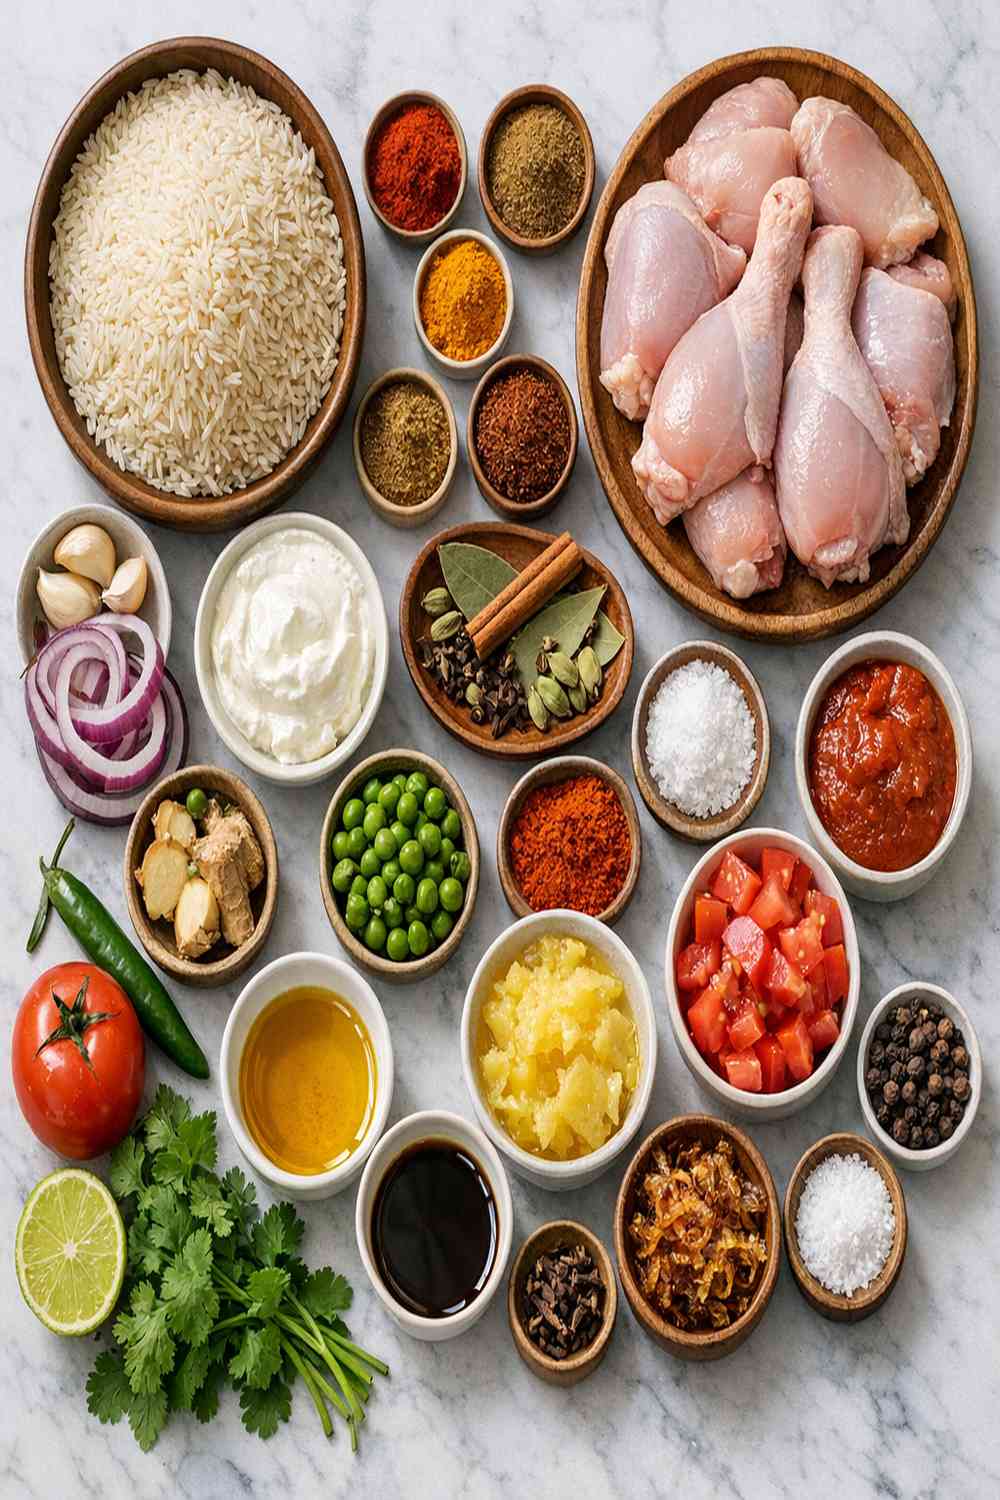
Every ingredient here earns its cost and its place. There’s no filler, no shortcuts that compromise the dish’s dignity. This is how I cook in real life—intentional, respectful of your budget, and absolutely delicious.
Makes 4 generous servings
- Sea salt and freshly ground black pepper (to taste, added in stages)
- ¼ cup fresh cilantro leaves (plus extra for garnish)
- 1 teaspoon ginger paste (minced fresh ginger is perfect)
- 4 chicken thighs, bone-in and skin-on (approximately 600 grams total, trimmed of excess fat)
- ¼ cup fresh mint leaves (adds brightness and cooling effect)
- Lemon wedges (for serving)
- 1 teaspoon soy sauce (adds umami depth)
- 1 teaspoon garlic paste (minced fresh garlic works equally well)
- ½ teaspoon ground turmeric (fresh turmeric root can be substituted)
- 2 cups basmati rice (rinsed thoroughly under cold water until water runs clear)
- 2 tablespoons ghee or neutral oil (1 tablespoon of each creates the best flavor and texture)
- 4 cups unsalted chicken stock or homemade chicken broth (room temperature works best)
- 1 tablespoon pomegranate arils (optional garnish, adds jewel-like color and tartness)
- 2 tablespoons fresh lemon juice (from 1 large lemon, plus extra for garnish)
- 2 teaspoons garam masala (the soul of this dish—don’t skip it)
- ½ teaspoon red chili powder (adjust based on your heat preference)
How to Make Indian Chicken Rice Without Breaking the Bank
This is smart cooking, not compromise cooking. Every step builds flavor while protecting your investment in these ingredients. I’m going to walk you through exactly how I make this in my own kitchen—no restaurant equipment required.
Step 1: Build Flavor with the Marinade
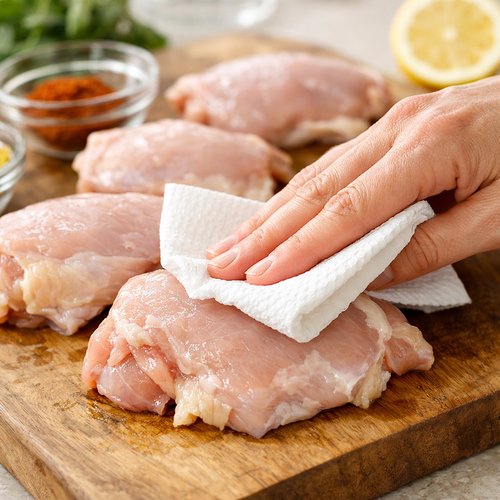
Pat your chicken thighs completely dry with paper towels. Moisture is the enemy of browning, and browning is where you develop the flavor that makes this dish sing. In a shallow bowl, combine your lemon juice, garlic paste, ginger paste, turmeric, red chili powder, garam masala, and soy sauce.
Pro tip: This marinade base costs under $1 total and is the difference between “good” and “restaurant-quality.” Garam masala is the secret weapon—it’s a warm blend of toasted spices (cinnamon, cardamom, cloves, cumin, coriander) that adds complexity that no single spice can achieve. Don’t use generic “curry powder.”
Add the chicken thighs to the bowl, turning each piece to coat all sides—skin included. Season generously with salt and pepper (this is where seasoning begins; you’re building layers, not salting at the end). Cover the bowl with plastic wrap and refrigerate for at least 30 minutes, ideally 2 hours if you have time. This isn’t just about marinating—it’s about time allowing the spices to penetrate the meat so every bite tastes intentional.
Step 2: Brown the Chicken Properly (This Is Critical)
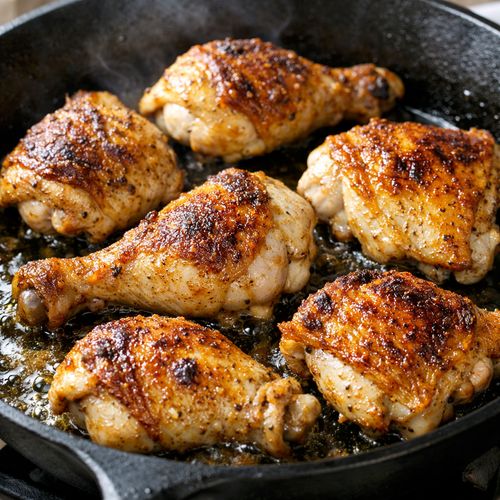
Heat your ghee and oil in a large, heavy-bottomed pan (cast iron is IDEAL because it retains heat, but a stainless steel pan works fine) over medium-high heat. When the fat shimmers and moves easily, it’s ready. You’ll know it’s hot enough when a piece of chicken skin hits the pan and immediately sizzles—not a gentle sizzle, a confident sizzle.
Working in batches if needed (don’t crowd the pan—space is your friend), place the marinated chicken thighs skin-side DOWN into the pan. DO NOT MOVE THEM. This is the hardest part for home cooks, but it’s essential. Let them sit undisturbed for 4–5 minutes while the skin renders and turns golden brown.
SAFETY WARNING: Watch the heat carefully. If the pan smokes heavily or the spices smell burnt (not toasty, but acrid), your heat is too high. Adjust immediately to medium. You want browning, not charring.
Flip each thigh and cook the other side for 3–4 minutes until golden. At this stage, the chicken should be about 70–75% cooked through (it will finish in the rice, so don’t overcook it now). Transfer to a clean plate.
Step 3: Toast the Rice Briefly
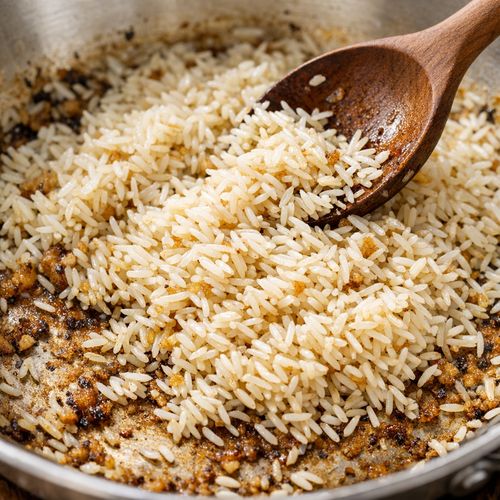
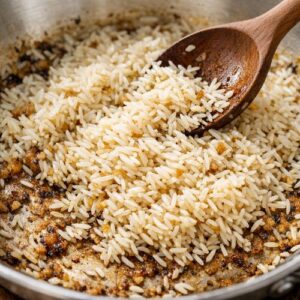
In the same pan with all those wonderful browned bits stuck to the bottom (that’s called fond, and it’s GOLD), add your rinsed basmati rice. Stir constantly for 2–3 minutes. You’ll hear it click slightly as the grains toast. The rice should smell warm and slightly nutty, not burnt. This toasting step adds a subtle depth that makes people say, “How did you make rice taste like THIS?”
Budget hack: Toasting rice is the free move that costs nothing but takes 3 minutes and changes everything.
Step 4: Add Liquid and Aromatics (The Assembly)
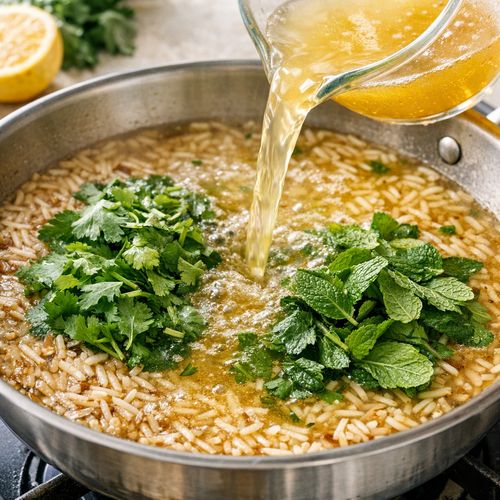
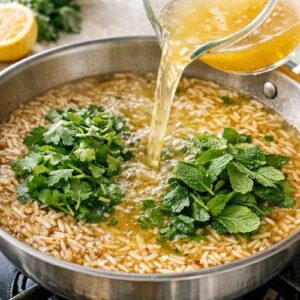
Pour your room-temperature chicken stock into the pan with the toasted rice. Add the remaining lemon juice, the fresh cilantro, and the fresh mint. Stir everything together gently but thoroughly, scraping up all that fond from the bottom. This is where all your flavor comes together.
Taste a small spoonful of the liquid and adjust salt and pepper. Remember: you’re seasoning the rice and the chicken simultaneously, and salt travels differently in liquid than in dry spices. Err slightly toward under-seasoned now because the liquid will reduce and concentrate flavor.
Place the browned chicken thighs on top of the rice in a single layer. Don’t submerge them completely—let the skin stay partially above the liquid so it stays crispy.
Step 5: The Final Cook (Low and Slow)
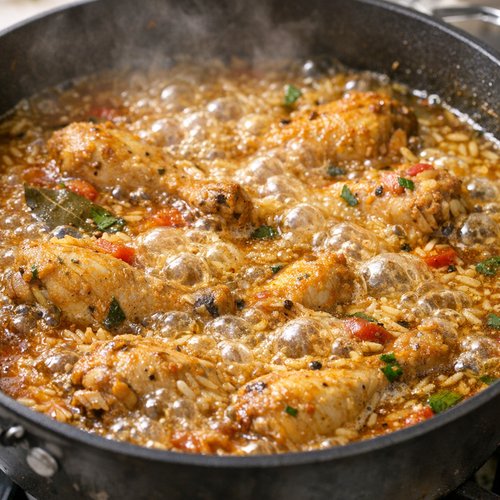
Increase the heat to high and bring everything to a boil—you’ll see large bubbles breaking the surface. Once it reaches a boil, reduce the heat to the LOWEST setting, place a tight-fitting lid on the pan, and let it simmer undisturbed for 12–15 minutes.
CRITICAL: Do not peek. Every time you lift the lid, you release steam and add 2–3 minutes to cooking time. Trust the process. Listen instead—you should hear gentle, occasional pops and sizzles, not aggressive bubbling.
After 12 minutes, lift the lid carefully (avert your face from the steam). The rice should be tender, the liquid should be completely absorbed, and the chicken should be cooked through (internal temperature 165°F if you have a thermometer, but you’ll see juices run clear when you pierce the thickest part).
If there’s still liquid pooling at the bottom, replace the lid and cook another 2–3 minutes. If the rice is tender but liquid remains, increase the heat to medium for 1–2 minutes to evaporate excess moisture without burning the bottom.
Step 6: Rest and Finish
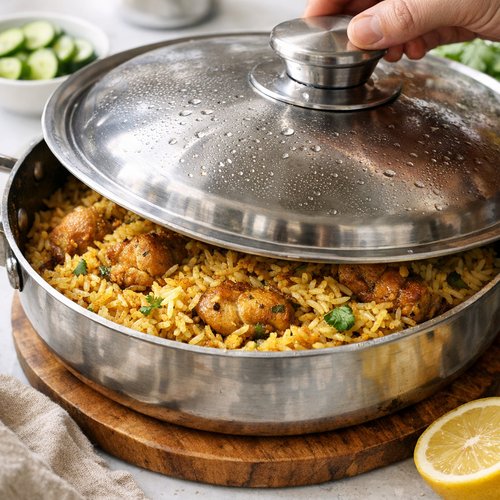
Remove from heat and let the pan sit covered for 5 minutes. This resting period allows residual heat to finish the cooking and helps the rice grains separate. Fluff the rice gently with a fork, breaking up any clumps. Taste and adjust salt one final time.
Transfer to a serving platter and garnish with additional fresh cilantro, lemon wedges, and pomegranate arils if using. That jewel-like color and the tartness of the pomegranate against the warm spices is the move that makes people think you spent hours on this.
Expert’s Nutritional Tip
As a registered dietitian, I’m genuinely excited about the nutritional profile here. Chicken thighs contain MORE iron and zinc than white meat—minerals many urban professionals are deficient in—and the dark meat is higher in selenium, a mineral critical for thyroid function and immune health. The turmeric and ginger aren’t just flavor; they’re anti-inflammatory compounds that your body actually absorbs better when eaten with fat (the ghee) and black pepper (which increases bioavailability of turmeric by up to 2,000%). The cilantro is a natural heavy metal chelator, meaning it helps your body eliminate toxins. THAT’S why this recipe isn’t just delicious—it’s nutritionally intelligent.
How to Stretch This Recipe Further
- Feed 6 people instead of 4 by adding 1 more chicken thigh, 1 cup extra rice, and 1.5 cups extra stock – The ratios stay the same, and the cost per person drops to under $2. This is how you eat well on a tight budget: cook once, feed more.
- Transform leftovers into crispy rice cakes for breakfast the next morning – Pack leftover rice into a hot skillet with a touch of ghee and let it develop a golden crust. Serve with a fried egg on top or with Greek yogurt mixed with fresh herbs. Your leftover becomes a completely different, equally delicious meal.
- Freeze portions in 2-cup containers for up to 3 months – Make a double batch on Sunday, freeze half in individual containers, and you have lunch or dinner ready in 5 minutes (just reheat in a pan with 2 tablespoons water). This strategy alone can save you $50–$100 per month on takeout.
Budget Substitutions That Don’t Sacrifice Quality
- Ghee -> neutral oil (vegetable, canola, or avocado oil): You lose the slightly nutty, caramelized depth ghee provides, but the dish remains delicious. Ghee costs more but lasts longer and has a higher smoke point. Oil is the practical choice on a tighter budget; you’ll use it for other dishes anyway.
- Fresh cilantro and mint -> dried herbs: Use 1 teaspoon dried cilantro and ½ teaspoon dried mint mixed into the stock. You lose some brightness, but dried herbs are cheaper and last longer. Fresh herbs are the splurge; dried herbs are the smart substitute.
- Basmati rice -> white jasmine rice or regular long-grain white rice: Basmati has a subtle floral note and individual texture, but jasmine rice is similar and often cheaper. Long-grain rice works fine—you just lose the perfume. The cook time remains the same.
- Homemade chicken stock -> water with 1 bouillon cube and 1 teaspoon salt: This hurts me to say, but if you’re in a genuine financial crunch, this works. The rice will be less flavorful, but the spices will still carry the dish. Buy quality bouillon (not the cheap stuff with MSG overload).
- Chicken thighs -> chicken drumsticks: Drumsticks are often 30% cheaper than thighs and have similar dark meat benefits. The cook time increases by 2–3 minutes, but the flavor is nearly identical. Some recipes require specific cuts; this one is flexible.
Can I Store Indian Chicken Rice Recipe?
YES, and it stores beautifully—actually tastes better the next day when the spices have continued to bloom and infuse. Here’s exactly how I handle it:
Refrigerator (Best for 3–4 days): Transfer cooled leftovers to an airtight container and refrigerate. To reheat, add 2 tablespoons water and warm over medium heat in a pan, stirring occasionally, for 5–7 minutes until heated through. The rice rehydrates slightly and tastes fresher than microwaving.
Freezer (Best for 2–3 months): Cool completely, then divide into individual 2-cup portions in freezer-safe containers or quart-size freezer bags. Press out excess air from bags to maximize space. Label with the date. To reheat: thaw overnight in the refrigerator, then warm in a pan with 2 tablespoons water, or reheat directly from frozen in a covered pan over low heat for 12–15 minutes (stir occasionally).
Make-Ahead Strategy (The Smart Play): Make this recipe on a Sunday evening. You’ll have lunch for Monday, Tuesday, and Wednesday. On Thursday, take the Thursday-Friday portion out of the freezer to thaw. By Friday evening, you’re cooking fresh, so nothing sits longer than necessary and you always have options.
CRITICAL WARNING: Never leave cooked rice at room temperature for longer than 2 hours. Rice can develop bacterial growth (specifically Bacillus cereus spores) that cause food poisoning. If you’re transporting this dish, keep it in an insulated container with an ice pack.
Common Mistakes to Avoid
- Not rinsing the rice thoroughly: Unrinsed rice releases excess starch during cooking, turning your individual grains into a starchy paste. Rinse under cold water in a fine-mesh strainer, stirring gently, until the water runs completely clear. This takes 2 minutes and completely changes the texture.
- Overcrowding the pan when browning chicken: If you stack thighs on top of each other, they steam instead of brown. Steam = no fond (those flavorful browned bits), and no fond = less depth. Brown in batches. Yes, it takes an extra 5 minutes. That 5 minutes is worth the flavor difference.
- Using old spices: Garam masala older than 6 months loses its aromatic compounds and tastes dusty instead of warm. The spice aisle at your grocery store is expensive and slow-moving, which means old stock. Buy from Indian markets where inventory turns over quickly. Spices are cheap insurance against a dish tasting flat.
- Lifting the lid repeatedly while the rice cooks: Every lift adds 2–3 minutes of cooking time because steam escapes. Trust the process and don’t peek. If you’re anxious about whether it’s cooking, listen for occasional gentle pops—you’ll hear them through the lid.
Nutrition Information
Per serving (approximately 2 cups total), based on USDA FoodData Central:
- Calories: 485–520
- Protein: 28–32 grams (37–42% of daily value)
- Fat: 14–16 grams (18–21% of daily value)
- Carbohydrates: 58–62 grams (19–20% of daily value)
- Fiber: 1–2 grams (4–8% of daily value)
- Iron: 2.8–3.2 mg (16–18% of daily value)
- Zinc: 3.1–3.5 mg (28–32% of daily value)
- Selenium: 22–25 mcg (40–45% of daily value)
- B vitamins (especially B6 and B12): Essential for energy metabolism
This is a complete, balanced meal—protein that satisfies hunger, carbohydrates for sustained energy, and healthy fat for nutrient absorption. The micronutrient profile is exceptional. You’re getting 16–18% of your daily iron in ONE MEAL, which matters if you’re managing energy levels through the day. And remember: all of this costs $2.24–$2.63 per serving. That’s $0.11–$0.13 per gram of protein, which beats most budget proteins dramatically.
Seasonal Variations
- Summer Version: Add 1 cup fresh corn kernels (or frozen, thawed) to the rice and increase liquid by ¼ cup to compensate. Corn adds sweetness that balances the spices beautifully. Add diced fresh tomato to the garnish instead of pomegranate.
- Fall/Winter Version: Substitute ½ cup of the rice with millet or quinoa for added texture and nuttiness. Add 1 tablespoon of tomato paste to the marinade for depth. Increase ginger and decrease mint slightly (mint is too bright for cold weather meals).
- Spring Version: Add 1 cup fresh peas (or frozen peas added in the last 3 minutes of cooking so they stay vibrant). Use fresh dill instead of mint—it pairs beautifully with the spices and reflects spring’s bright energy.
- Year-Round Vegetable Boost: Reduce rice to 1.75 cups and add 1 cup diced vegetables (zucchini, bell peppers, carrots, or green beans) mixed into the stock before cooking. The cost per serving drops by $0.30, fiber increases significantly, and you’re essentially making the dish stretch further without feeling like you’ve compromised.
What Can I Serve With Indian Chicken Rice Recipe
This is a complete meal on its own, but if you want to build a simple dinner spread without adding significant cost, here are my favorite pairings:
- Plain whole-milk Greek yogurt mixed with fresh herbs (approximately $1.50 for 4 servings): The cool yogurt against the warm spices is restaurant-quality comfort. Add fresh cilantro, a tiny pinch of salt, and lemon juice to the yogurt. This costs almost nothing and completely elevates the meal.
- A simple cucumber and tomato salad with lime juice (approximately $1.25 for 4 servings): Cool, bright, and cutting through the richness. Dice fresh cucumber and tomato, toss with a pinch of salt and fresh lime juice. That’s it. This is the move that makes the meal feel complete.
- Warm naan or roti from a grocery store bakery section (approximately $1.50–$2.00 per serving): If you want carbs to soak up the spiced rice, store-bought naan works. Skip the expensive restaurant delivery version and hit the bakery section. It’s hot, soft, and perfect.
- Fresh mango slices for dessert (seasonal, approximately $0.75 per serving): The sweetness and tropical flavor contrast beautifully with the savory spices. Slice fresh mango and serve plain or with a squeeze of lime.
For more rice-based combinations, explore my Basmati Fried Rice Recipe for weekend leftovers, or check out my Paneer Fried Rice Recipe if you’re vegetarian and want to build a similar flavor profile with paneer instead of chicken.

Indian Chicken Rice Recipe
Ingredients
Method
- Pat your chicken thighs completely dry with paper towels. Moisture is the enemy of browning, and browning is where you develop the flavor that makes this dish sing. In a shallow bowl, combine your lemon juice, garlic paste, ginger paste, turmeric, red chili powder, garam masala, and soy sauce. Pro tip: This marinade base costs under $1 total and is the difference between "good" and "restaurant-quality." Garam masala is the secret weapon—it's a warm blend of toasted spices (cinnamon, cardamom, cloves, cumin, coriander) that adds complexity that no single spice can achieve. Don't use generic "curry powder." Add the chicken thighs to the bowl, turning each piece to coat all sides—skin included. Season generously with salt and pepper (this is where seasoning begins; you're building layers, not salting at the end). Cover the bowl with plastic wrap and refrigerate for at least 30 minutes, ideally 2 hours if you have time. This isn't just about marinating—it's about time allowing the spices to penetrate the meat so every bite tastes intentional.

- Heat your ghee and oil in a large, heavy-bottomed pan (cast iron is IDEAL because it retains heat, but a stainless steel pan works fine) over medium-high heat. When the fat shimmers and moves easily, it's ready. You'll know it's hot enough when a piece of chicken skin hits the pan and immediately sizzles—not a gentle sizzle, a confident sizzle. Working in batches if needed (don't crowd the pan—space is your friend), place the marinated chicken thighs skin-side DOWN into the pan. DO NOT MOVE THEM. This is the hardest part for home cooks, but it's essential. Let them sit undisturbed for 4–5 minutes while the skin renders and turns golden brown. SAFETY WARNING: Watch the heat carefully. If the pan smokes heavily or the spices smell burnt (not toasty, but acrid), your heat is too high. Adjust immediately to medium. You want browning, not charring. Flip each thigh and cook the other side for 3–4 minutes until golden. At this stage, the chicken should be about 70–75% cooked through (it will finish in the rice, so don't overcook it now). Transfer to a clean plate.

- In the same pan with all those wonderful browned bits stuck to the bottom (that's called fond, and it's GOLD), add your rinsed basmati rice. Stir constantly for 2–3 minutes. You'll hear it click slightly as the grains toast. The rice should smell warm and slightly nutty, not burnt. This toasting step adds a subtle depth that makes people say, "How did you make rice taste like THIS?" Budget hack: Toasting rice is the free move that costs nothing but takes 3 minutes and changes everything.
- Pour your room-temperature chicken stock into the pan with the toasted rice. Add the remaining lemon juice, the fresh cilantro, and the fresh mint. Stir everything together gently but thoroughly, scraping up all that fond from the bottom. This is where all your flavor comes together. Taste a small spoonful of the liquid and adjust salt and pepper. Remember: you're seasoning the rice and the chicken simultaneously, and salt travels differently in liquid than in dry spices. Err slightly toward under-seasoned now because the liquid will reduce and concentrate flavor. Place the browned chicken thighs on top of the rice in a single layer. Don't submerge them completely—let the skin stay partially above the liquid so it stays crispy.
- Increase the heat to high and bring everything to a boil—you'll see large bubbles breaking the surface. Once it reaches a boil, reduce the heat to the LOWEST setting, place a tight-fitting lid on the pan, and let it simmer undisturbed for 12–15 minutes. CRITICAL: Do not peek. Every time you lift the lid, you release steam and add 2–3 minutes to cooking time. Trust the process. Listen instead—you should hear gentle, occasional pops and sizzles, not aggressive bubbling. After 12 minutes, lift the lid carefully (avert your face from the steam). The rice should be tender, the liquid should be completely absorbed, and the chicken should be cooked through (internal temperature 165°F if you have a thermometer, but you'll see juices run clear when you pierce the thickest part). If there's still liquid pooling at the bottom, replace the lid and cook another 2–3 minutes. If the rice is tender but liquid remains, increase the heat to medium for 1–2 minutes to evaporate excess moisture without burning the bottom.

- Remove from heat and let the pan sit covered for 5 minutes. This resting period allows residual heat to finish the cooking and helps the rice grains separate. Fluff the rice gently with a fork, breaking up any clumps. Taste and adjust salt one final time. Transfer to a serving platter and garnish with additional fresh cilantro, lemon wedges, and pomegranate arils if using. That jewel-like color and the tartness of the pomegranate against the warm spices is the move that makes people think you spent hours on this.

Notes
FAQs
Can I use chicken breasts instead of thighs to save money?
I don’t recommend it, and not because of cost—chicken breasts are actually expensive and lean, so they dry out in this cooking method. Thighs are genuinely cheaper (often $1.99–$2.49/lb versus $3.99–$5.99/lb for breasts) and stay juicy because of their fat content. If you already have breasts, cook them, but reduce the cooking time in Step 5 to 10 minutes. They’re done faster. But for budget AND flavor, thighs win.
What if I don’t have garam masala—can I substitute something else?
Garam masala is genuinely irreplaceable because it’s a specific blend of toasted spices. That said, if you’re in a pinch: combine ½ teaspoon ground cumin, ¼ teaspoon ground coriander, ¼ teaspoon ground cinnamon, and a pinch of ground clove. It’s not perfect, but it’s close. But PLEASE buy real garam masala from an Indian market—a jar costs $2 and lasts 6+ recipes. One trip to an Indian grocery store saves you more than that in cost.
The rice is still crunchy after 15 minutes—what went wrong?
Three possibilities: (1) Your heat wasn’t actually low—increase the time by another 3–5 minutes with the lid on. (2) The lid wasn’t tight, so steam escaped. (3) Your stock was cold when you added it (this reduces cooking time). Going forward, bring stock to room temperature before adding. If rice is crunchy NOW, add ¼ cup water, cover tightly, and simmer on low for 5 more minutes.
Can I make this recipe without ghee or oil?
Theoretically yes (you could use cooking spray and brown the chicken dry), but you’ll lose the fond—those flavorful browned bits—that make the final dish complex. You need just enough fat to create browning, which requires about 1 tablespoon total. If you’re avoiding fat for dietary reasons, thin the stock with extra water instead, but I’d encourage you to use at least 1 tablespoon of oil. The fat is what carries flavor.
How do I know if the chicken is fully cooked inside?
Pierce the thickest part of the largest thigh. If juices run clear (not pink), it’s done. If you have an instant-read thermometer, aim for 165°F internal temperature. Thighs are more forgiving than breasts—they’re harder to overcook because of their fat content—so don’t stress. At 15 minutes in the rice, they’re definitely done.
More Budget-Friendly Recipes
- Best Chicken Gravy Recipe – Transform chicken drippings and pan scrapings into a luxe sauce for under $1
- Easy Shrimp Fried Rice Recipe Without Vegetables – Another one-pan wonder that costs less than takeout
- Chinese Egg Fried Rice Recipe – The ultimate budget rice dish when you have leftover rice and eggs
- Baked Dijon Chicken Recipe – A completely different flavor profile for chicken thighs at the same price point
You Just Made Restaurant Food on a Realistic Budget
This is what I want for you: food that tastes like you spent three hours cooking and $40 on ingredients, when really you spent 45 minutes and under $11. Food that your friends ask for the recipe for. Food that makes your own apartment smell like a restaurant kitchen. Food that’s nutritionally sound—actual iron, actual zinc, actual anti-inflammatory compounds—not just calories.
This chicken and rice recipe is proof that budget eating and excellent eating aren’t opposites. They’re the same thing when you’re intentional. When you choose basmati over filler rice. When you brown your protein properly. When you buy spices where they’re fresh and cheap. When you refuse to accept that feeding yourself well requires sacrifice.
Make this recipe this week. Cook it twice. Freeze half. Let the spices bloom in your fridge overnight and taste it again tomorrow—it gets BETTER. Share it with someone. Watch their face when they taste it. Enjoy knowing it cost you $2.63 per serving and a little over 40 minutes of your time.
Let’s make cooking a breeze!
